 Search for specific products and use our comparator
 Search for a ressource in our library
Hey guys and welcome (back) to Free the Tree! This past week was full of events, this might be a long one.
We validated the fact that we had a Thrips invasion and not a Spider Mite one, thank god! (How to tell the difference? We did a guide here 😉 ) These suckers are much easier to kill than spider mite.
Also, since we’re in the late flowering stage we can’t really use anything on our flowers without taking the risk of spraying anything, even Neem oil could leave a taste and ruin the harvest.. So again, thank god it’s thrips and not Mites.
During this week we also saw some crazy Thrichome and bud growth 🙂 They’re smelling beauuuutifully
Let’s get started
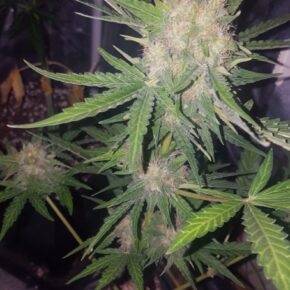
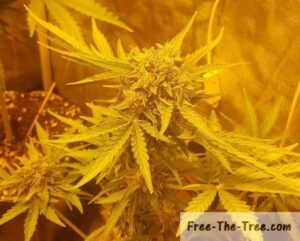
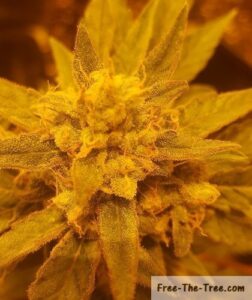
Day 48 – Trichomes all over the place!
Our Critical + 2.0 has been growing more and more Thricomes on her buds, they’re all white and powdery, i’m loving this! here’s a couple pictures (which we had a microscope to show you what they looked like up close)
As always click on the picture to see the full screen version
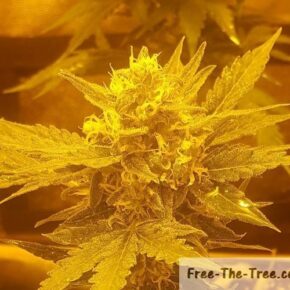
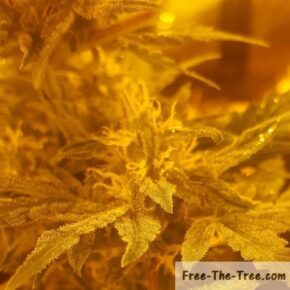
Can you see all those little white specs? Those are the trichomes 🙂
You may be wondering what the fuss is all about, we’ll do a full article very soon on this but basically here’s the deal.
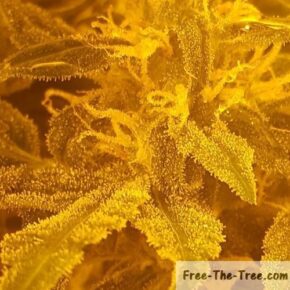
Tricomes are what contain, at a specific moment in the plants development, a molecule called TetraHydroCannabinol, aka THC. Tricomes contain many other molecules such as CBD, produced by the Tricomes once they deteriorate (become gold like color)
At this time under the eye glass we can see that they’re totally clear which means that they’re not quite ready, we want them to be a nice milky color in our situation.
Trichomes are important to track since they’re the best way to know when to cut, so if you don’t have one yet buy a magnifying glass!
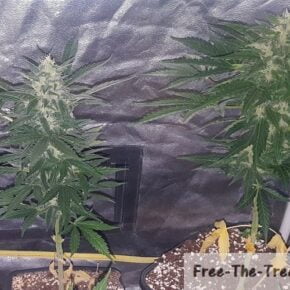
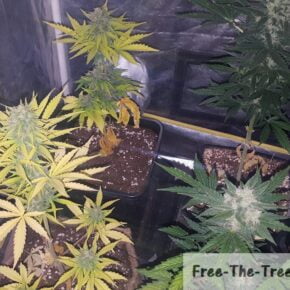
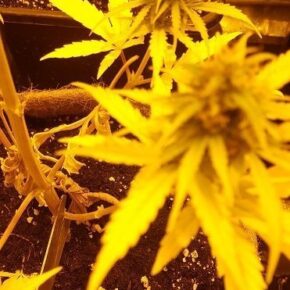
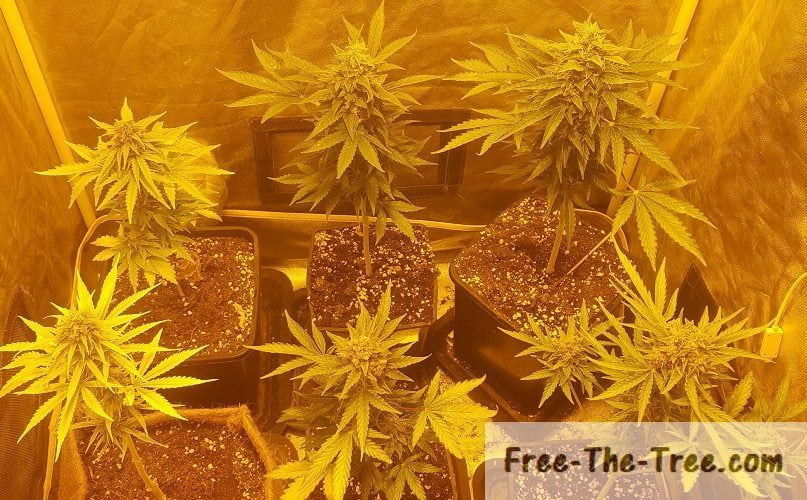
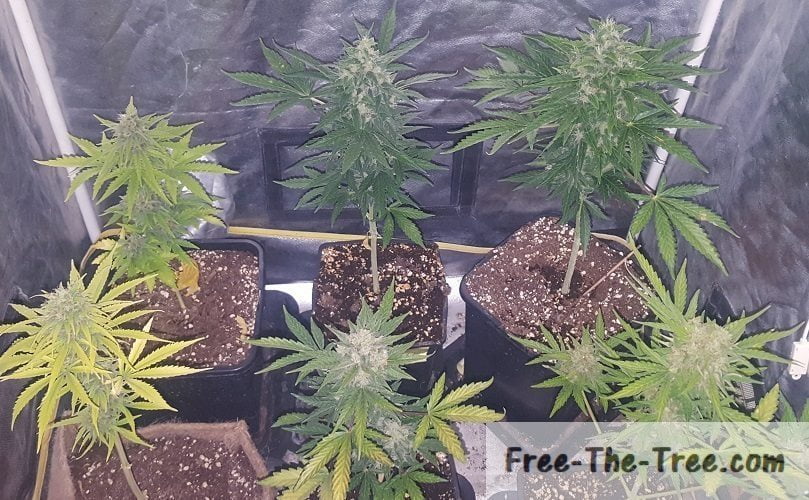
Day 49 – Fattening buds, Browning pistils and Nitrogen Deficiency
The flowers have been growing more and more with almost daily evolution, it’s really a pleasure to watch these plants grow, although we’ve been fighting these thrips (we’ll cover that in the next section).
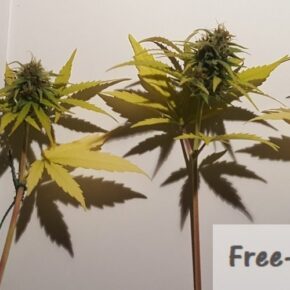
As you can see the 2 plants on the far left are showing mid to late stage Nitrogen deficiencies with all leaves impacted. They seem to be further along the flowering stage than their 2 fruit strain counter-parts. I think this is due to the fact that their soil in much less compact, thus their root systems aren’t as solid.
On top of that we kept side branches to make an A/B test between this style and One Bud technique (What are the Different types of cultures? Here’s a guide).
Browning Pistils – Round 1
In the middle picture you can see that the pistils have started browning, and as you may have read this can mean that the plant is ready, keyword being can.
Marijuana flower pistils will turn brown 2 or 3 times during the flowering stage so do not harvest here, you’ll be cutting yourself short of up to 50% of your harvest!
Those different rounds of browning pistils followed by the flower opening back up (white pistils) is her way to grown and increase the size of the flowers, you’ll notice those buds getting bigger and bigger as it goes on, but don’t wait too long! 😉
(If you’re wondering, the best way to identify when to harvest is by observing the trichomes.)
Day 51 – Confirming the presence of Thrips
As you may be aware, we’ve noticed signs of a Thrips or Spider mite invasion, we were leaning for Thrips since the white marks were spread out all over the place but we we’re positive.
In order to be sure we decided, for an hour or so, to drop the humidity levels, take the fans off the plants and raise the heat making the perfect environment for Thrips, hoping they would show their faces.
And sure enough, after leaving it for a little while we could see a couple of those suckers, both on the larva and post-larva stage (no adults though, suspect I killed it couple days ago).
If you want to know more about Thrips and Spider Mites we’ve liked to our articles below.
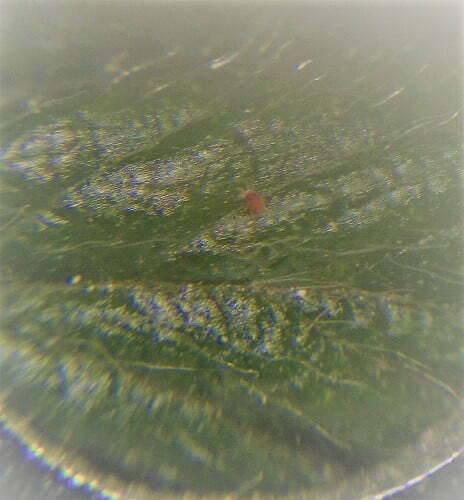
Here are a couple pics of these suckers, in total we had to have killed about 10 of them across all our plants.
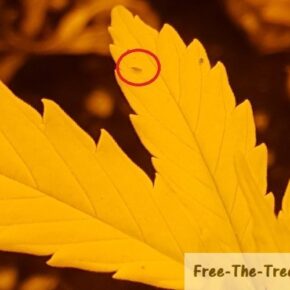

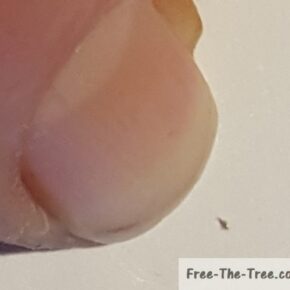
As you may know, Thrips are between 0.5mm and 1.5mm long, so they can be pretty hard to spot but it’s defenitly . In comparison to my index finger nail its super tiny!
If you’re wondering if you spotted one or not, move the leaf around you’ll be able to see if it moves or not. If it does than that sucker is a pest, kill it! (I used my fingers when I spotted some).
As we’ve said in our previous report, since we’re so far along within the flowering stage we can’t use any treatment by fear of leaving a taste in our buds, so we’ve been hunting them by hand and keeping conditions as unfavorable as possible for them.
Thankfully the infestation isn’t that bad and our plants are surviving it fine, showing healthy signs, smelling beautifully so we’re not too worried.
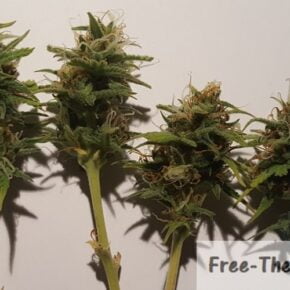
Day 51 – Cutting Side Branches
As we said further up, we tested different styles and one of are buds is really small, so we decided to cut the side branches in order for her to focus on the Apex for the end of her life.
It’s really late in the game to hope for a real impact of this, but we still decided to cut the for satellite branches, hopefully the main bug will get somewhat bigger.
Cutting the side buds
Here’s a couple pictures of how we cut the branches. It’s pretty straight forward, you place you scissors at the intersection of the branch and the main stem and make a clean cut.

Curing Marijuana Buds
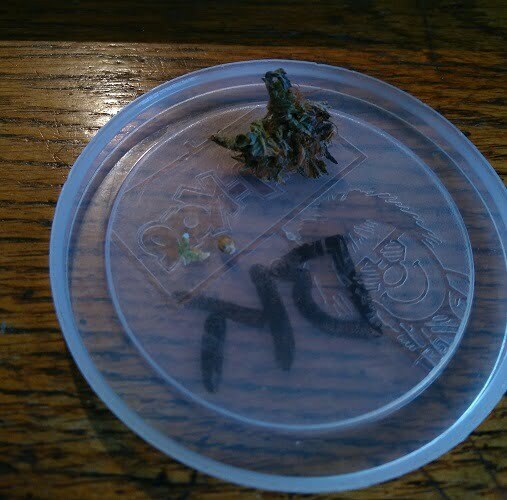
As you can see on the pictures below, these buds are real small, but they still look and smell beautiful, can’t wait to taste this Fruit strain :p
Curing the buds are one of the most important steps, the aim is to cut off all the main leaves and as many of the small leaves as possible.
Since this is personal consumption, and the small leaves near the buds have so many trichomes, we decided to just trim them; but if you’re intending on selling your harvest it’s more aesthetic to just keep the flowers.
Side note, keep your leaves and stems! we’ll do a full post on what can be done with them, from tea to hash you can do a whole lot with everything so don’t toss it out.
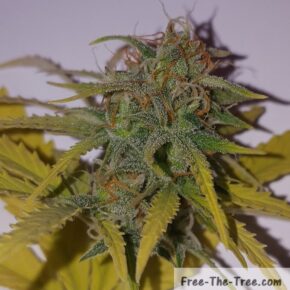
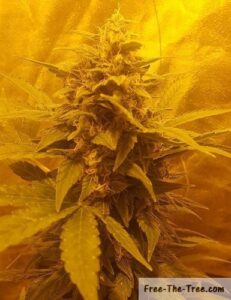
Day 53 – Fattening Buds and first signs of readiness
Although our plants are objectively small, which we were prepared for, some of these buds are getting nice and fat 🙂 The beautiful smell is all over the room and their shining with trichomes. It’s going to be a small but tasty harvest!
Curing Marijuana Buds
Alright guys that’s all for this one!
Until next time, be safe and grow easy 😉
Don’t wanna wait? Check out all our other Critical+ 2.0 Grow Reports
Check out all out Indoor Growing Tips
Hey there and welcome (back) to Free the Tree!
So this is the first post of this new grow journal series, it’s going to be an exciting one 🙂
Here’s what we got in store for this report:
Marijuana Strains: This time around we’re going to grow 4 different strains. Now generally this isn’t the best idea since flowering times and nutrient needs can, and generally are different.
So we made sure that the flowering times were all about the same and hopefully their nutrient needs will also be about the equal.
Here’s the four strains were going with this time around:
- Blue Kush
- Blue Thai
- Big Buddha Cheese (cuttings)
- Cheese
We should have some beautiful plants and pics for you by the flowering stage.
Here’s the context of the grow:
Soil: Still using the a non-enriched medium
Types of pots: We’re doing a test on this one, we’re using Air Pots, Fiber Pots and regular pots. We decided to do a test between each to see what the renders of each are.
Lighting: 400W HPS for the vegetative stage, then we’ll switch to a Sodium light
Let’s get into the nitty gritty of this post, the germination of the seeds and the first days in the grow house
Germinating the marijuana seeds
We did a full “how-to” on germinating your marijuana seed a little while back so we won’t go back over each step in detail, don’t hesitate to go check it out if you need more info than what’s given here.
The tap root of each strain really didn’t come in the same time. The Blue Thai’s tap root broke the seed in less than 2 days, whereas the cheese plant took about 3 days.
Here’s a couple pictures of each step of seed germination, as always you can click on them to have a full view.
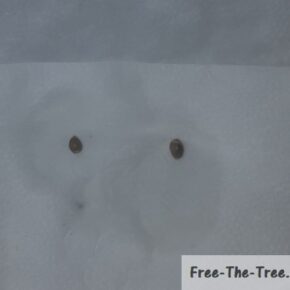
Seeds just set in wet paper tower
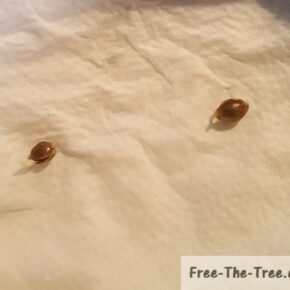
Tap root breaking the shell
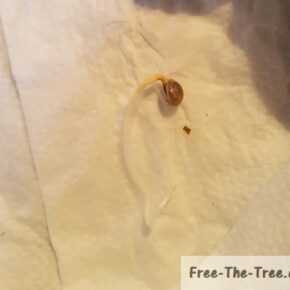
Blue Thai’s Huge Tap Root
As you can see, we waited a little long with the Blue Thai seed and it developed a huge tap root. To be honest it kind of scared us but it the end definitely not an issue 🙂
Planting Germinated seeds
Once the tap root is a little over a centimeter long it’s time to get them into the soil, about 1cm down.
Within a couple days you’ll see the sprout breaking the ground. As soon as that happens within 24 hours you’ll see it stand straight, get rid of the shell and fan out her first leaves to capture the light. It’s pretty beautiful to watch.
This time around we didn’t make the same mistake as last time when we left the light source too far away for the sprout, making the plant stretch for the light source.
Here’s these steps in image:
About 2cm Hole for the Seed
Cannabis Seed in soil
Blue Thai’s Huge Tap Root
Most of the seeds broke the ground within 2 days after planting them, although we did lose one Cheese and One Blue Kush seed that died in the soil… The cheese taproot had started to dry up within the paper towel, giving it little chance to develop within the ground. The Blue Kush one I think we mismanaged the watering of the soil, killing it within the ground.
By this the time the last picture above was taken it had been exactly 7 days since we had placed the seed in the soil, closing the first week of this grow.
Until next time, be safe and grow easy!
Don’t want to leave just yet? Check out our other Grow Reports
A question? Check out all our Indoor Growing Tips
Hey there and welcome (back) ! 🙂
This past week was a pretty eventful one, these little ones needed a good amount of attention, which we were happy to provide hehe
As always, before we get into it, here’s a little overview of what we’re going to cover
Grow Report 2 – Table of content
- Laughing Buddha – Early stretch & first leaves
- Critical+ Cuttings – Transplanting and fungus gnats…
- Makin some cannabutteeeer 🙂
- Blue Thai Mother – First cutting
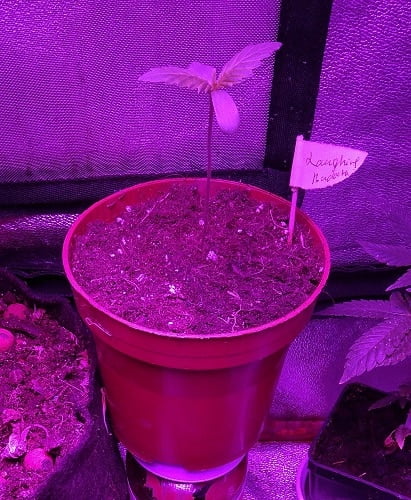
Don’t hesitate to skip ahead if you want, for the others let’s get into the Laughing Buddha, she’s scaring us a baby bit
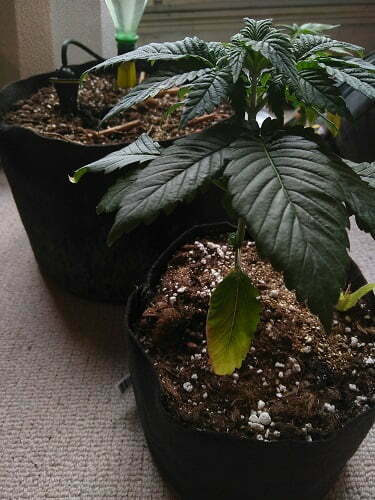
Laughing Buddha – Early stretch & First leaves
Growth of the first leaves
If you’ve checked out last weeks grow report you’re aware that this little one had just broken ground and spread her cotyledons by the end of last week.
Within 2 days she started growing her first leaves which is pretty awesome 🙂 really want her to get growing quickly so we can make some cuttings and flower them asaaaap
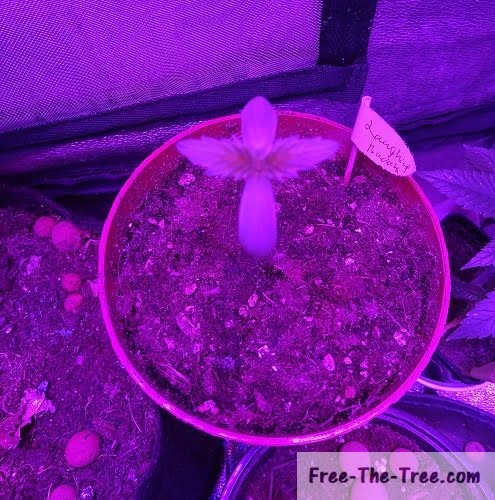
Growth of first leaves
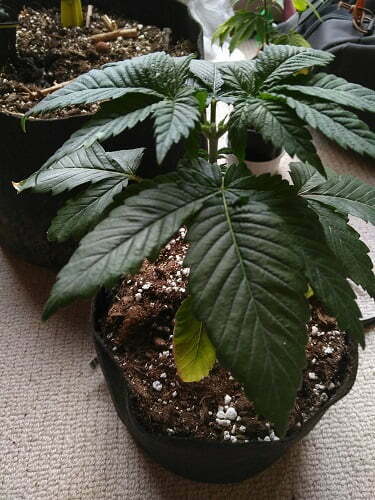
Seedling stem stretching too much
As you can see in the image on the right the stem of this little one is pretty long, showing that she’s not receiving enough light, thus reaching for it.
This is really no optimal, appart from the fact that she’s focusing on vertical growth and not developing foliage (leaves) she will most likely be top heavy once those leaves do start to grow..
This is something we’ve experienced a couple grows ago, and covered a previous grow report.
It’s not the end of the world if she does get top heavy, we’ll give her a crouch until the stem gets strong enough to for her to stand.
Plant place closer to the light source to avoid any more stretching
Growth of the second stage of leaves
This little one is a fast grower, the first stage of leaves had hardly grown that she was already sprouting the second one.
She’s really looking good, still a bit worries about her balance, when we watered her she wasn’t holding up all that good.
We’ve also added [a much needed] fan in there to get some wind blowing, which will make her develop the stem much more, as well as help dry up the soil after watering, avoiding these damn fungus gnats (getting to that next)
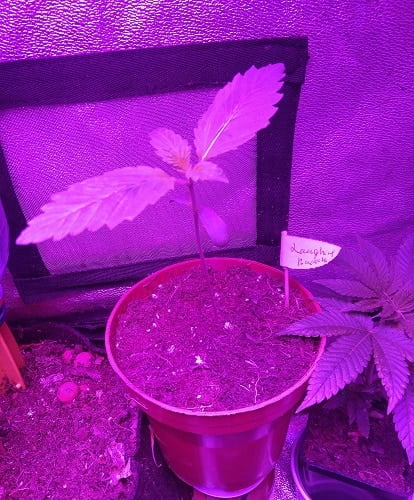
Second stage of leaves growing
Critical+ Cuttings – Transplanting and Fungus gnats
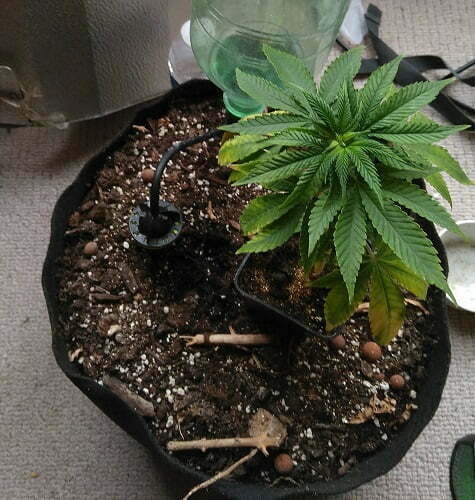
Transplanting the Critical+ plants
Although it was a bit early to do so, we decided to go ahead and transplant the plant that’s going to stay in the vegetation tent as a mother.
For the the 3 other ones we’re going to wait until they grow a bit more than transplant & flower them right away, can’t waiiiiiiiiiit 🙂
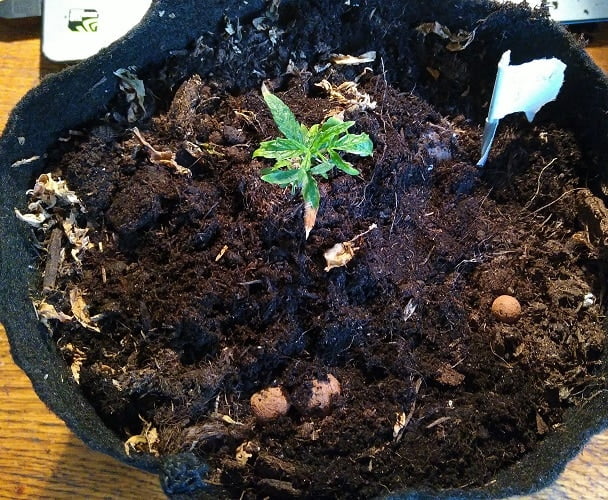
Critical+ transplanted to a 2L fabric pot
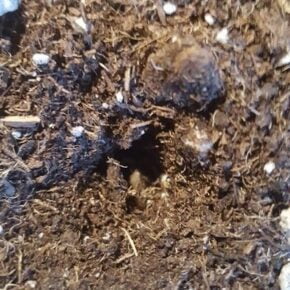
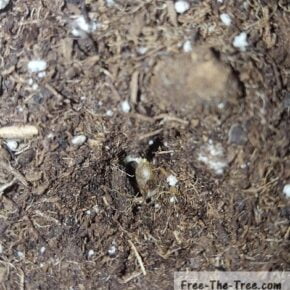
Dealing with fungus gnats
After thrips and spidermites here we are dealing with fungus gnats… haven’t signed up for pests control school, but we’re getting close to being experts here -_-“
We had been wondering why our little cuttings were growing so slowly and with unhealthy looking foliage; turns out, it’s linked to the fungus gnat larvae feeding on our babies roots..
We’ll do a full “how to” deal with fungus gnats soon, but basically here’s how we’re dealing with them :
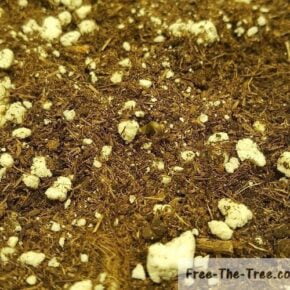
- Sprayed the soil with a mix of Hydrogen peroxyde (1/4) and water (3/4).
This kills the larvae, but doesn’t deal with the eggs or adults - Manually hunted the visible adults
- Set a fan out in order to dry the top soil (fungus gnats need humid soil)
- Put down sticky traps for the adults. This doesn’t seem super effective atm, we’re going to lay out a glass with a little beer for them to drown in (follow a tip through instagram)
Next we’re going to remove the top 3/4cm of soil in order to get any and all eggs out of there, and possibly buy some nematodes to get this soil living with healthy organisms.
Hopefully this is going to be the end of that..
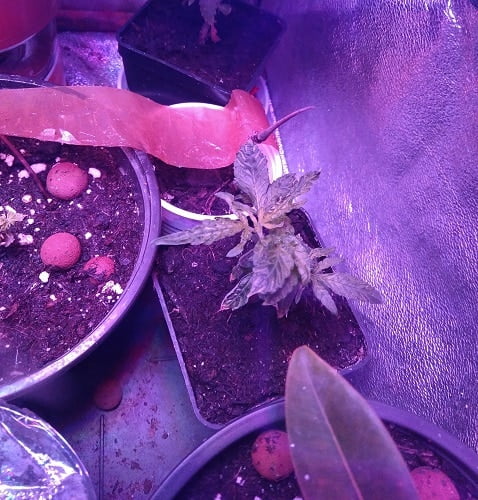
Fungus gnat damage visible on the foliage
Fungus gnat damage visible on the foliage
Makin’ some cannabutteeer
We had been putting it off for awhile but finally got around to making some cannabutteeeer!
Been saving up the trims of the past 5 grows so really exited to see what it’s going to turn our to be hehehe.
We’re not going to detail all the steps here, if you’re trying to make some check out our recipe over here, that said here’s a couple pics just cause 😉
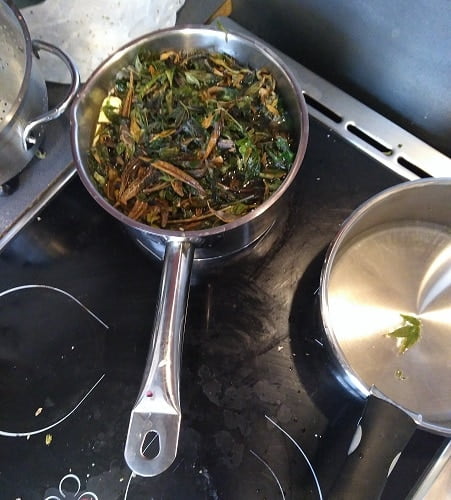
Leaves&Butter chillin in water
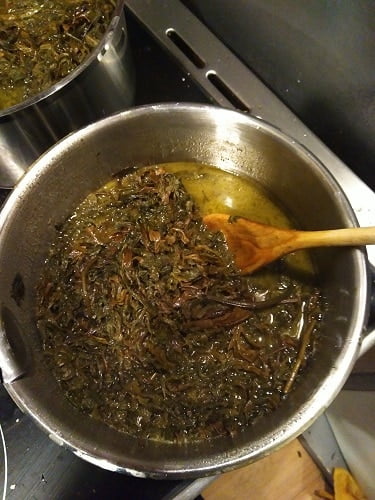
Leaves&Butter chillin in water
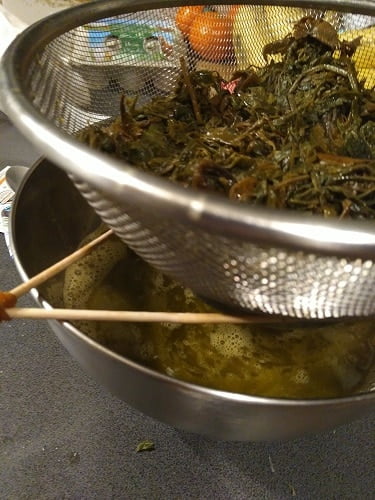
Straining the water&cannabutter mix from the leaves
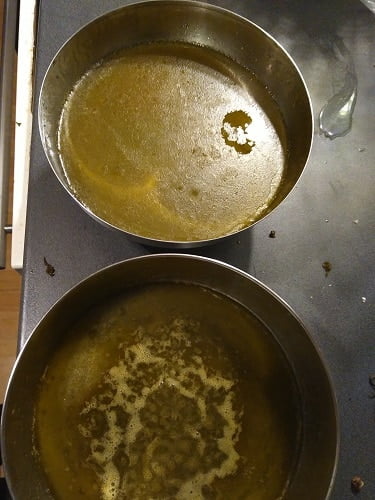
Cannabutter&Water
ready to cool down
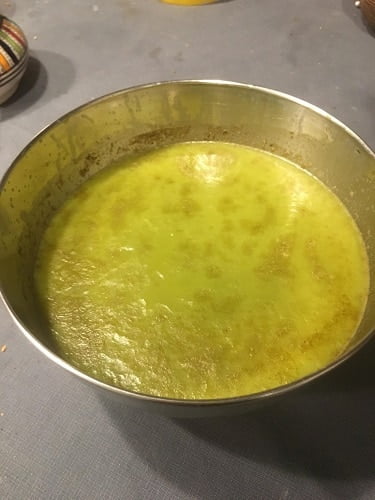
After 24 hours in the fridge,
cannabutter is solid.
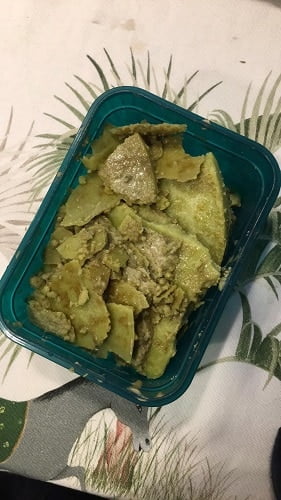
Water poured out leaving the cannabutter ready for cooking! 🙂
Blue Thai’s first cutting
Since we don’t want to flower our last blue thaï plant, we’ve decided to keep this one as a mother and flower some cuttings. Thing is… i’m not super super patient (workin on it ^^), and want to get her into the flowering tent asaaaaap.
In that spirit, I looked for a nice little side branch big enough to make a cutting out of.
Blue Thai mother plant
Blue Thai mother plant
As you can see, we spotted one that was small, but not too small, and went for it. Hopefully, since it’s such a young sprout, it’ll still have a bunch of rooting hormones and will take quickly.
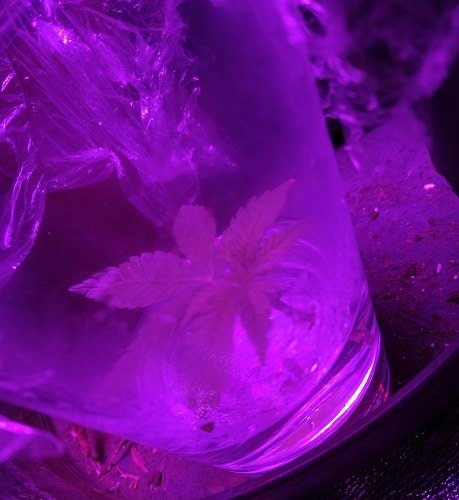
In order to keep it in a nice, humid, environment we placed it in a glass of water and placed cellophane over it, with a couple whole.
Water droplets quickly formed on the sides of the glass, showing that humidity levels are high. Hopefully she’s going to take!
Alright folks that’s all for this week,
Until next time, be safe and grow easy!
P.S: if you want to keep in touch, come say hi on our insta 😉
Hey there and welcome (back) !
Much has happened since the last grow report, from dealing with our fungus gnat infestation to germinating a new little strain, we had a lot of fun 🙂 Let’s get right into it
Grow Report n°4 – Table of Content
- Fungus Gnat vs Nematodes
- Phytoseiulus persimilis protecting our babies
- Sex Bud – New strain germinating
- Topping our Laughing Buddha
- Blue Thai showing problems
- Curing the Blue Kush
Nematodes vs Fungus Gnats – Get eeeem!
This week we finally got the Nematodes, these little worms are a natural predator for Fungus Gnats eggs and larvae, perfect to go hunt and kill these suckers and protect our babies root system 🙂
We’ll do a full article on fungus gnats shortly, but basically the nematodes enter the larvae or eggs and develop in there, feeding on the insides of the fungus gnat.
Within a couple days, the effected larvae is dead hehe.
On top of that, nematodes keep the soil healthy, eating through the soil and adding nutrients to it, so it’s also a long term investment.
Nematodes in soil (jammin’ to the black eyed peas)
Phytoseiulus Persimilis protecting our plants
If you’ve followed our previous grows, you’re aware that we’ve had some intense battles against spidermites and thrips.
We’re sure that there’s eggs left, just waiting for the right weather to hatch and start back up this infestation (yeah these suckers can hibernate for months).
With that in mind, we decided to go ahead and get some phytoseiulus persimilis in order to introduce them to near our vulnerable plants.
Hopefully, this year will be one without spidermites!
Phytoseiulus persimilis on strawberry leaf
Phytoseiulus persimilis hunting Spidermite – Credit to Kopper Biological Systems
Sex Bud Germinating
Sooooo exited about this, here’s our first full sativa, the SexBud by Female Seeds. Her parents are the C99 and White Grapefruit, giving a fast flowering sativa (8/9 weeks), with a stimulating, creative and energetic social high. Can’t waiiiiit to see her grow.
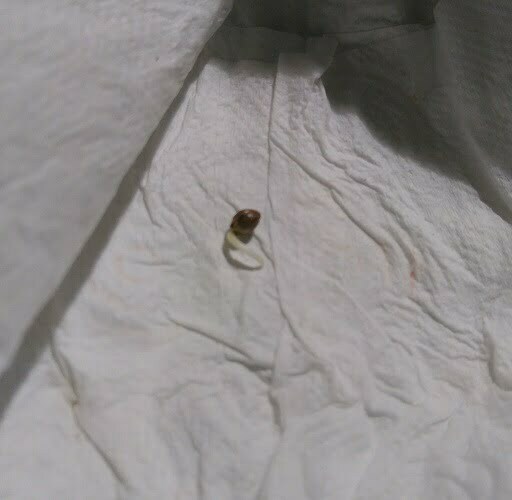
Seed germinating in paper towel
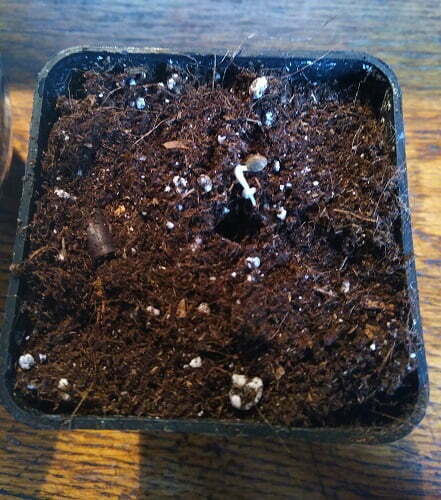
Germinated seed going into the soil
She germinated within 24 hours, although we left her in the paper towel a big longer in order to let the tap root grow a bit.
As we speak the cotyledons have opened up and the first fan leaves are starting to show hehe
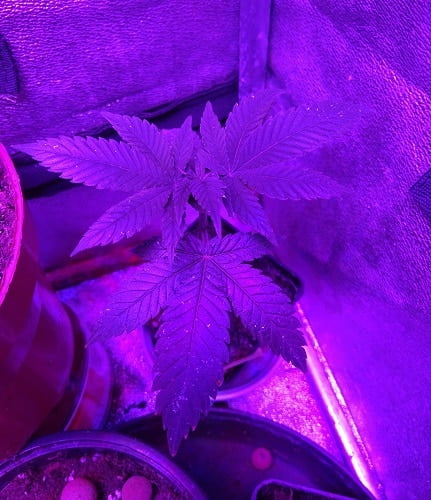
Topping the Laughing Buddha
This baby has been growing so nicely, originally we were scared she would get top heavy, but nope, she grew a nice stem and is now growing faast!
Although we’re not sure that we’re going to scrog this round wedecided to top this baby in order to get multiple Apex’s. From there we will make a cutting off one of them for a mother plant, than get this beauty to flower 🙂
Blue Thai showing problems
For the past week the blue thai is showing issues. We though it was linked to the fast that she was still in a small pot, but the leaves are still turning yellow..
We’re hesitating on a nutrient or light burn situation.. To be safe, we flushed the soil and lifted a bit the light.. hopefully the situation will improve
Leaves starting to turn yellow
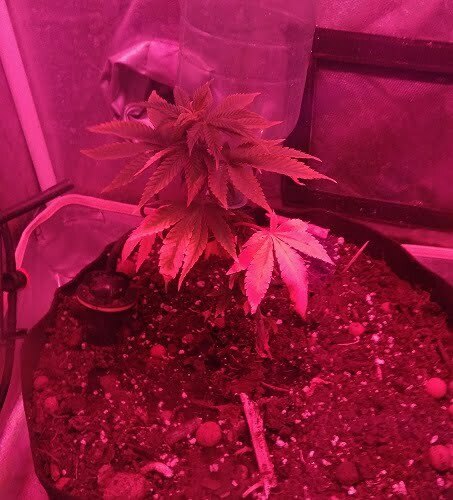
Issue is spreading
Curing the Blue Kush
Sooo we didn’t share this grow on here (too busy on the citizen lobbying tool crowdfunding at that time), but we just couldn’t resist sharing this little beauty
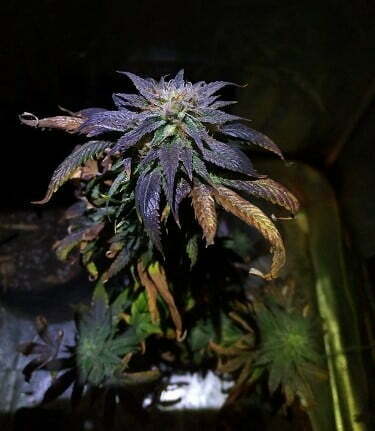
Blue Kush – Ending her flowering stage
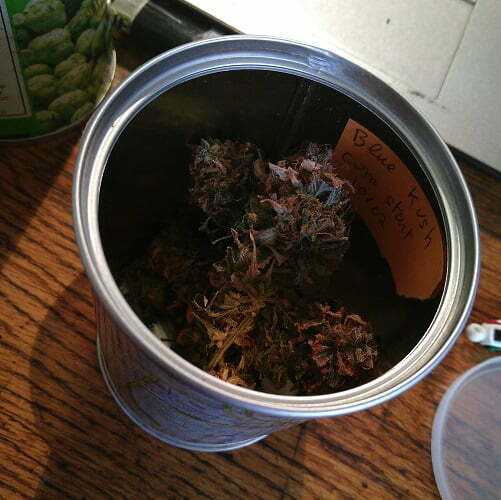
Dried flowers curing it a container
She gave a seeeeeeed!
We harvest her couple weeks ago, she’s now curing and soon ready to be smoke hehehe 🙂
Honestly we didn’t even weigh the final yield, as a g*d d**n spidermite attack impacted strongly her development around the middle of the flowering stage…
That said, isn’t she beautiful?
Alright folk that’s it for this one! Until next week,
Be safe and grow easy!