 Search for specific products and use our comparator
 Search for a ressource in our library
Hey there and welcome back for another update on our current marijuana plant.
These little one’s now need a new home so it’s time to get them into a new pot. Now since we just watered we have to wait a day or two but it’s time. Let’s get into it.
Day 22 – Growth during the vegetative stage
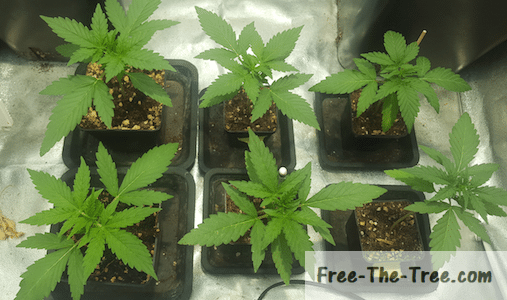
So this is 2 days after watering the plants, the plants are pretty much chilling.
The one on the top right is still drooping a little, but nothing serious. Here it seems like everything is on track, no deficiencies seem to be present, heat and humidity levels are good.
One thing you can notice though is that the soil is starting to be dry (bottom right plant). After just 2 days since the watering, this is a strong sign that the roots have well invaded the ground and the transplantation of these marijuana plants should come soon.
In our case, that’s the next day so let’s get to it.
Day 24 – Transplanting the plants
Before
After
So when you’re about to transplant you should be ready to be at it for at least 20 minutes per plant. Now obviously that depends on the size of your pots, but with all the different steps I think that’s a safe minimum.
We documented all the details of transplanting your weed plant in a guide over here but here are the main details:
- If you don’t transplant you will have root issues and you’re plant won’t be able to grow successfully.
- The bigger the root system, the bigger the plant (and the buds).
- You need to transplant your plant once the roots have invaded the soil.
- Transplant between 2 waterings, when the soil isn’t too dry nor too humid.
- Be careful, with auto-flowering seeds! They start to flower when the main root hits ground, don’t make the mistake we made and go straight for the 11L pots! Check out our guide ou auto-flowering plants if you want to know more
- Expect stress signs the couple days following the transplantation.
- Make sur you clean all the dirt off your leafs (don’t forget underneath!)
- Water the new soil after the transplantation. This will push the roots to invade the new ground.
This time around we only transplanted 4 out of our 6 plants, the reason why? I didn’t have enough pots… -_- Get everything you need before germination!
Luckily 2 of the 6 plants were actually in bigger pots (since I didn’t have enough pots in germination time), so I had a couple days to get some (or that’s what I though, but getting ahead of myself here).
Appart from that the transplantation was a bit of a struggle. The soil was a little too dry, and the roots were nicely stuck to the pots so a lot of tapping and bending the pot went on, but got all 4 of them out!
Really the humidity level of the soil does it all, when its too dry it’s a fight. I probably spent 40 minutes just getting them out of their pots.
After this, generally you want to water your plant right after transplanting them, in my case I waited the next day, which isn’t optimal, especially since the old soil was real dry.
This is a little like a “what not to do guide”, and you’ll see in the upcoming days why I’m saying this…
Day 25 – Watering after the transplantation
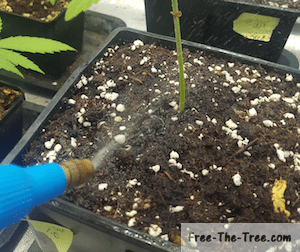
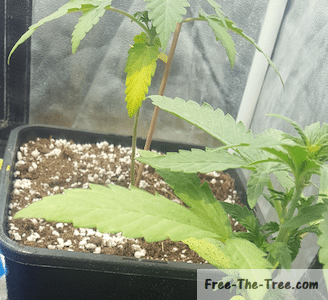
So the day after the transplantation you can see the first deficiencies coming in.
See on the right picture how the weed leaf is turning yellow. It started at the tip and is working itself inwards.
Seems to me like Nitrogen deficiency, so I boosted a little the amount in this mix, adding about 2.5ml for 2L of water. Hopefully that will do the trick.
These signs are showing up on all our plants unfortunately, but it’s also giving us the opportunity to cover nitrogen deficiency!
Apart from that they seem to be enjoying their new home, although this watering was really needed.
alright folks well that’s it for this one! See you guys in a few days.
Until then, be safe and grow easy!
Don’t want to go just yet?
Check out the days of this little one’s life
Check out our previous cultures