 Search for specific products and use our comparator
 Search for a ressource in our library
Hey everyone, hope everything’s going good. On our end we had a bad surprise after transplanting these babies… They started flowering…
Now, if you’ve been following you see how tall they are right? You’ll agree that we definitely needed more time in the vegetative stage. This got us going with deficiencies and possible light burn, still not sure.
Let’s get into these past couple days. Unfortunately I don’t have any pics for day 26, so we’ll start on day 27.
Here’s what we are going to cover:
- Day 27 – Deficiencies and First signs of the flowering stage
- Day 29 – Watering the Critical + 2.0
- Day 30 – Transplanting the last plants
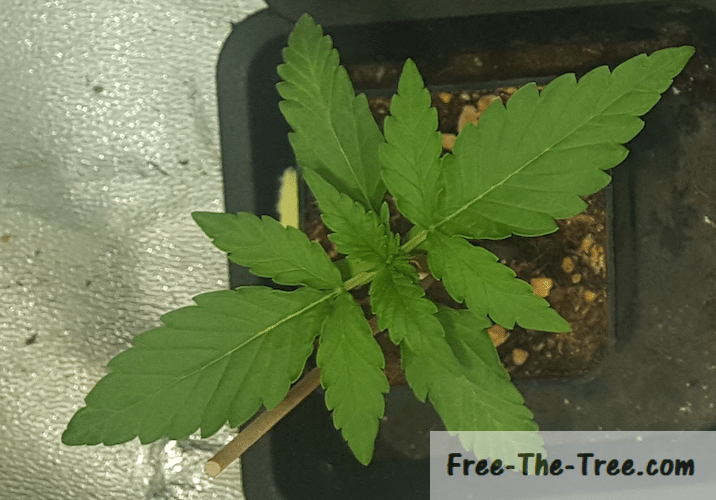
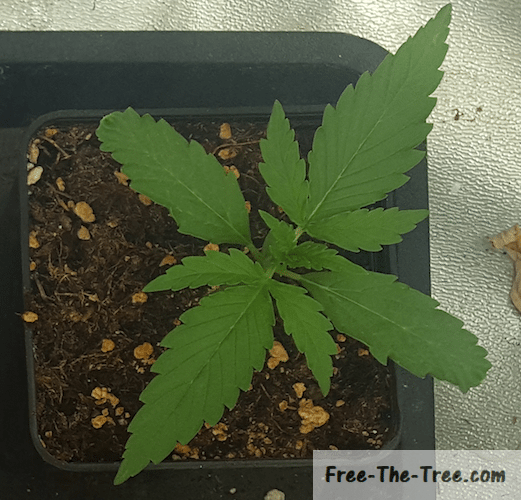
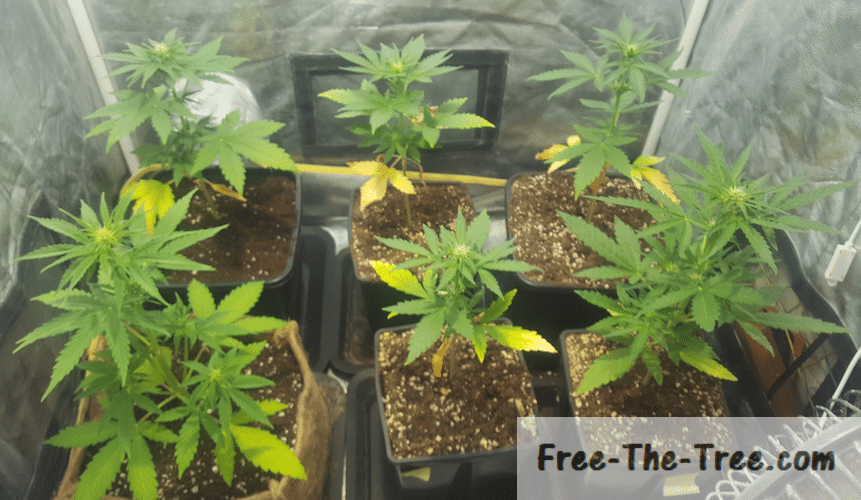
Day 27 – Deficiencies and First signs of the flowering stage
On these pictures you can clearly see a couple issues.. Let’s decrypt them together.
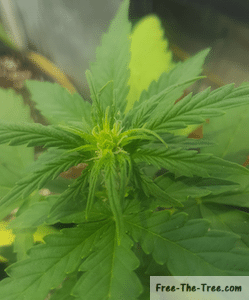
On the one on the left you can start seeing the first pistils of the flower showing up on the Apex. These one’s are much less advanced than the one’s visible on the article’s main image, but nonetheless you can see the starting to sprout up.
Within the middle picture you can see than most of our plants are showing signs of deficiencies. As we started suspecting during the previous days, this is most likely Nitrogen Deficiency.
It would make even more sense due to the fact that they are entering the stretch phase, time at which the plant consumes a large amount of Nitrogen in order to grow.
This means that the next watering definitely needs a good amount of Nitrogen, especially since the cannabis plant stop intaking Nitrogen after the Stretch.
I might actually have to pulverise some on the leafs one of these nights.
On the last image you can see the leafs facing upwards. This is a sign that our lights are too close and need to be brought up.
Light burn can do a lot of harm to your plants, even ruin your harvest! So be careful and make sure you have at least 25cm (10inch.) between the light and the Apex’s of the plants.
If you’re wondering why these plants started to flower without a shift if photoperiods here’s the quick answer, we’ll put a link below to our article if you want to know more.
Since these plants are auto-flowering plants they don’t depend on photoperiods in order to get into the flowering stage, so what do they depend on?
Auto-flowering plants start the flowering stage when the main roots have hit bottom. Meaning that when the main root cannot go deeper, the plant will start going into the stretch phase.
Don’t make the mistake I made and pot your auto-flowering seeds directly into your final pots. That way you’re sure they won’t flower early
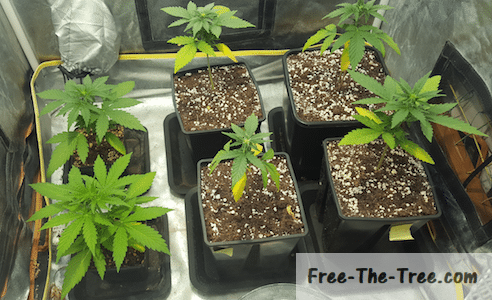
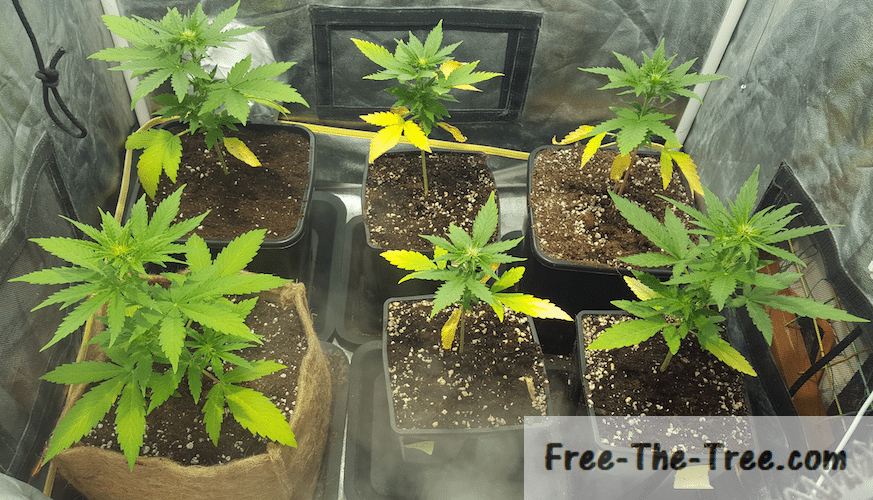
Day 29 – Time to Water the Critical+ 2.0
Here we are again to a watering time. Now if you look well you can see that not all the plants are showing signs of thirst. I suspect this is our fault, after the transplantation we must have watered some plants more than others.
The other possibility is root development. If the root system of these plants isn’t as developed as their sisters than they cannot access what they need within the new soil. Meaning that the humidity is there, she just can’t get it.
You can also see that the deficiencies have continued to spread across the leafs, showing that we haven’t fixed the issue yet..
It might be due to the fact that they haven’t taken in the nutrients yet, so we’re going to have to wait it out, or else we might go from nutrient deficiencies to nutrient burn.
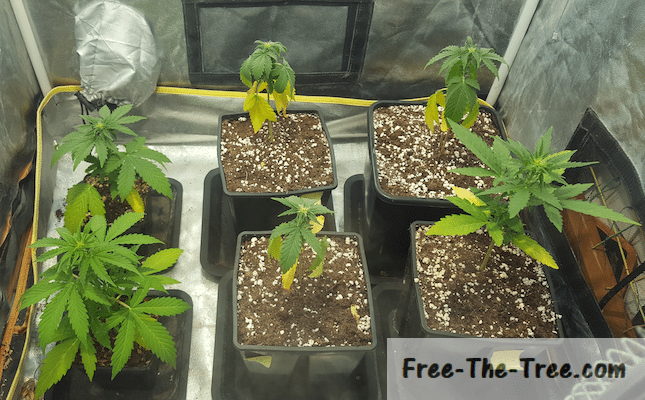
Apart from that, it’s really time for our 2 last plants to be transplanted, it’s been almost a week since the 4 others are in their new pots, if we wait too much longer we’re going to have problems with them, and they’re are best one’s out of the bunch so that really would suck
Day 30 – Transplanting the last Critical + 2.0 Marijuana plants
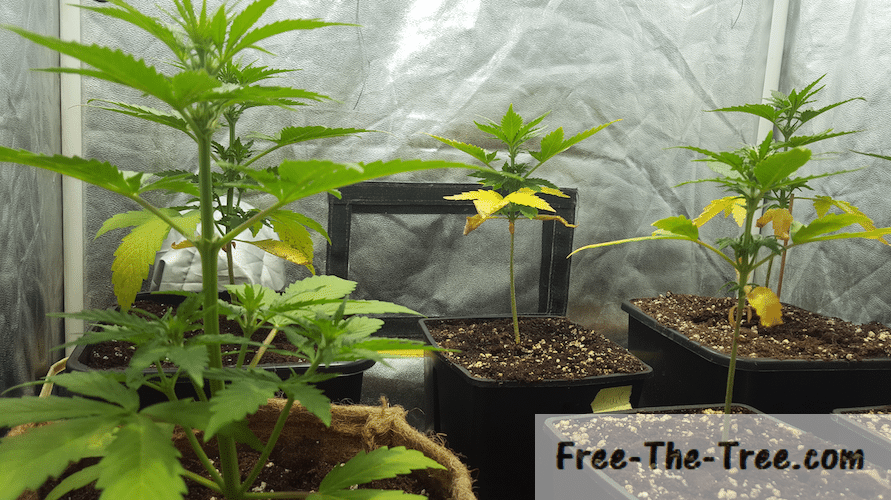
So we finally got these last one’s into their new pots. They weren’t supposed to be their final pots, but since these babies have started to flower I don’t really have a choice here..
You can see on the left picture that they had well invaded the ground. If you look close you can even see some roots starting to exit what used to be the bottom wholes of the pot. This is definitely a sign that I should of transplanted earlier.
In the middle picture you can see that our issues just keep going, have some leafs starting to go white on the tips, other already dead, it’s just not looking good.
On top of adding some more Nitrogen during the last watering, I started to add so P and K (Phosphorous and Potassium) as well as raised the light a bit.
Hopefully that will do it will stop spreading.. the one’s the most hurt are the one’s with the less leaf mass which is a big problem, their going to concentrate of leaf growth during the flowering stage, where we want them to be growing some fat buds.
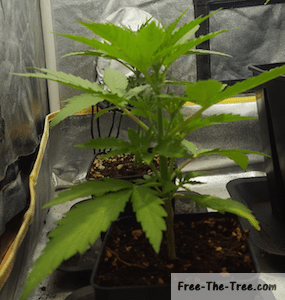
On the last picture you can clearly see the differences in our late plant vs the earlier one’s. The earlier ones have week stems, their first stage is much higher off the ground and they have much less branches and stages.
It’s crazy how a small difference during the first 2 days of their lives can make such a big difference later on.
Now you might also be wondering what that brown looking thing is. It’s actually an “eco pot”, made out of organic material.
A friend gave it to me and we’re testing it, it’s supposed to be better for the roots since they can grow into the sides of the “pot” instead of being stuck to the sides of the plastic one’s. We’ll see how it goes.
That’s it for this one folks! In the next post we’ll start talking about cutting your branches and leafs in order to keep just what you need
Until then, don’t hesitate to give feedback on this post, or if you’ve had similar situations, we’d love to hear about it.
Be safe and grow easy!
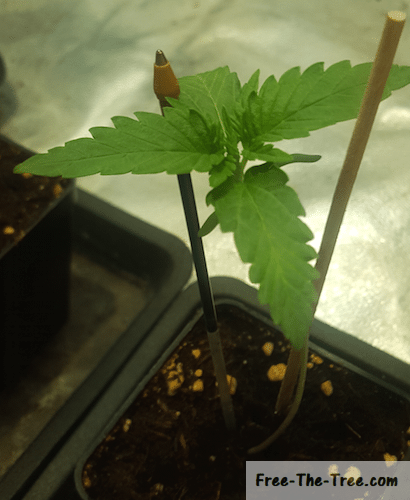
So as I told you guys on the previous post, the sprouts got too tall for their own weight making them fall over.
Easy fix though, you just need to find something sturdy to support the main branch.
Try and avoid anything that would hide the light from it.
As you can see with the wet soil we’ve also given them water since then, here’s the mix we can them:
- 4ml of Root Boost for 2L of water
- Ph at 6.4
For the moment we’re just letting them grow, I try to give them as less ingredients as possible.
Apart from that there’ been some heat issues, getting up to 30°C in there, but they seem to be taking it alright..
Here’s a couple pictures for the time period:
That’s all for this one folks! talk to you guys in a couple days
Mean while want to learn more about the sprouting stage?
Hi there, Welcome back to another edition of our Critical + 2.0 and Fruit culture!
We’re now about three weeks after the germination of these little ones and they’ve been coming along pretty nicely.
Critical + 2.0 And Fruit: Third week of the vegetative stage
For the past week we’ve had issues in the balance of 3 of our plants and it’s been pretty rough. I’m happy to finally say that by day 21 we passed that hurdle! We actually did an article covering balance issues during the early vegetative stage if you want to check it out.
During this week, apart from those balance issues we went through heat stress and a nice watering, By the end of the week they were looking pretty happy and soon to be ready to get transplanted, but I’m getting ahead of myself here.
Let’s go through these couple days together.
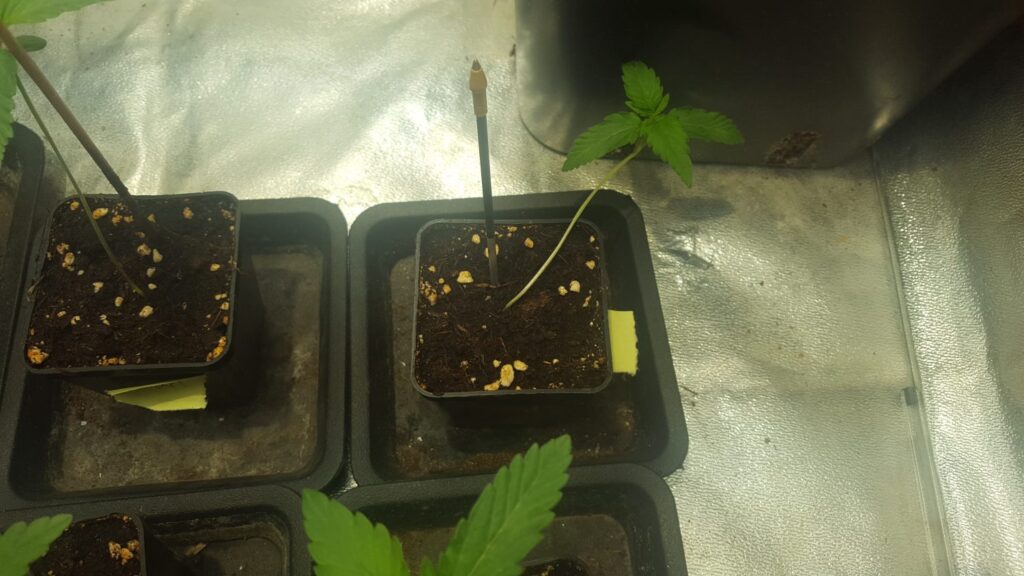
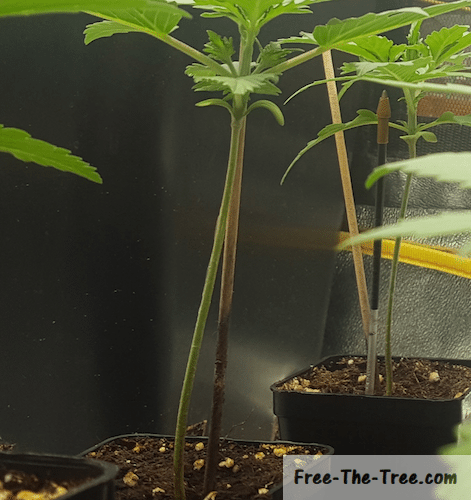
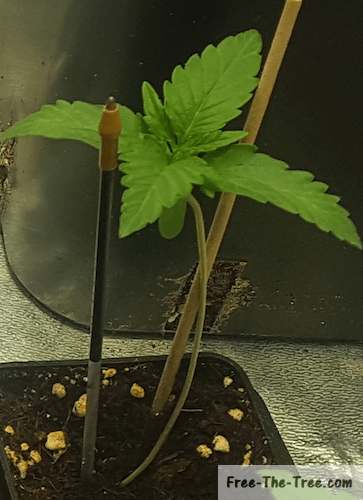
Day 16 – Final days of our balance issues
At this point the plant on the bottom left corner was now stable, we had had the fan blowing over it for the past 2 days and the stem got strong enough to hold. We still decided to keep the pencil in for a couple days just in case. The 3 other ones.. not so much
You can see that the one with the biggest issues (top right) is still very top heavy, without the 2 stakes she would be totally horizontal to the ground. Technically she could survive that way, but we’ll agree that it’s not optimal.
On this issue, only time will tell if what we’ve done is enough, any way she should grow strong enough to stand straight, but it’s using up energy to do so instead of growing leaf mass.
Day 17 – It’s getting hot in the grow room!
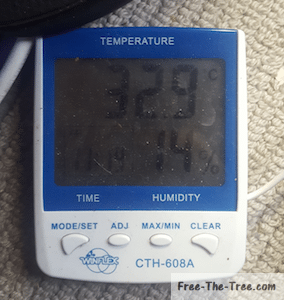
Sooooo woke up this morning, the humidifier was out and it got up to 33°C(91°F) in there!! (Reminder: You really don’t want to get over 29°C), with the 14% humidity, really not the best way to wake up.
Luckily it didn’t really last very long, filled up the humidifier and it dropped back down to 27°C pretty quickly. It didn’t seem to really do much damage, although one of them is showing signs of heat stress.
On the picture below of day 19, you can see the edges of the leafs curling up, this might be signs of heat stress happening, so I really got to be careful during the upcoming days that the temperature doesn’t get too high (just bought a brand new fan!).
Day 19 – Watering time for these plants!
See how the leafs of the plant are drooping down? This is the plant showing that its thirsty and you really need to water them ASAP
Now we did a whole guide on watering your marijuana plants that you can check out here but as a reminder here are the main points:
- During the vegetative stage you want to give Nitrogen based solutions.
- Give about a quart of soil volume in water.
- Add some root booster to your mix
- Keep the pH between 6 and 7
Now as you can see on the image, I already watered her and she’s still drooping. This is normal, it takes a couple hours for her to get back to her good old self!
Now if that’s not the case then you might be overwatering your plant so cool down. We’ll do a whole article on that soon but if you’re suspecting this, just chill out on the watering for a little less than a week, then water her, she should be better by then.
Day 20 – Nicely watered plants, getting back to growth

These little one’s really enjoyed to watering, look at the nice green color, their leafs are nice and strong, basically just looking great 🙂
Now if you can notice, on the 2 right ones the soil is already dry on top layer and you can’t see but it’s also the case within the medium. These are the first signs that they are going to need a new home.
We still have stakes holding on all 4 plants just to be safe, although they seem to be holding up by now.
At this point, better safe than sorry so we’re going to keep them in as long as there’s hesitation.
Apart from that they’re pretty much living their lives now, chilling.
That’s it for this one guys, on the next post we’re going to go over the transplantation of these little one’s among other things.
Until then, be safe and grow easy
Looking for tips on indoor growing?
Check out our previous culture: Big Buddha Cheese using SCROG
Critical +2.0 and Fruit auto-flo: First days of Growth
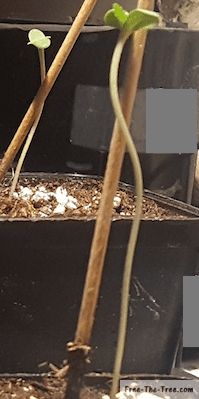
So for the past couple days we’ve been fighting this top heavy issue, and what a fight…
This morning I was pleased to see that 2 out of 5 are basically standing on their own (the bottom left one being a late bloomer, she doesn’t have this issue)
Had another surprise, which wasn’t so pleasing.
As they say, a picture is worth a thousand words
As you can see this little one is basically parallel to the ground.
This one is worrying me a little, the stem just can’t hole up the weight of the leafs. We’ll see how she evolves during the next couple days but we might have to set something up to get her standing.
Apart from that they’re pretty much chilling, the leaf mass has been increasing nicely which is cool, the second stage seems to be appearing from the most advanced ones, I’m pretty confident on this round.
Hey guys and welcome (back) to Free the Tree! This past week was full of events, this might be a long one.
We validated the fact that we had a Thrips invasion and not a Spider Mite one, thank god! (How to tell the difference? We did a guide here 😉 ) These suckers are much easier to kill than spider mite.
Also, since we’re in the late flowering stage we can’t really use anything on our flowers without taking the risk of spraying anything, even Neem oil could leave a taste and ruin the harvest.. So again, thank god it’s thrips and not Mites.
During this week we also saw some crazy Thrichome and bud growth 🙂 They’re smelling beauuuutifully
Let’s get started
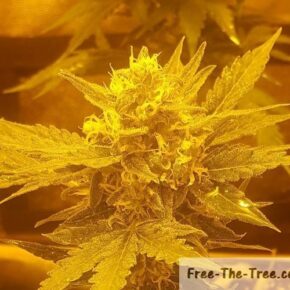
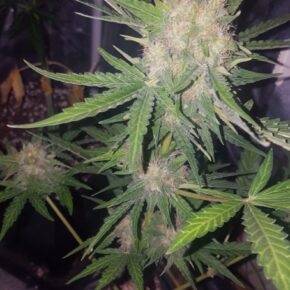
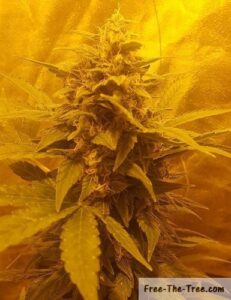
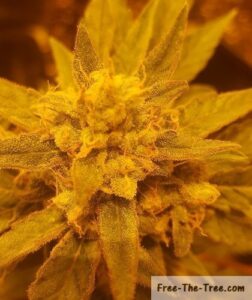
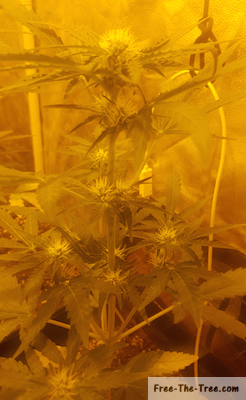
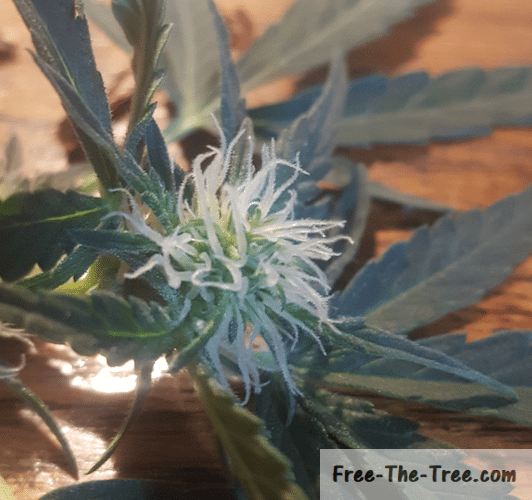
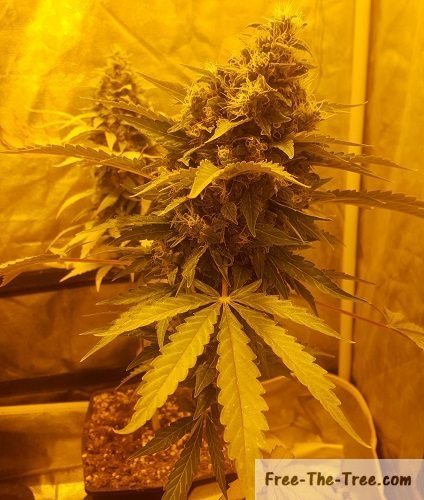
Day 48 – Trichomes all over the place!
Our Critical + 2.0 has been growing more and more Thricomes on her buds, they’re all white and powdery, i’m loving this! here’s a couple pictures (which we had a microscope to show you what they looked like up close)
As always click on the picture to see the full screen version
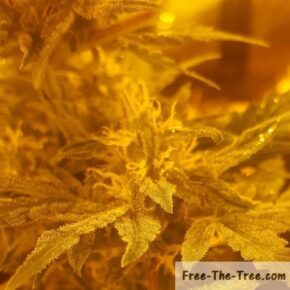
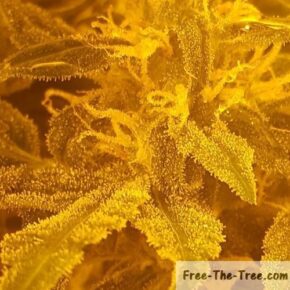
Can you see all those little white specs? Those are the trichomes 🙂
You may be wondering what the fuss is all about, we’ll do a full article very soon on this but basically here’s the deal.
Tricomes are what contain, at a specific moment in the plants development, a molecule called TetraHydroCannabinol, aka THC. Tricomes contain many other molecules such as CBD, produced by the Tricomes once they deteriorate (become gold like color)
At this time under the eye glass we can see that they’re totally clear which means that they’re not quite ready, we want them to be a nice milky color in our situation.
Trichomes are important to track since they’re the best way to know when to cut, so if you don’t have one yet buy a magnifying glass!
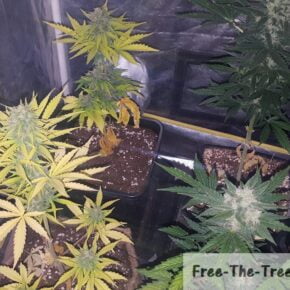
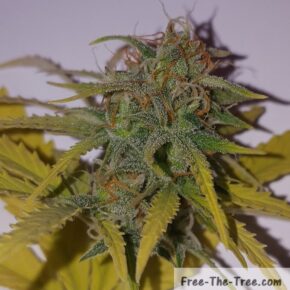
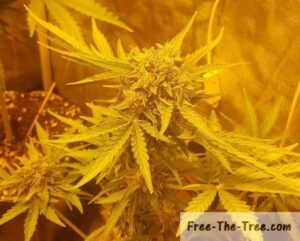
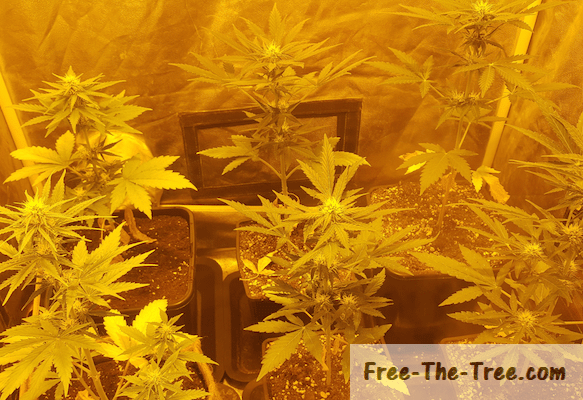
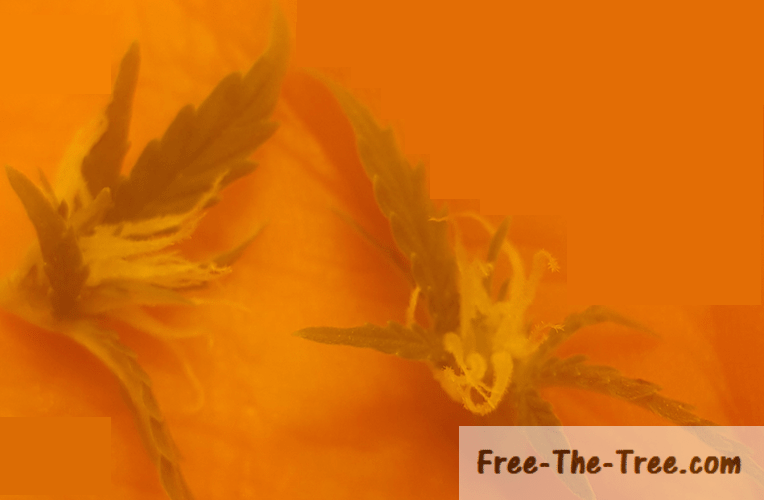
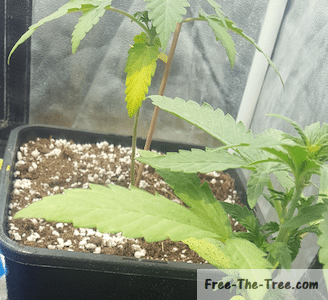
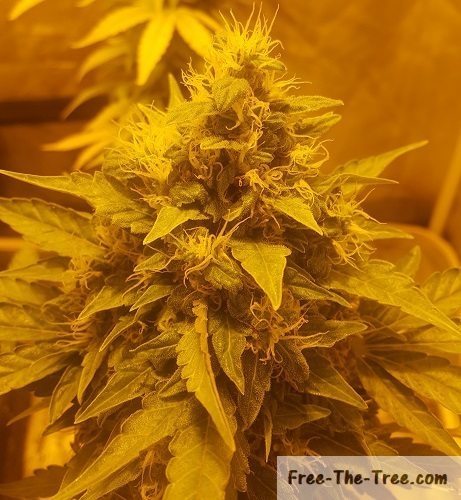
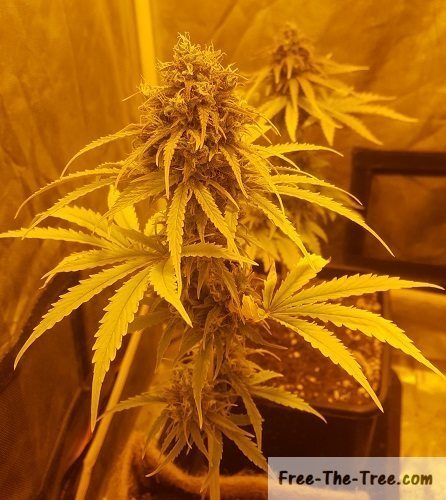
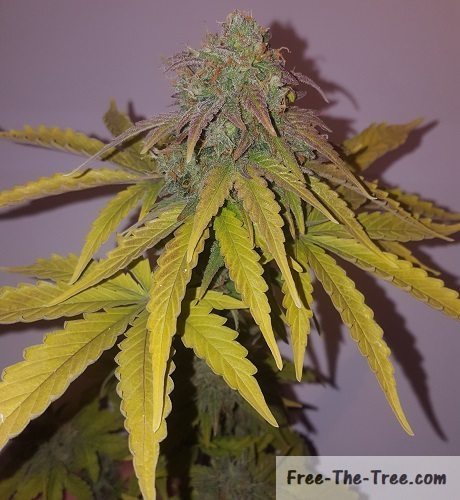
Day 49 – Fattening buds, Browning pistils and Nitrogen Deficiency
The flowers have been growing more and more with almost daily evolution, it’s really a pleasure to watch these plants grow, although we’ve been fighting these thrips (we’ll cover that in the next section).
As you can see the 2 plants on the far left are showing mid to late stage Nitrogen deficiencies with all leaves impacted. They seem to be further along the flowering stage than their 2 fruit strain counter-parts. I think this is due to the fact that their soil in much less compact, thus their root systems aren’t as solid.
On top of that we kept side branches to make an A/B test between this style and One Bud technique (What are the Different types of cultures? Here’s a guide).
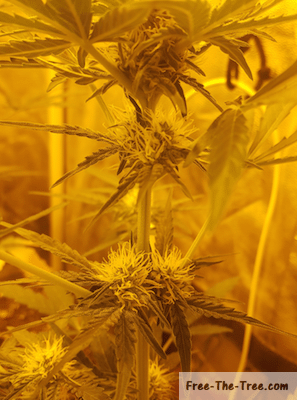
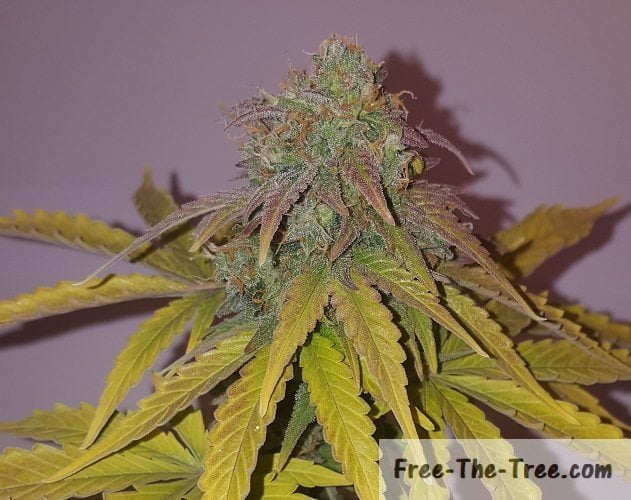
Browning Pistils – Round 1
In the middle picture you can see that the pistils have started browning, and as you may have read this can mean that the plant is ready, keyword being can.
Marijuana flower pistils will turn brown 2 or 3 times during the flowering stage so do not harvest here, you’ll be cutting yourself short of up to 50% of your harvest!
Those different rounds of browning pistils followed by the flower opening back up (white pistils) is her way to grown and increase the size of the flowers, you’ll notice those buds getting bigger and bigger as it goes on, but don’t wait too long! 😉
(If you’re wondering, the best way to identify when to harvest is by observing the trichomes.)
Day 51 – Confirming the presence of Thrips
As you may be aware, we’ve noticed signs of a Thrips or Spider mite invasion, we were leaning for Thrips since the white marks were spread out all over the place but we we’re positive.
In order to be sure we decided, for an hour or so, to drop the humidity levels, take the fans off the plants and raise the heat making the perfect environment for Thrips, hoping they would show their faces.
And sure enough, after leaving it for a little while we could see a couple of those suckers, both on the larva and post-larva stage (no adults though, suspect I killed it couple days ago).
If you want to know more about Thrips and Spider Mites we’ve liked to our articles below.
Here are a couple pics of these suckers, in total we had to have killed about 10 of them across all our plants.
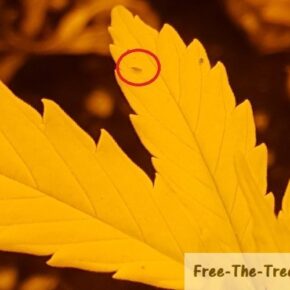

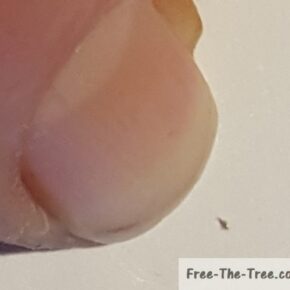
As you may know, Thrips are between 0.5mm and 1.5mm long, so they can be pretty hard to spot but it’s defenitly . In comparison to my index finger nail its super tiny!
If you’re wondering if you spotted one or not, move the leaf around you’ll be able to see if it moves or not. If it does than that sucker is a pest, kill it! (I used my fingers when I spotted some).
As we’ve said in our previous report, since we’re so far along within the flowering stage we can’t use any treatment by fear of leaving a taste in our buds, so we’ve been hunting them by hand and keeping conditions as unfavorable as possible for them.
Thankfully the infestation isn’t that bad and our plants are surviving it fine, showing healthy signs, smelling beautifully so we’re not too worried.
Day 51 – Cutting Side Branches
As we said further up, we tested different styles and one of are buds is really small, so we decided to cut the side branches in order for her to focus on the Apex for the end of her life.
It’s really late in the game to hope for a real impact of this, but we still decided to cut the for satellite branches, hopefully the main bug will get somewhat bigger.
Cutting the side buds
Here’s a couple pictures of how we cut the branches. It’s pretty straight forward, you place you scissors at the intersection of the branch and the main stem and make a clean cut.

Curing Marijuana Buds
As you can see on the pictures below, these buds are real small, but they still look and smell beautiful, can’t wait to taste this Fruit strain :p
Curing the buds are one of the most important steps, the aim is to cut off all the main leaves and as many of the small leaves as possible.
Since this is personal consumption, and the small leaves near the buds have so many trichomes, we decided to just trim them; but if you’re intending on selling your harvest it’s more aesthetic to just keep the flowers.
Side note, keep your leaves and stems! we’ll do a full post on what can be done with them, from tea to hash you can do a whole lot with everything so don’t toss it out.
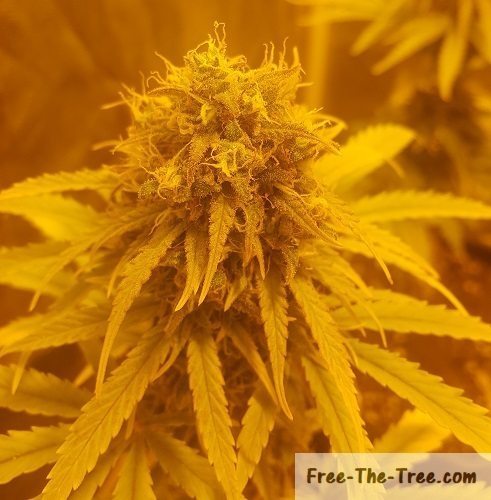
Day 53 – Fattening Buds and first signs of readiness
Although our plants are objectively small, which we were prepared for, some of these buds are getting nice and fat 🙂 The beautiful smell is all over the room and their shining with trichomes. It’s going to be a small but tasty harvest!
Curing Marijuana Buds
Alright guys that’s all for this one!
Until next time, be safe and grow easy 😉
Don’t wanna wait? Check out all our other Critical+ 2.0 Grow Reports
Check out all out Indoor Growing Tips

Since this summer was pretty hot we couldn’t launch a production during a couple months, so we figured it was the opportunity to try out some auto-flowering seeds!
Here’s the batch of Dinafem‘s seeds we decided to go with:
- 5 Fruit Auto-Flowering seeds
- 2 Critical + 2.0 Auto-Flowering seeds
The cycle should be of about 2 months until harvest, so it’s going to be a pretty quick one!
Unfortunately one of the Fruit seeds didn’t germinate, so we’re down to 6 plants.
Appart from that loss there’s also been a couple issues with the sprouts starting ~day 3/4.
So here we go with a little storytelling of the first few days went.
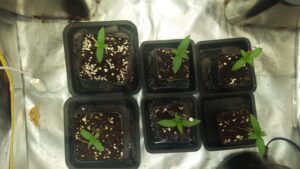
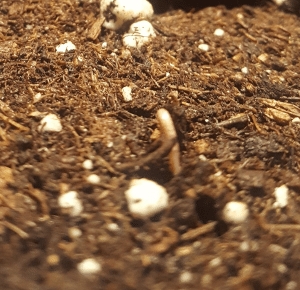
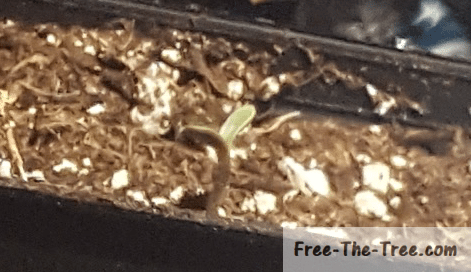
Day 0: Breaking ground
When I planted the seeds the roots were actually pretty long, some up to 1cm, so it only took the seeds about 2/3 days to break ground which was pretty cool.
Last time I had done it prematurely and it took aver 10 days for some!
Don’t miss this moment it’s pretty awesome to follow each step of the process.
Here’s a couple pictures I took this round, during day 0 and day 1 (they grow so fast!)
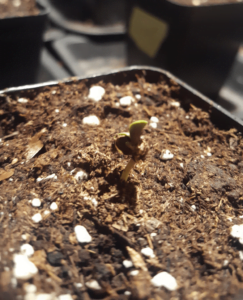

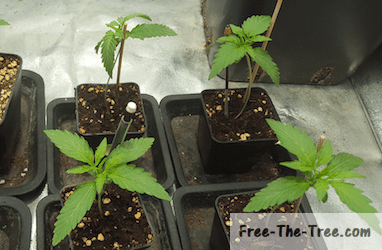
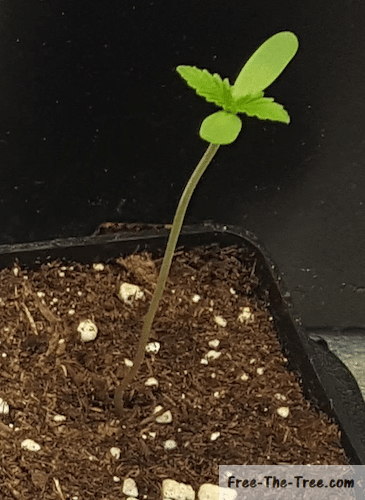
Day 2: The First Stretch
Within 2 days (day 3/4), these little one’s took a couple centimetres. You’d think that’s a good thing, but in the end not really..
Taking so much high creates 2 issues:
- It’s not concentrating it’s energy on producing leaf mass, that will in turn increase the production of energy through photosynthesis.
- Once the leaf mass will grow, the plants will get top heavy and tip over.
I figured out the reason though.. my lamp was way to weak and far out. If you’re not already using the grow lamp at this stage, get the lamp at about 50cm from the Apex.
How to deal with balance issues of a Marijuana plant?
- Take a straight stick or pencil to help the plan stand straight.
- Plan it in the soil in a manner that supports your plant.
Be careful not to break any of those first roots! - If you’re in my situation, get more light to the plants, so that they stop growing in height and start growing leaf mass.
You can either get the light closer, get a light bulb that emmits more lumens or get a strong light source
Having issues we didn’t cover here? Check out our comprehensive guide on Marijuana’s life cycle! We cover many different daily issues there
That’s all for this one folk’s, see you in a couple days!
Hey there and welcome (back) to our growing guide! This has been a turbulent session with these auto-flowering plants, it was our first time with these types, full of learnings! We’ve actually grouped it all together in an in-depth article if you want to know more.
During these couple days so many things happened, we started noticing some weird white marks on a couple leaves of our plants, had to prune some branches and pop-corn buds off and started seeing some nice bud growth getting started.
Before getting into it here’s some pics of the plant during these days, don’t hesitate to clic on them so see the full picture.
Day 36
Day 37
Day 38
Day 39
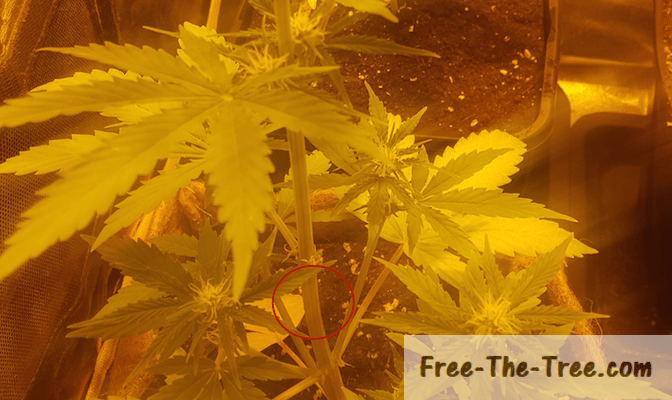
Day 36 – White marks on leaves and pinching the stem
On day 36 two things really went down.
The first concerns pinching the stem of the plant where we are growing multiple side branches (bottom right one). The objective of this is to reduce the amount of nutrients going to the Apex and redirect it to the side flowers.
It should also create a knot on the stem allowing the plant to store more nutrients. This is something that should be done during the flowering stage, but as we said in one of our previous posts these babies started their flowering stage a little early.
The second is that we started noticing some white marks on a couple leaves of one of our Critical+ 2.0 flowers. At that time we though it was some kind of deficiency, just couldn’t believe we had spider mites. We decided to see how would evolved over the next couple days before acting (worst thing to do ever!!); We should of just cut of those leaves right away..
If you want to now more on those little suckers and what they can do to your plant, check out our article on Spider Mites (aka the Tetranychidae Family)
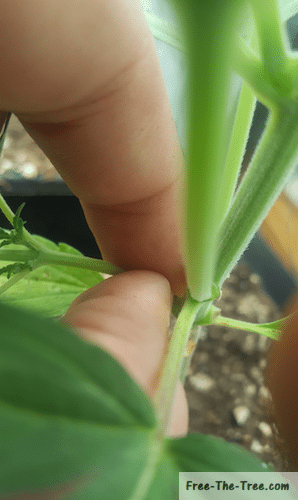
Pinching the stem of Marijuana
As we said earlier, pinching the step of your cannabis plant will:
- Reduce the nutrients brought from the roots to the area after the pinching area
- Increase the nutrients brought to the rest of the plant
- Create a knot allowing her to stop more nutrients
- Should balance out the nutrient distribution on all branches or bud area’s
Here’s more on this
How to pinch the stem of Cannabis
- Identify where to pinch. This will depend on your goal.
- Place your index on one side of the stem and your them on the other
- Squeeze the stem until you fell/hear a clicking noise. You will know it when you feel it.
In our case we wanted to increase the amount of nutrients sent from the roots to the side branches, so we decided to pinch the stem just under the first level of buds.
This does not mean that the top of the plant won’t have any food, remember that plants produce their food through photosynthesis, what comes up from the roots are “just” extra nutrients. Furthermore, nutrients will continue to flow, just not as much.
In case you squeeze way too had and you’ve broken the outer layers of the plant place some tape around it until she fixes herself up.

Appearance of White Spots on the leaves
We started noticing that a couple leaves of one of our Critical + 2.0 plant started to have a couple little white marks grouped together on them.
You can see on the images on the right that each leaf has more or less marking on them.. Little did we know but that was the start of our infestation and the leaf with the most marking was the base leaf of it all.
At this point we didn’t really know what it was and thought it was some type of deficiency. As most first people first encountering spider mites.
In that spirit we at the next watering we decided to increase the amount of nutrients given, which didn’t hurt but didn’t help out for the infestation.
To make matters a little worst we also decided to lower humidity levels to about 45% since the flowering stage has begun. As we’ve covered in our guide, spider mites hate humidity and love hot dry weather (which we learned after hand..) so this made matters worst.
Spoiler alert: We were able to survive this but lost a good amount of leaf mass and spend a good amount of energy in management of the infestation. More on that in our next posts 😉

Day 37 – Trimming Pop Corn Buds
Now that our plants have well entered the flowering stage we can identify the bud sites that we want to keep and those that need to go (aka pop corn buds)
This is also the “last” opportunity to cut branches that are not receiving direct light, thus taking energy produced by photosynthesis of other sections of the plant.
What are pop-corn buds?
Basically Pop-corn buds are those small buds growing low of at the middle of your stems.
These area’s will generally produce low quality buds while taking a lot of energy to produce. It is much better to remove these buds in order to keep the energy for the buds higher up on the stem.
The earlier you are able to identify and remove these pop corn buds the more energy your plant will place into your main buds.
You might need to repeat the procedure once or twice if your plant sprouts new bud area’s but this shouldn’t be the case.
What might happen though is that you notice that you’ve missed a couple further down the road, at which point you’ll have to make the call.
Are they going to produce anything worthy or are you getting a blunt or two out of it? In the second case, get her to go.
(if you’re far enough down the line get it drying, it’ll be an early, lower quality taste of your harvest)
How to cut pop corn buds?
- Identify what branches to remove
- Take scissors or a cutter (optional but recommanded)
- Place your fingers or cutter at the base of the flower
- Pinch/Cut off the bud
As you can see this is pretty simple and very similar to removing branches off your marijuana plant. Be careful not to damage the outer layer of the branch or stem.
As you can see in the last picture, by doing this with your fingers the cut isn’t very clean, since a clean cut will heal faster, it’s better to use a blade or scissors in order to trim your marijuana plant.

Our trimming session included pop corn buds and a branch of one of our Critical branches.
Why would we cut off a full branch? It was being covered by a large leaf over head so it was either that leaf of the branch, normally it’s pretty straight forward, the leaf has got to go, but in this case we already had pruned too many top leaves so we decided to cut the branch itself.
Here’s some pictures of a plant right before and after a pruning session
Before Pruning Marijuana
After Pruning Marijuana
As you can see a large amount of buds are gone and this is good! Instead of having a bunch of small buds the plant will be able to focus on the remaining flowers to make them big and beautiful.
Our pruning was pretty late, as you can see in the images of what we’ve removed the plants had already started producing trichomes, so we lost a good amount of energy.. although in this case I think it’s better late than never
Here’s some of what removed and a focus on what a early marijuana flower looks like. As always click on the image to view it fully
Day 38 and 39 – Calm before the storm
After those 2 pretty active days, day 38 and 39 was pretty calm. We watered out plants with some more nutrients in order to see if the white marks was some type of deficiency (so wrong) and let the plants recover from the recent pruning.
Little did we know that while we though our plants were recovering from an attack they were also being infested by some nasty bugs… But that’s for the next post of our indoor grow journal.
Until then, be safe and grow easy!
Want to share your indoor grow reports?
Send us your email and we’ll get back to you. After that you can start sharing your own experience and help others!
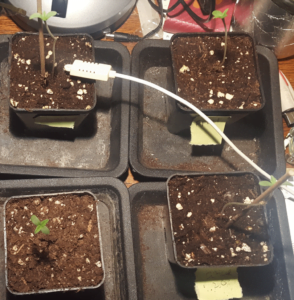
Hey there and welcome back for another update on our current marijuana plant.
These little one’s now need a new home so it’s time to get them into a new pot. Now since we just watered we have to wait a day or two but it’s time. Let’s get into it.
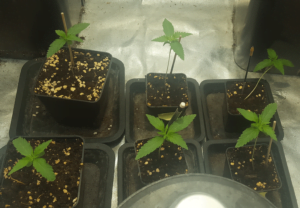
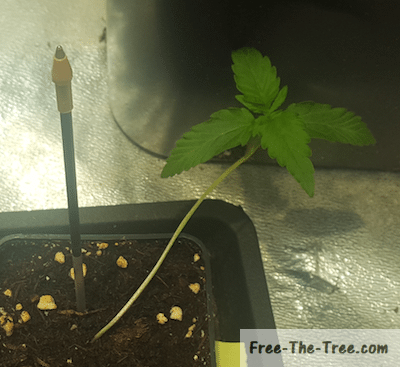
Day 22 – Growth during the vegetative stage
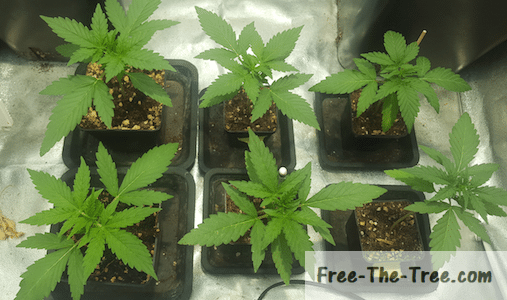
So this is 2 days after watering the plants, the plants are pretty much chilling.
The one on the top right is still drooping a little, but nothing serious. Here it seems like everything is on track, no deficiencies seem to be present, heat and humidity levels are good.
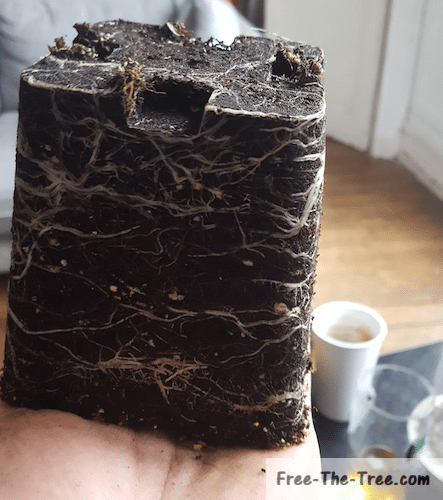
One thing you can notice though is that the soil is starting to be dry (bottom right plant). After just 2 days since the watering, this is a strong sign that the roots have well invaded the ground and the transplantation of these marijuana plants should come soon.
In our case, that’s the next day so let’s get to it.
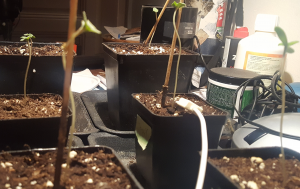
Day 24 – Transplanting the plants
Before
After
So when you’re about to transplant you should be ready to be at it for at least 20 minutes per plant. Now obviously that depends on the size of your pots, but with all the different steps I think that’s a safe minimum.
We documented all the details of transplanting your weed plant in a guide over here but here are the main details:
- If you don’t transplant you will have root issues and you’re plant won’t be able to grow successfully.
- The bigger the root system, the bigger the plant (and the buds).
- You need to transplant your plant once the roots have invaded the soil.
- Transplant between 2 waterings, when the soil isn’t too dry nor too humid.
- Be careful, with auto-flowering seeds! They start to flower when the main root hits ground, don’t make the mistake we made and go straight for the 11L pots! Check out our guide ou auto-flowering plants if you want to know more
- Expect stress signs the couple days following the transplantation.
- Make sur you clean all the dirt off your leafs (don’t forget underneath!)
- Water the new soil after the transplantation. This will push the roots to invade the new ground.
This time around we only transplanted 4 out of our 6 plants, the reason why? I didn’t have enough pots… -_- Get everything you need before germination!
Luckily 2 of the 6 plants were actually in bigger pots (since I didn’t have enough pots in germination time), so I had a couple days to get some (or that’s what I though, but getting ahead of myself here).
Appart from that the transplantation was a bit of a struggle. The soil was a little too dry, and the roots were nicely stuck to the pots so a lot of tapping and bending the pot went on, but got all 4 of them out!
Really the humidity level of the soil does it all, when its too dry it’s a fight. I probably spent 40 minutes just getting them out of their pots.
After this, generally you want to water your plant right after transplanting them, in my case I waited the next day, which isn’t optimal, especially since the old soil was real dry.
This is a little like a “what not to do guide”, and you’ll see in the upcoming days why I’m saying this…
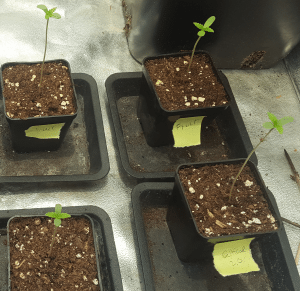
Day 25 – Watering after the transplantation
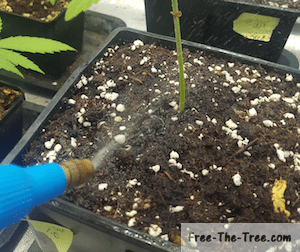
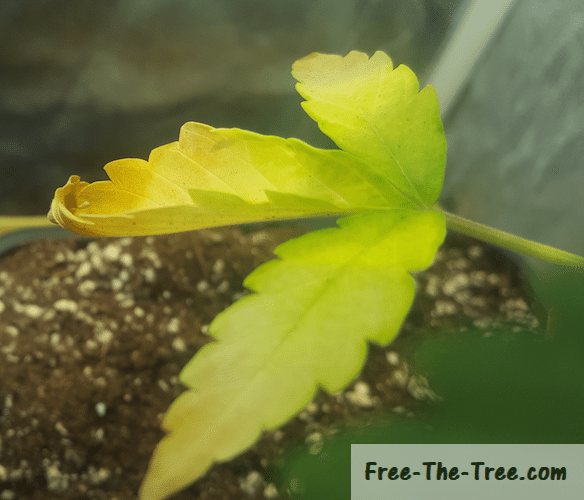
So the day after the transplantation you can see the first deficiencies coming in.
See on the right picture how the weed leaf is turning yellow. It started at the tip and is working itself inwards.
Seems to me like Nitrogen deficiency, so I boosted a little the amount in this mix, adding about 2.5ml for 2L of water. Hopefully that will do the trick.
These signs are showing up on all our plants unfortunately, but it’s also giving us the opportunity to cover nitrogen deficiency!
Apart from that they seem to be enjoying their new home, although this watering was really needed.
alright folks well that’s it for this one! See you guys in a few days.
Until then, be safe and grow easy!
Don’t want to go just yet?
Check out the days of this little one’s life
Check out our previous cultures
Going through all these balance issues with 2 of our plants we decided to do a quick piece on balance issues with marijuana plants during the early vegetative stage. Hopefully this will help some of you that have the same issue, or to avoid having it in the first place.
Here’s what we’re going to cover:
- Why do marijuana plants get balance problems
- How to avoid balance problems during the early growth
- How to fix balance problems
Why does Marijuana get balance issues
Generally a plant gets a balance problem when the direction of the light source pushes it to grow in an un-natural fashion. Either too fast, or at an angle that it cannot sustain in the long run.
This can be generated by:
- A light source to far from it’s Apex: The plant will grow so tall the stem won’t be able to hold the weight of the top anymore.
- A light source too far to the side. Try to keep your light source as centered as possible to all your plants. If you can’t then get it a little closer (without giving them light burn)
In our case, during its very early growth the light we used was too far from them and not strong enough.
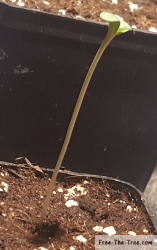
The 2 earliest sprouts just grew straight up to get as much light as they needed.
Once they we’re tall enough they started growing leaf mass, but its weak stem cannot hold all that weight, and after a little growth the plant falls over.
Now, plants are pretty well built, she will adapt in order to face the light source, but we will all agree that a horizontal stem isn’t the most optimal for a plant. You can see this right here on the picture. Found her like that one day, she had fallin over and stayed that way a couple hours so she adapted, facing up.
Lets get to how to avoid these situations early on, and then how to fix it.


How to avoid balance issues during the early vegetative stage
As we said earlier, the Cannabis plant will have issues with balance if the light source isn’t strong enough or not aligned with the plant. Here are our tips to avoid these issues all together:
- If you don’t have your sprouts in your grow room during the first 2/3 days after sprouting, keep the light source about 15/20cm (6 inch.) over the apex of the plants
- Get your plants in the grow house tops 3 days after breaking ground or if the sprouts are over 5cm (1.5inch.) high
- Keep your light source aligned with the top of your plants. If your using desk lights, add a second light source
Just by getting your plants into your grow room quickly you can avoid any issues, here’s an example between 2 of our plant that had the same conditions, except one of them spent much more time out of the grow house after breaking the ground than the other.
On the left you will see the one that broke ground earlier, the one on the right broke ground about 2 days later.
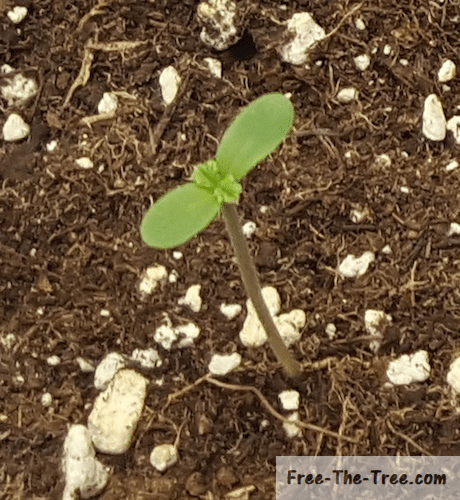
Day 2 – I need light!!
You can see the she’s been focusing on growing high in order to reach for the light source. You’d think this is cool to get a nice big plant, but at this point it’s not really what you want, you want leaf mass.
Day 0 – Hello World!
This little one’s just coming out of the ground and discovering the world. Her 5 sisters have been out for a while now, this is really the late bloomer of the batch.
Day 4 – All the light I need, lets get some leaf
By day 4 of this early bloomers life they were in the grow house. This one is the first that broke and the tallest out of them all.
Growing in height got her late in leaf production, which isn’t really the best thing here, especially that these are auto-flowering seeds so there’s no control over the length of the vegetative stage
Day 2 – Ah in the grow house with some nice lighting
The entry into the grow house was on day 2 for this one, you can see that appart from a little burn to the new leafs due to the change in lighting being so abrupt. I should of eased her into the new environment by doing a 12 hours in/12 hours out of the grow house during the first days.
Apart from that it’s all going great for this little one
Day 8 – Top heavy and falling over
The entry into the grow house was on day 2 for this one, you can see that appart from a little burn to the new leafs due to the change in lighting being so abrupt. I should of eased her into the new environment by doing a 12 hours in/12 hours out of the grow house during the first days.
Apart from that it’s all going great for this little one
Day 6 – Chillin’ and growing leaf mass
The entry into the grow house was on day 2 for this one, you can see that appart from a little burn to the new leafs due to the change in lighting being so abrupt. I should of eased her into the new environment by doing a 12 hours in/12 hours out of the grow house during the first days.
Apart from that it’s all going great for this little one
Day 10 – Starting to stabilise and growing
By the 10th day you can see that she’s pretty much stabilise, although she still can hold up on her own.
Soon enough she’ll be holding up just fine, although all of this will have used up some energy!
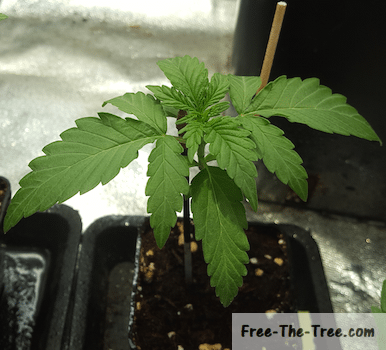
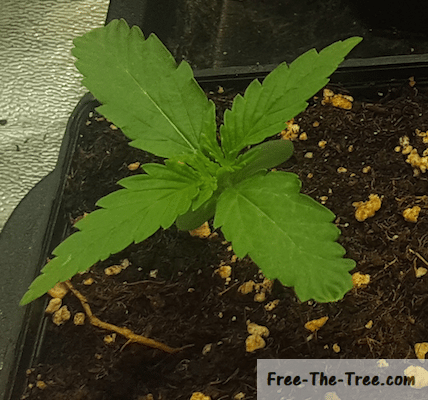
Day 8 – Growing 3rd stage of leafs
You can see that by day 8 this plant almost looks like the one from day 10, why’s this? She didn’t have to waste any energy on growing up vertically, so she’s shorter but already has a strong source of energy to get her growth going!
I’ve got a feeling this one will be the diamond of the batch
Day 14 – Tall and now Balanced
By Day 14, the plant had finally gotten strong enough to hold on their own. I’m still leaving the stakes in just in case but I’m going to get them out of there real soon.
I’ve got the fan blowing on them for the past couple days which got the stem to start strengthening which is a good sign
Day 12 – Short but growing strong

This one’s just nice, she’s short, with some very tight knots which is a good sign to get a nice and dense plant. She’s short but her stem is already nice and strong, much wider than her sisters. The 3rd stage of leafs is already growing! Kind of confirming the idea that this will be the nicest one of the batch (don’t want to jinx it though ^^)
As you can see, just a difference within the first 2 days of growth you can have a strong impact on the early days of the vegetative stage, so it’s important to be careful as soon as you get your seeds going.
Lets get into how to fixe balance issues
How to fix Marijuana balance issues
Here you have 2 objectives:
- Keep the stem as straight as possible
- Get the stem stronger so that it can hold itself up
Let’s go over the ways to accomplish these objectives
Keeping the Marijuana stem upright
- Get a long piece of wood, it should be at least the height of your stem, if not a little longer
- Get the stem into the ground near the base.
careful not to brake any roots! - Get the stem to lean onto the wooden stake, allowing her to stand upright
- If need be, get a second stake on the other side of the stem in order to hold her up.
Don’t hesitate to use the leafs to balance the plant out - Get your fan to blow just over the top of the Apex, so that it’s moving a little, this will get your stem to strengthen.
If you can’t because your plant keeps falling, wait until it’s a bit stronger to do this
Alright that’s it for this one folks, we’ll be posting about day 15 to 20 of these Critical + 2.0 and fruit babies in the upcoming days,
Until then, be safe and grow easy!
Hey there and welcome (back) to Free The Tree!
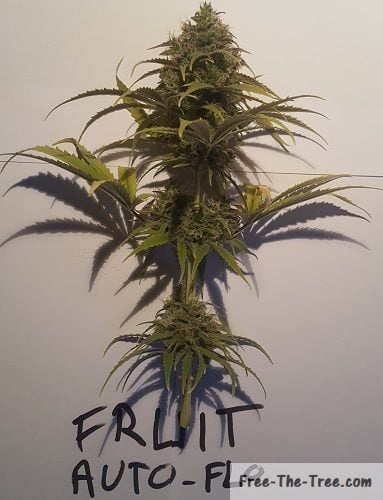
We’ve now arrived at the final post of this grow, it was short but intense! But don’t worry we’ve already got 5 seeds that have germinated and 4 Big Buddha Cheese clones going, next series is going to be even better 🙂
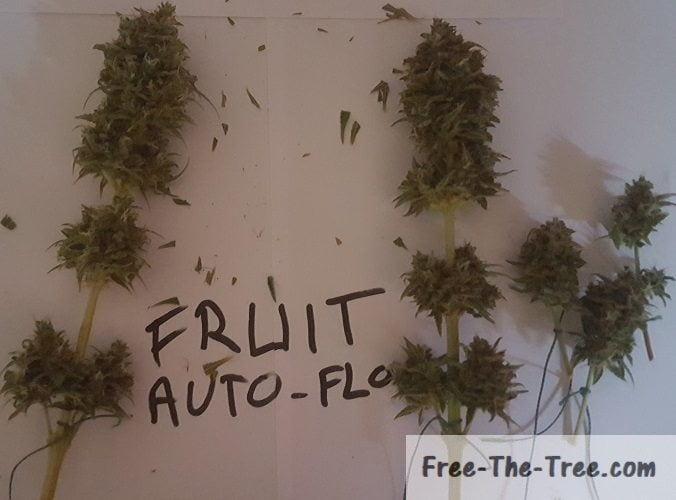
But we’re getting ahead of ourselves, today we’re going to cover the harvest and curing of our 2 Fruit Auto flowering Marijuana plants, the 2 others aren’t ready yet.
As you will see, the 2 we’re about to cut are are super small, but the 2 one buds are looking ok considering, especially one of them. Regardless, as soon as those autoflowering plants started flowering on their own we knew that this would be a small one;
Let’s get into it!
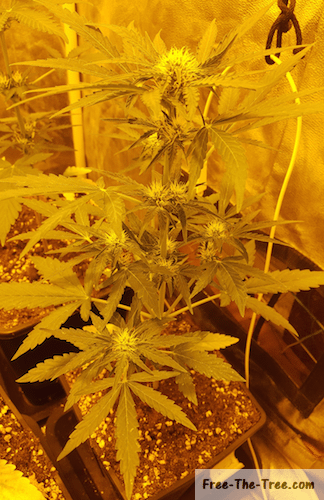
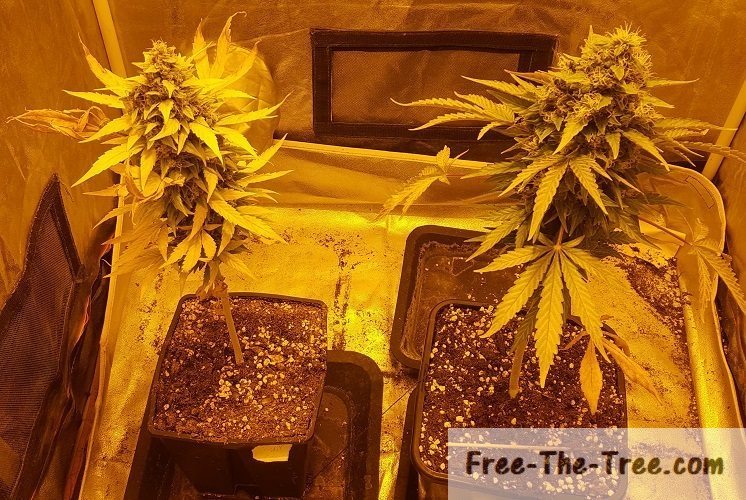
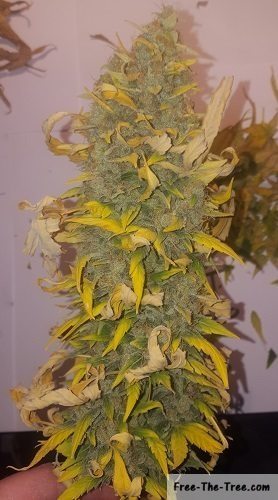
Day 59 – Holding back on harvesting
By now we had been observing the trichomes every day or two for the past 7 days or so, the two plants on the left were entering their 3rd and last cycle of browning pistils and most of the trichomes were milky. Furthermore they had been in a Nitrogen deficiency state for awhile now, so we new those buds were going to be super light, but suuuper tasty.
So really at this point they were ready to be harvested, but so small that we wanted to give them as many more days as possible to fatten..
The two one bud plants (on the right) were no where near ready, many trichomes were still clear, they had little or no signs of Nitrogen deficiency and they hadn’t even entered the 2nd round of browning pistils. We figured we had at least a week left on those two.
Here’s a couple of pics of these babies at this stage, as always you can click on them to see the full screen version.
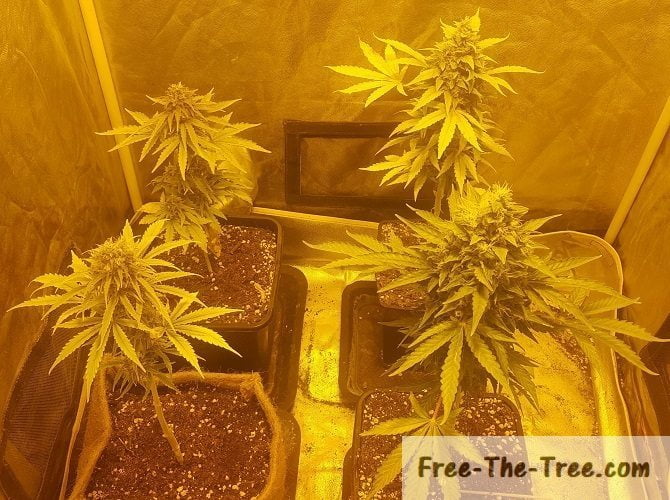
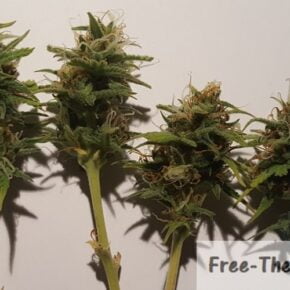
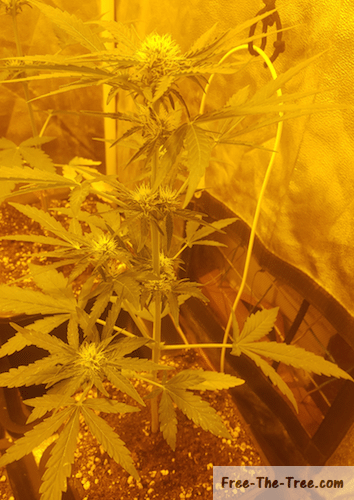
4 Fruit Strain plants at the end of the flowering stage

One of the 2 One Buds
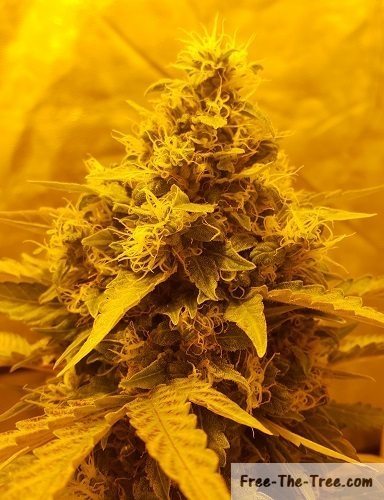
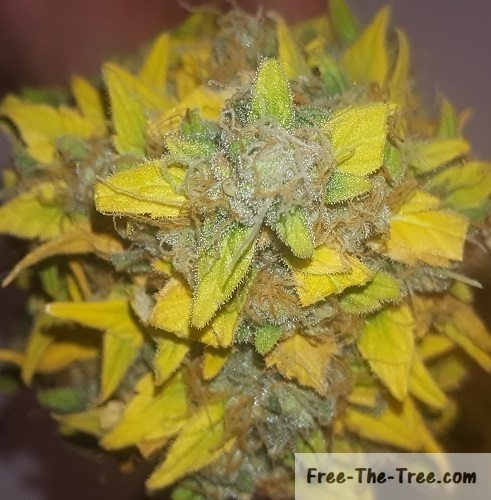
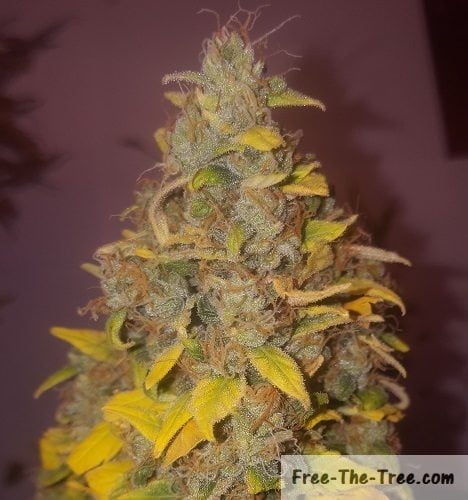
Now to show you with more detail what we meant when we said that the one buds still had white pistils and the other 2 plants were entering the 3rd phase of browning pistils here’s 2 close-ups on one of each
Mostly white pistils on the buds
Marijuana Pistils have started to become brown
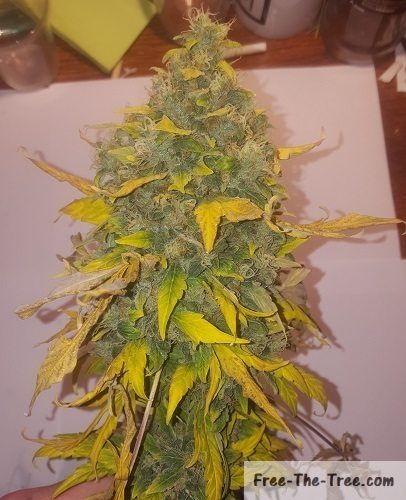
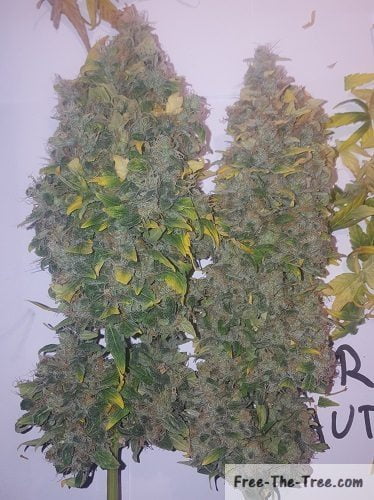
Day 61 – Harvesting and curing the 2 first plants
By this time we started seeing some trichomes starting to turn and golden/brownish color, which is a sign that the THC levels are reducing and the CBD is rising. Depending on the type of plant and what you want as a high you might want to wait more, but since this is a Hybrid we don’t want her indica side to come out too much, it’s chop chop time.
Fruit ready to be harvested
One Bud leaning under bud weight
As you can see once out of the grow room her colors finally show on camera 🙂 Her strong nitrogen deficiency is a sign that her taste should be great, and those purple hints on the top of the buds just make her sexy haha.
We also placed a little picture of our one bud in the middle. As you can see her root system and stem aren’t strong enough to hold the weight of the bud. We had to strap her up a little in order to help her stand up straight.
Getting back to the harvest, now that the plants are cut we need to get to curing them, we covered that with more detail in our previous article so we won’t go in detail on how to do so, but here are some picture (don’t expect the fattest buds..)
Purple bud
Fruit plant before curing
2 Fruit plants after curing
Crazy how much size they lose before and after curing them no?! Now it’s time to get them to dry for about 10 days.
[su_quote]Reminder: As we said in our previous article, don’t throw out your stems and leaves, you can reuse them for many things, from Hash with the leaves to Tea with the branches; (how to make hash over here) [/su_quote]
Day 63 – Nitrogen Deficiency kicking in
In just 2 days the Nitrogen deficiency had started to advance, the bottom leaves started drying and were almost ready to fall off and the symptoms started spreading further up the plant.
Here’s a couple pictures of the 2 last plants of this cycle
Nitrogen deficiency spreading upward
Close up on bud on the right

2nd plant about a week short of harvest
Day 68 – Harvest and Curing the last plants
By now the nitrogen deficiency had advanced well, the pistils had started to brown for their 3rd time and the trichomes were all nice and milky, time harvest these last babies! Here’s what they looked like
Plant 1
Plant 2
As always, after this we got to get curing, here’s a couple more picture
2nd plant about a week short of harvest
Close up on bud on the right
Plant 1 and 2 after curing
Now that we’ve cured them we got to get them drying. As we’ve said in the previous post, we just tie them upside down either in the grow room or in a cupboard. Since we’ve already started germinating new seeds this time they’re going in the cupboard!
Here’s what the 4 plants look like in there, you’ll be able to see right away the different in size and in color. The color difference is due to the fact that the 2 smaller plants are now in their 8th day of drying. Actually a little of the size difference is also linked to this, since while drying they loose in mass.
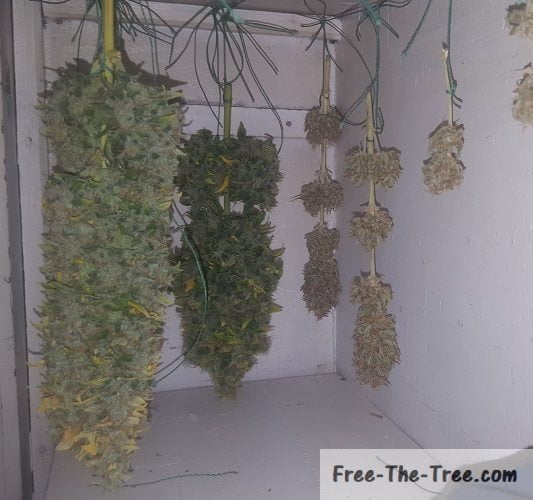
Fruit Plants drying in cupboard
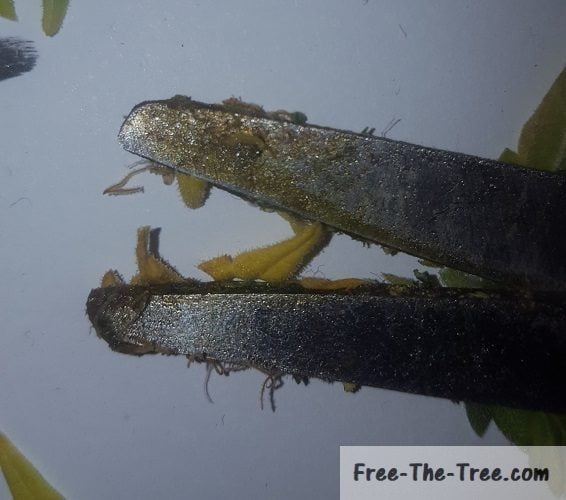
Scissor full of resin and pistils
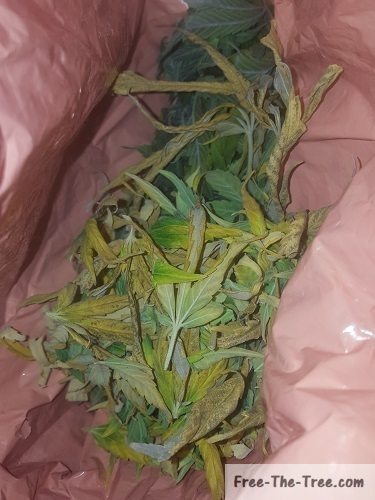
Leaves ready to go into the freezer for later use (home made hash soon!)
Well that’s it for this one guys, next time we’ll cover the germination of the Blue Thai, Blue Kush and the Cheese seeds, can’t wait 🙂
Until then, be safe and grow easy!
Don’t want to leave just yet? Check out our other grow reports and indoor growing tips!
Grow Reports
Indoor Growing Tips
Welcome back to our Critical+ 2.0 auto-flowering and Fruit auto-flowering series!
If you haven’t been following up here’s a little recap.
A little over a month ago we germinated 7 marijuana seeds, 2 Critical+ 2.0 auto-flowering and 5 Fruit auto-flowering. Unfortunately one of those fruit seeds didn’t take so we were left with 6 babies.
During the early vegetative stage we had couple issues with the balance of our sprouts and early stem with about 2/3 of our plants.
After that the flowering stage got going waaaaay too early because the main root hit resistance.. Yeahwhat makes the an auto flowering plant go into the flowering stage is the root system… something we didn’t know and learned with this one! We’ve covered all that in our guide on auto flowering seeds if you want to know more.
So here we are, after the first days of the stretch, and you’re going to see that she’s totally changing, welcome to the teenage years!
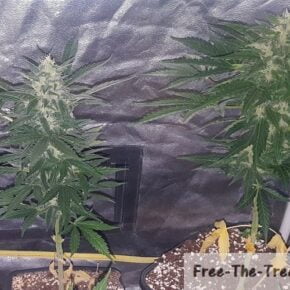
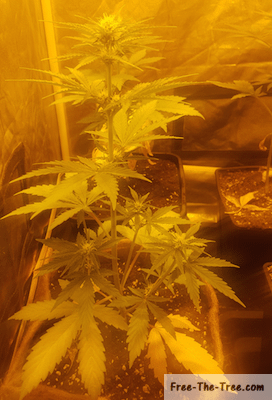
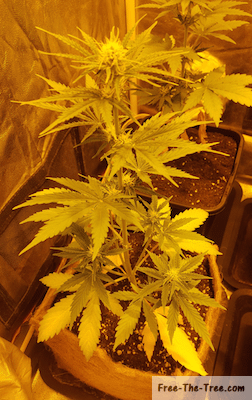
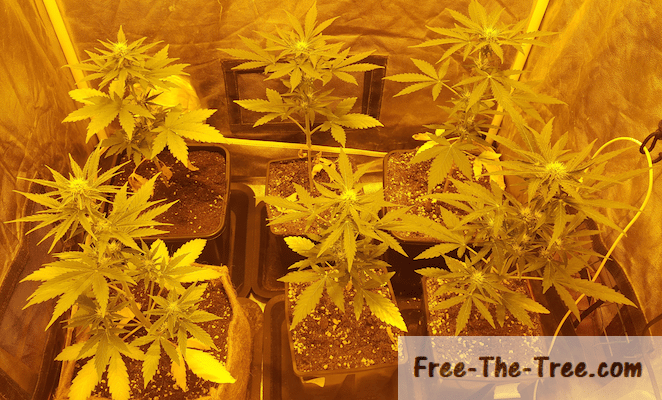
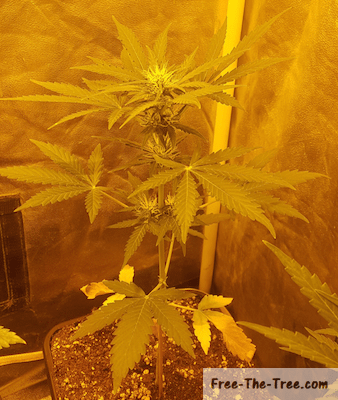
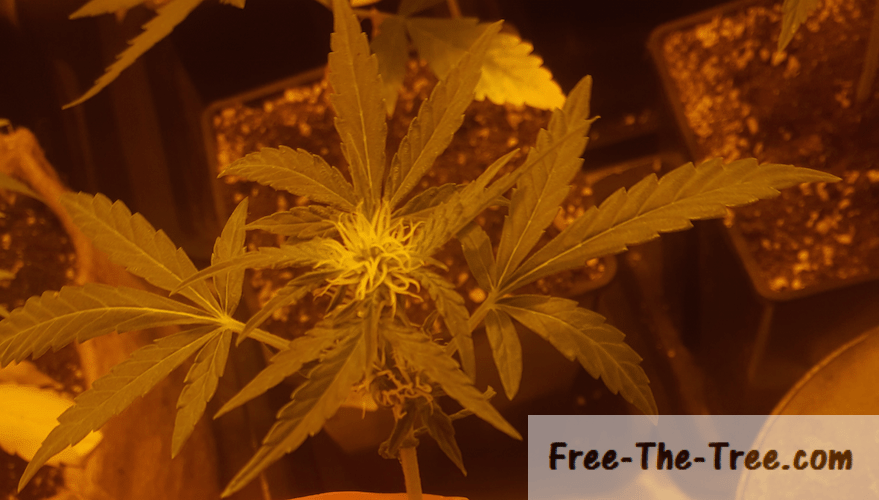
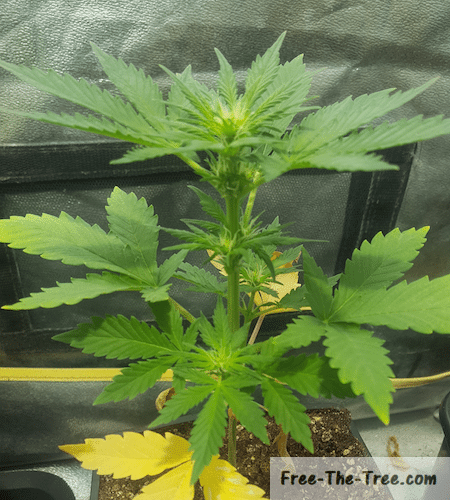
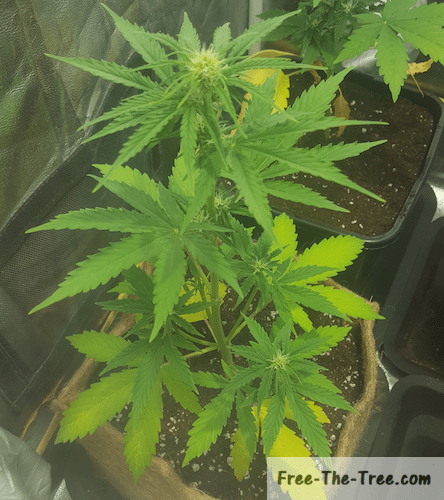
Day 32 – Auto-flowering seeds entering the stretch
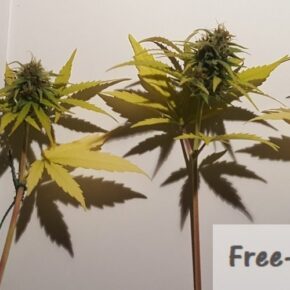
So during day 33 we started cutting (pruning) some branches and leaves. Normally you do this during the vegetative stage, but since we kind of got blind sided we’re doing this know.
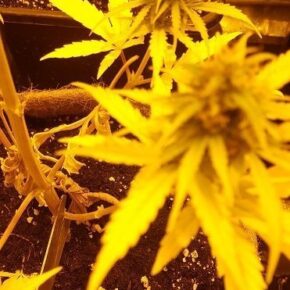
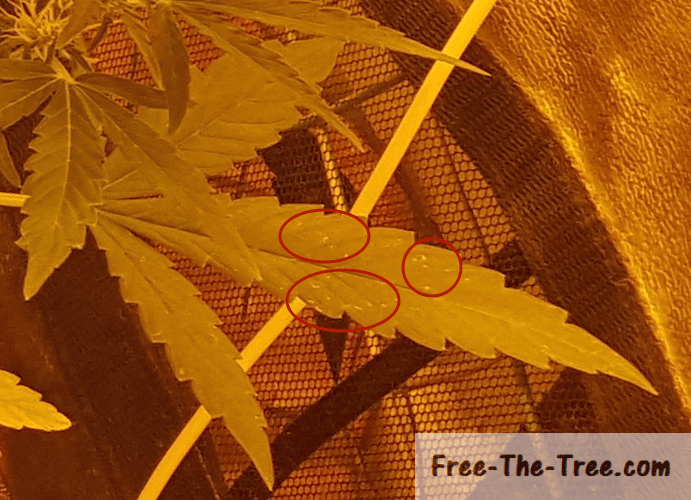
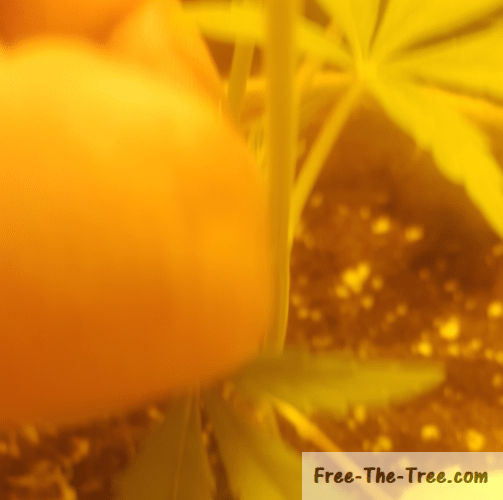
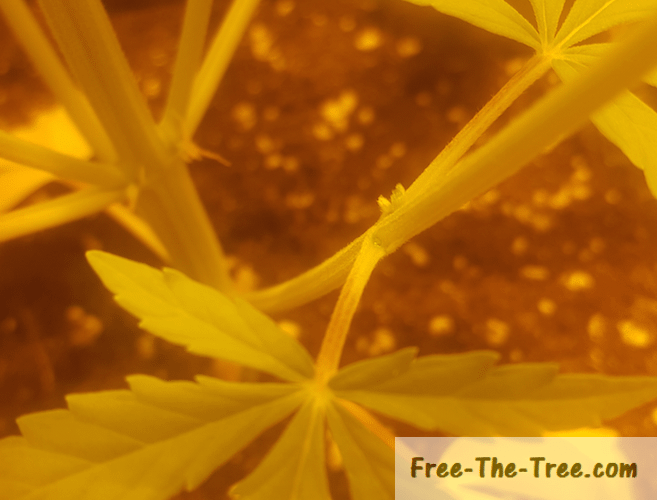
We’re also having many deficiency issues as you can see with the colors of most of our plants.. Although it seems like the decision of lifting the lights about 15cm (5.9inch) did some good to them. Here’s a couple pictures of the leaves showing issues. We’ve got hypothesis’s on why it’s happening but still not sure… One we figure it out we’ll Update this section to let you know! (If you have an idea share in the comment section!)


Spotting deficiencies during the stretch
So our suspicion here is Light burn. We hadn’t lifted our light yet since we put them in the grow room, it was about 20cm over head which isn’t that close, but they had been used to a light source that was further up so who knows it’s possible.
I know you might be telling yourself “that’s Nitrogen deficiency”. There are 2 things that go against that hypothesis:
- I’ve given them plenty, some of the plants with these deficiencies are actually also showing signs of nutrient burn
- The dead leafs aren’t falling of very easily, you have to pinch or cut them off to remove them from the stalk.
Now that second point is actually the one that hinted me off the most. Why? Because Nitrogen deficiency and light burn globally have the same signs, apart from 2 things. One of them being that with ND the dying leafs will just fall off, whereas with light burn they are hard to remove.
The only this that has me still hesitating is the fact that these signs are coming from the bottom of the plant, where normally light burn starts on top (second difference). But, these are also the main leaves receiving light, so it’s not totally crazy to think this.
In the pictures I didn’t show the next steps, but the leaf becomes all brown and dead, after which you need to pinch it or clip it off. This way to remove it is pretty unusual for a dead part of the plant.
Anyway, we brought the light up, hope it will do the trick.. they’re already not that big, loosing leaf mass is the last thing we want during the flowering stage.
This is a bit paradoxal with what I just said, but we’ve also been pruning some of our plants.
The one’s with the most deficiencies we’re cutting off all the side branches and pop corn buds, on the others removing the leafs in order to give direct light access to the branches below.
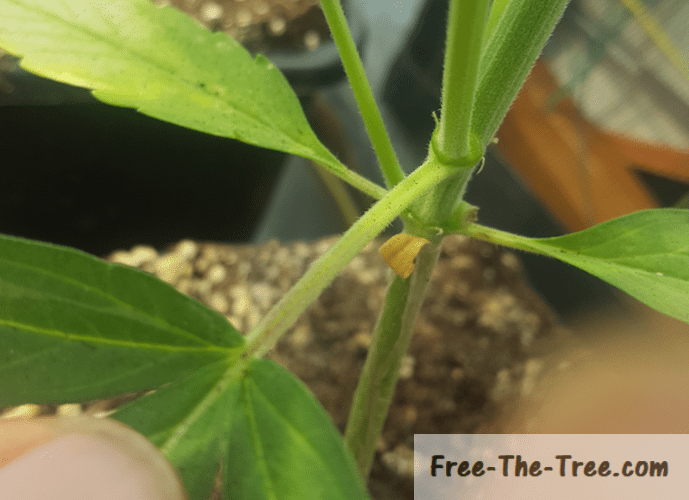
Pruning the marijuana leafs during the stretch
We’re going to go over the pruning (or cutting) of marijuana leafs and branches in 3 steps:
- How choose the leafs or branches you’re going to prune
- How to prune your marijuana plant
- What are we aiming for in this culture
In this example we’re taking a leaf as an example, but it’s basically the same thing with branches.
How to decide what to prune off your plant
During the stretch you really want to minimise extensive growth. The taller the plant, the more energy it takes to get the nutrients for the soil to the colas, as well as the “food” created by photosynthesis.
Keeping this in mind, if the branches you decided to keep don’t have direct sunlight due to a leaf making shade you need to cut that leaf. If you think it’s too risky because you don’t have enough leaf mass than cut that branch (or wait a little if you’re still in the vegetative stage).
Again, normally this is something best done during the vegetative stage since you can most likely recover, but we don’t really have a chance here.
Now that you’ve identified what you want to cut off, let’s look at how to do so.
How to prune your marijuana plant
- Identify the leafs or branches you want to remove
- Pinch at the intersection between the leaf or branch and the stalk of the plant. You can also decide to use a pair of scissors or clippers.
Whatever you use make sure you don’t damage the outer skin of the main stalk. - Clip the branche off
In the case where the branch doesn’t cut straight off and the other skin of the main stem is still attached, cut it as close as the stem as possible. Try to damage it as less as possible.
The days following this you will see the other sections of the plants grow more, the energy previously used at this spot have been reallocated!
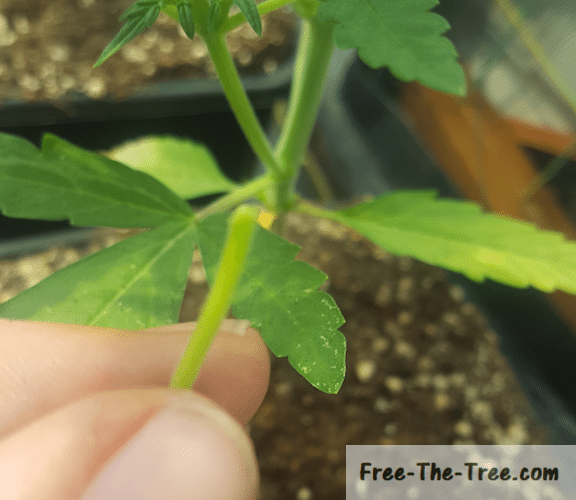
What are we aiming for in this culture
With 2 or 3 of our plants we’re decided to go for a one bud situation. The plants we picked only had 1 pair of small side branches and are the weakest ones. This will enable them to focus the energy they do have on their core flowers.
With the other flowers we decided to keep the main bottom branches, hoping that they will also produce a good amount of buds. We’ve remove all the “popcorn buds” or branches not receiving any direct light, hoping the cola buds will finish out to be nice and dense.
This means that on half the plants we had to mainly cut branches off, keeping the leaves for photosynthesis. On the other half we cut mainly leaves so that the main branches can have access to a direct source of light.
Globally we’re already aware that our harvest won’t be too crazy, this early flowering kind of screwed us.. But it’s alright, we learned something and could share it with you guys!
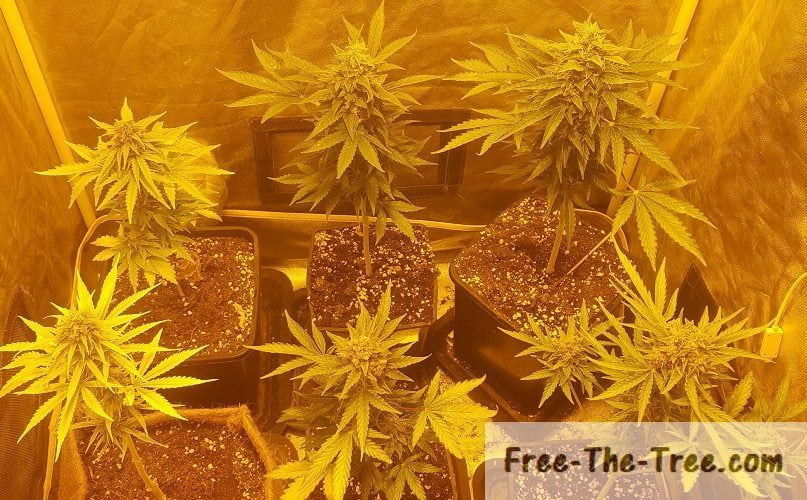
Day 33 – Nothing special to report
On this day nothing special really happened, so we’re going to share some pice with you guys!

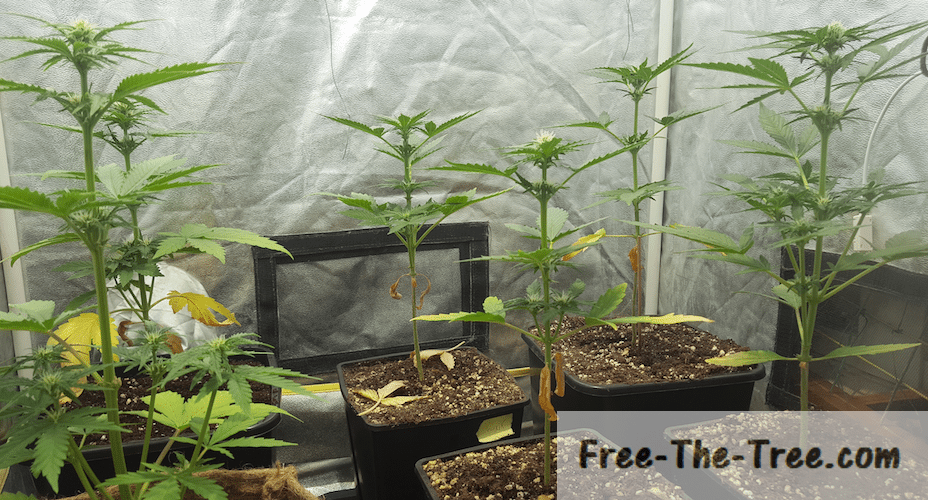
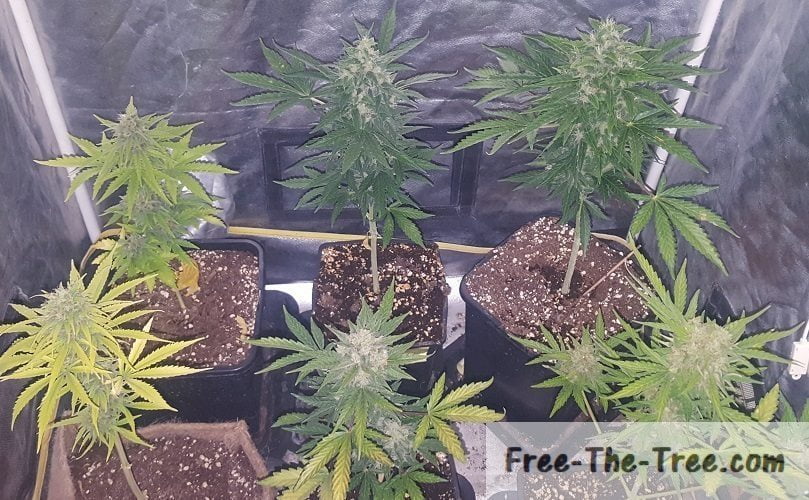
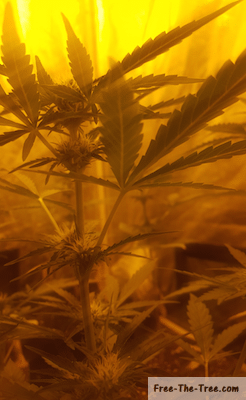
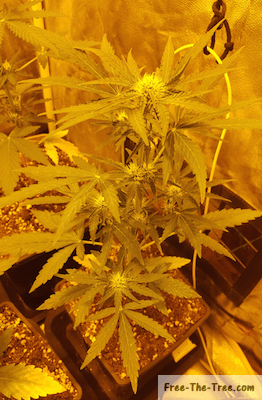
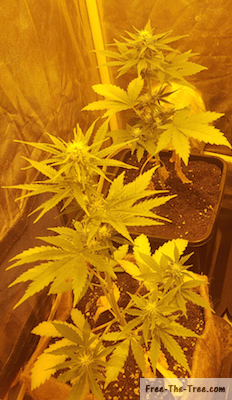
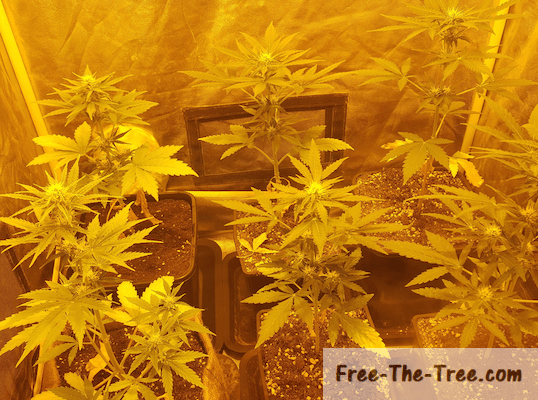
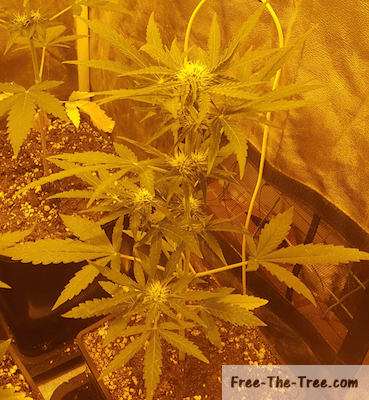
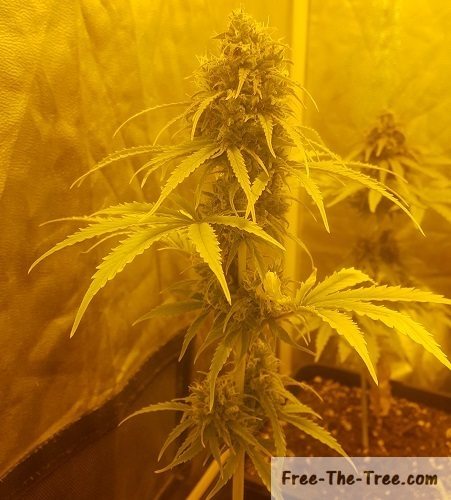
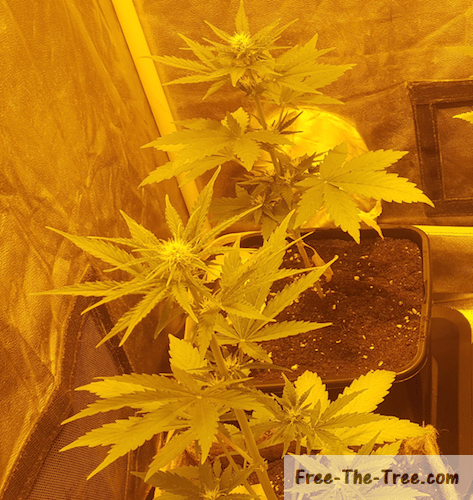
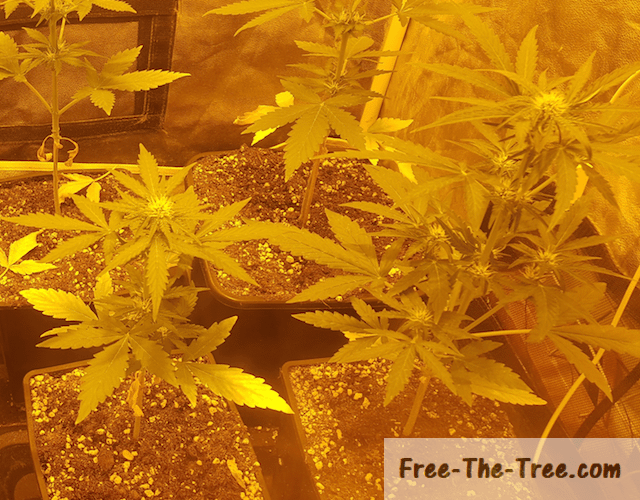
Day 34 – Changing to a Sodium Bulb
So we’ve entered the flowering stage for a couple days now and decided to change the light bulb so the sodium based one. The main difference between both is the light spectrum they emit. The vegetative light is more of a white/blue light whereas the Sodium based one if is more in a orange/infra red spectrum.
I’ve been reading around that during the stretch it can be good to keep the white light in order to reduce the spacing between the nodes, but honestly I don’t feel like doing more testing with these one’s, one yield isn’t going to be crazy, we’ll keep that test for the next run around!
Here’s a couple pics after the light change
P.S: remember to unplug your light before hand! I shocked myself, it hurts believe me!

I don’t know if you guess which one’s we’ve decided to go for a one bud or not off these pics, we’ll let you know in the next article!
We’re also going to go for another round or pruning, but for the flowers this time. We want the energy of the plants to focus on the main flowers on the top colas, not the one’s further down the stem that have little chance to make anything worth it.
Until next time, be safe and grow easy!
Check out our previous articles on our Critical+ 2.0 and Fruit Marijuana Strains