 Search for specific products and use our comparator
 Search for a ressource in our library
Hey there and welcome (back)!
This week was pretty chill, out little laughing buddha is coming along nicely, the Blue Thai is almost ready to get some cuttings done and we make a niiiiice space cake 🙂
Apart from these d**n fungus gnats, really can’t complain! Let’s get into is
Grow report 3 – Table of content
- Laughing Buddha – Growth and Transplantation
- The fight against fungus gnats
- Transferring to the big tent
- Space Cake
Laughing Buddha – Vegetative growth & Transplantation
Vegetative growth
This week our little sprout spread her leaves fully! Our fear of her getting top-heavy didn’t come true, we even set the fan pointing at her for awhile to test her and she stood strong 🙂
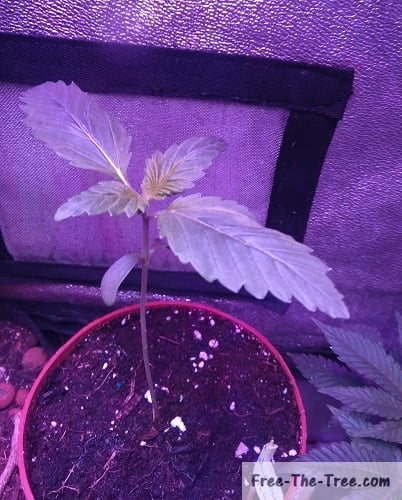
Little one at the beginning of the week
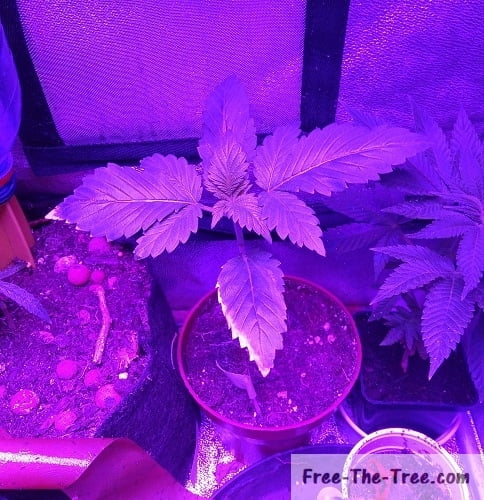
Couple days later, fans leaves well developed
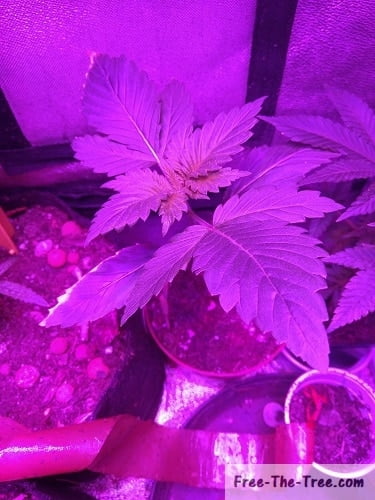
3rd stage growing well – plant starting to lean
First deficiency signs
As you may have noticed in the previous pictures, during the week the little laughing Buddha started showing signs of a deficiency on her first fan leaves.
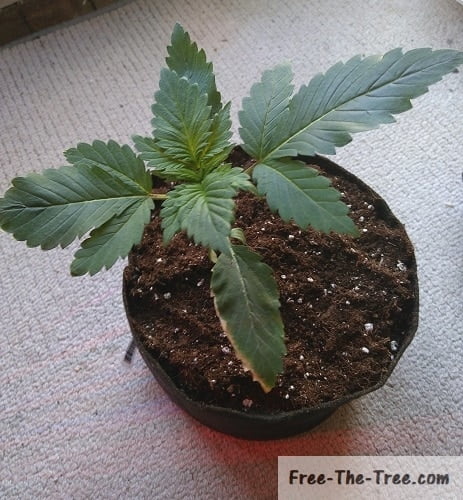
Pretty sure this is due to the fact that she needs to be transplanted more than a actual nutrient deficiency, sooo let the transplant begin! 🙂
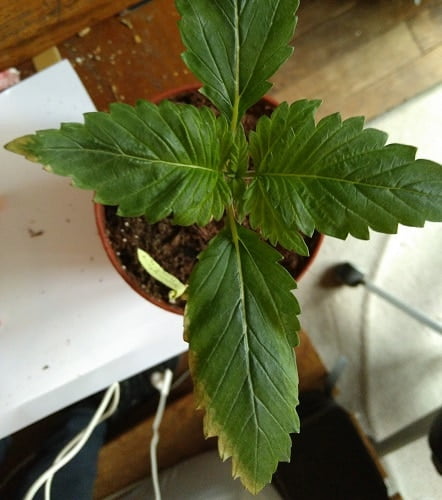
First fan leaves showing deficiency
Transplanting to a 2L fabric pot
As you may be aware, the root mass of a plant is general twice as big as it’s visible foliage.
With that in mind, the pot she’s in is now too small and since it’s made of plastic the roots are most likely spiraling around.
As we started saying above, her first deficiencies are most likely related to this more than any nutrient needing to be added into the soil, although we will start adding some nutrients soon.
Laughing buddha ready to be transplanted
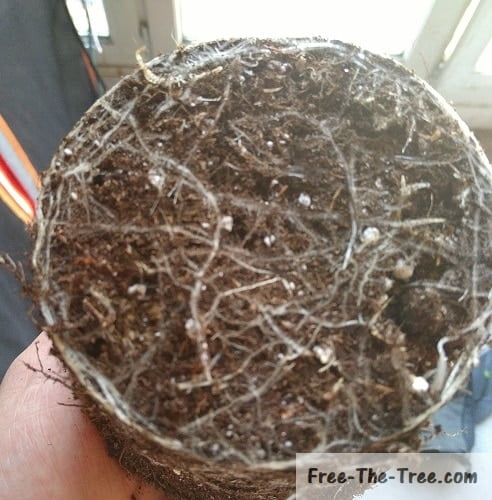
Roots circling in the soil (not good)
Roots circling in the soil (not good)
We decided to place her into a 2L fabric pot, which will allow the roots to prune themselves, and set her into our main tent, will a 400W LED light system.
The idea is to have her grow quickly, make a couple cuttings and then get her to flower. One of those will be used as a mother, the others will join their clone in the flowering tent 🙂
Fighting off Fungus Gnats
As we pointed out in last weeks grow report we had treated the soil of each pot with a hydrogen peroxyde mix in order to kill all the larvae, the mix being ineffective against the eggs..
Apparently, there were a lot eggs.. as you can see on the image on the right hand side (click to enhance) within a couple days the sticky traps were filled with young fungus gnats.
We’re waiting for a package with some nematodes, gnats natural predators, in order to get fully ride of these sucker..
Hundreds of young gnats on sticky trap
Transferring plants to the big tent
Once we transplanted the laughing Buddha we decided to get the 3 main plants into our bigger room, where the light is much stronger.
Our plan is to get them growing, make couple cuttings, then get to flowering.
With the cuttings we’ll keep one of each to make a mother and the other will meet their sibling in the flowering tents as soon as they’re ready 🙂
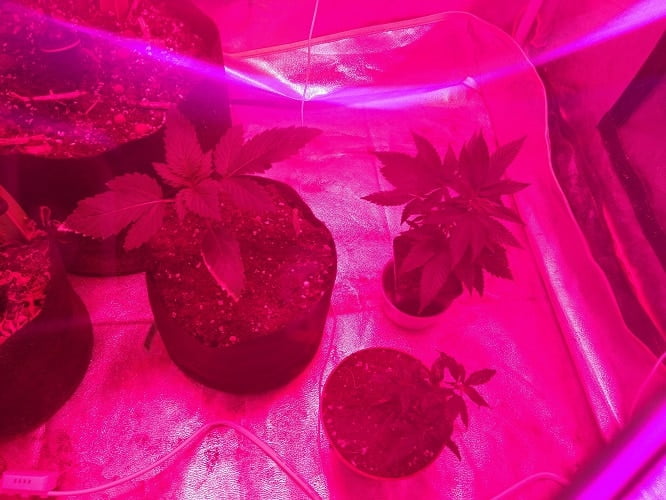
3 plants installed in main grow tent
Space Cookies
If you were with us last week, you’ve followed that we had made some cannabutter; now it’s time to take off.
We used Flo’s famous chocolate cake recipe (;p). Butter wise, to be fully honest, we have noooooo idea of how potent it is, so we’ll find out.
Here’s the ingredients and so pictures to end this post in a tasty manner
Space cookie ingredients (2 cakes made)
- 480g of cannabutter
- 400 of dark chocolate (the cooking kind!)
- 8 eggs
- Sugar
And that looks liiiiike :
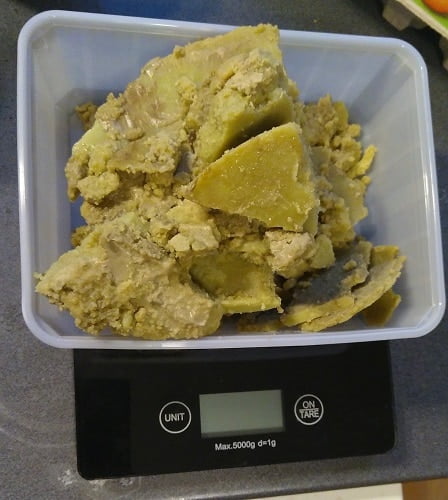
480g Cannabutter
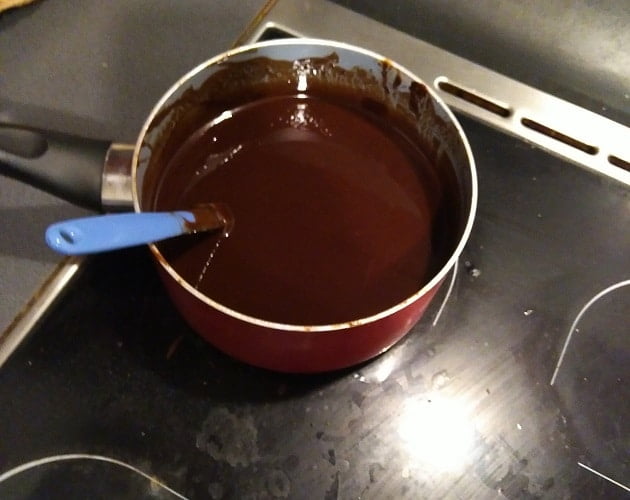
Chocolate and Cannabutter heating up
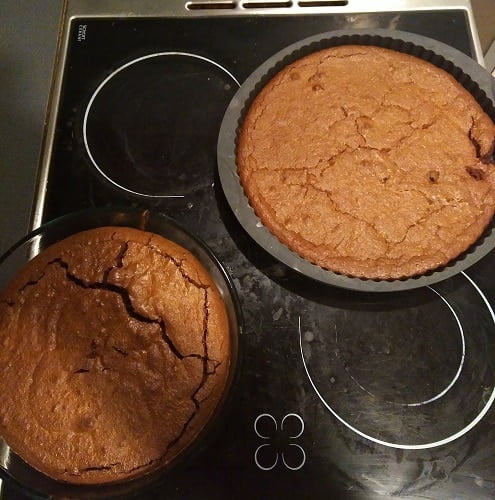
Space Cake out of the oven (wish you could smell em)
Alright got some cake to go eat hehehe
Until next week,
be safe and grow easy 😉
EDIT: that butter was pretty potent, got way too high