Automatic watering systems for Cannabis

Free the tree content
DIY | Making an Automatic Drip Watering System Easy and Cheap thumbnail

DIY automatic watering system for your indoor grow

Hi there and welcome (back) to Free the Tree!

Today we’re going to cover different ways to make your own Automatic Watering system. We will mainly be covering drip systems, that irrigate slowly but surely your soil.

For the past couple days we’ve been testing out different techniques to do so. We figured, might as well share it with our fellow growers 🙂

Watering your cannabis plants is one of the most time consuming aspects of growing. This is especially true if you want to have an even irrigation across the whole medium.
This is the main reason why we started doing this, watering our current babies is too time consuming.

The thing is, we didn’t have the money to buy one so we looked for the cheapest, most efficient ways to do so. We found a way to do it for 20 bucks or less !

Here’s what we’re going to talk about:

Automatic Watering System - Table of content

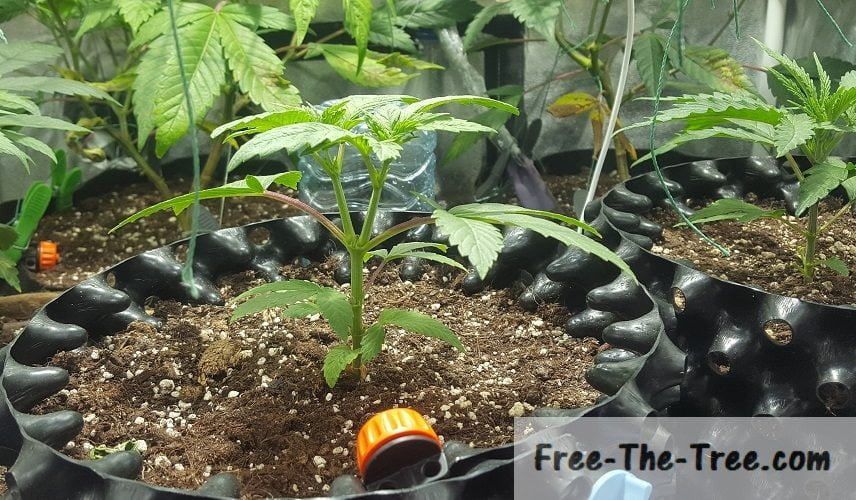
Before getting into the nitty gritty of watering systems we thought it would be useful to define it.

What is an automatic watering system

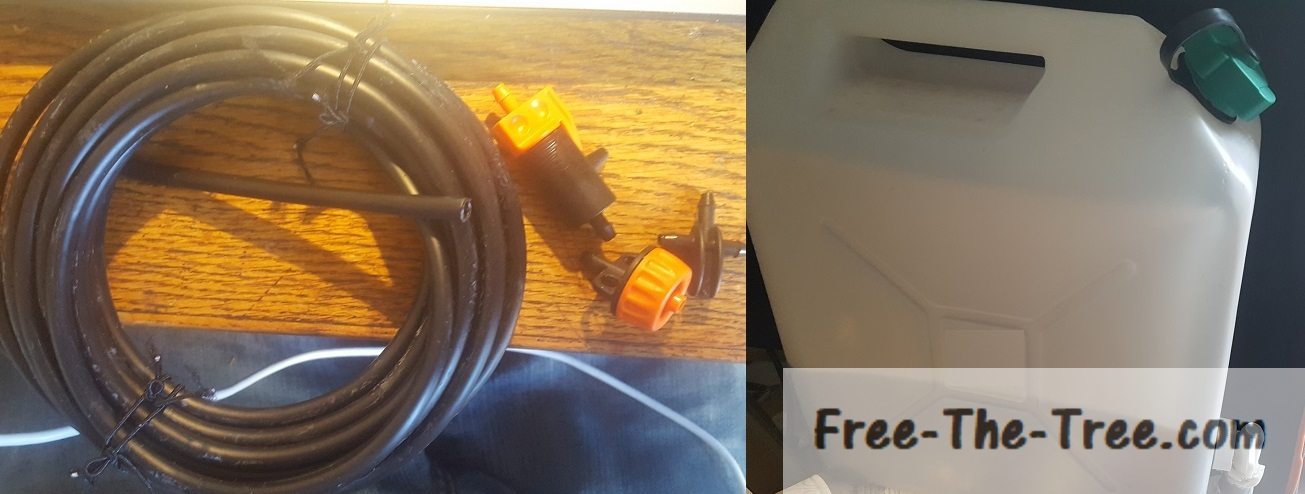
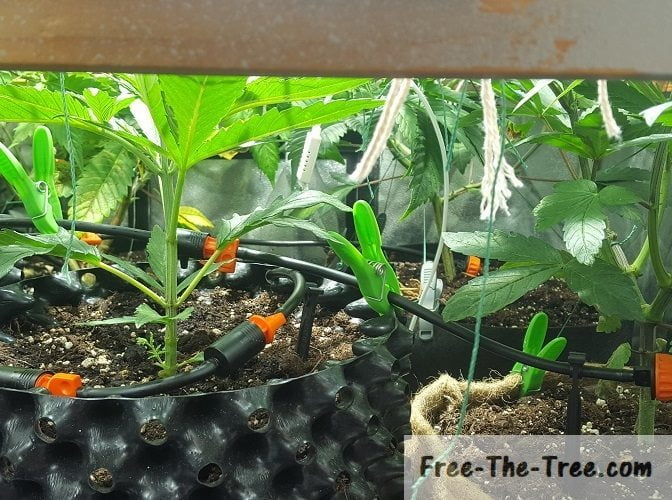
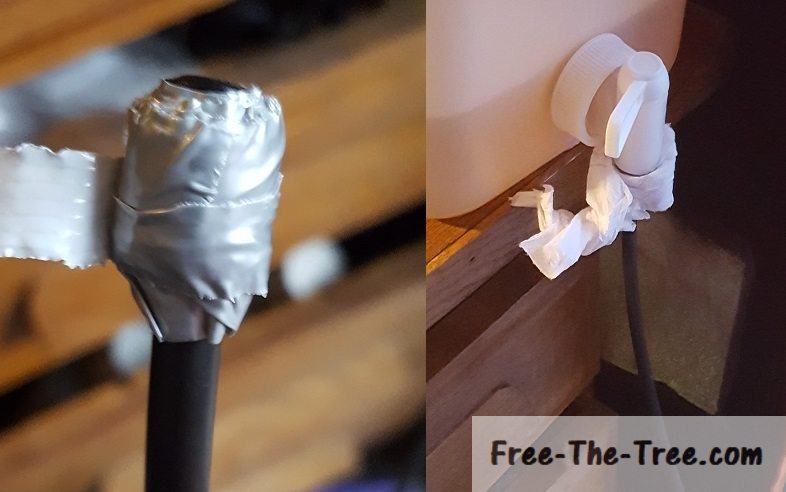
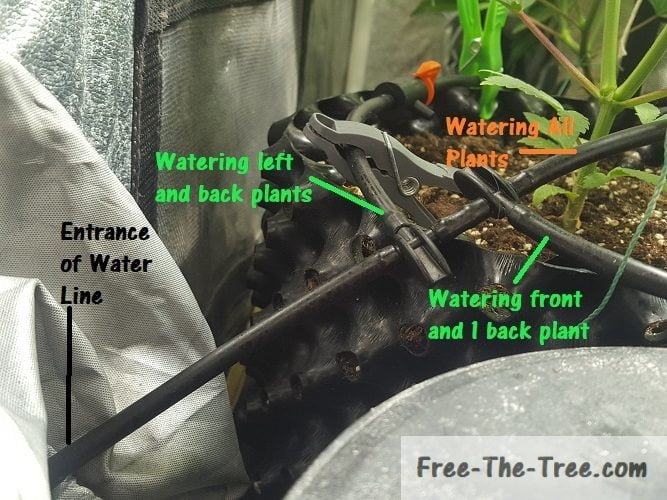
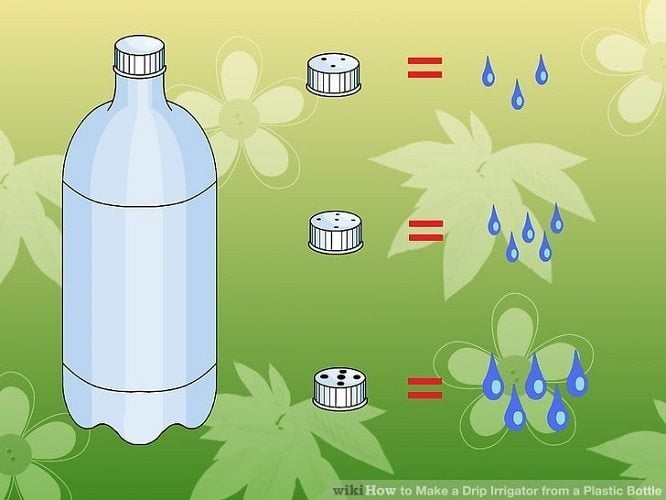
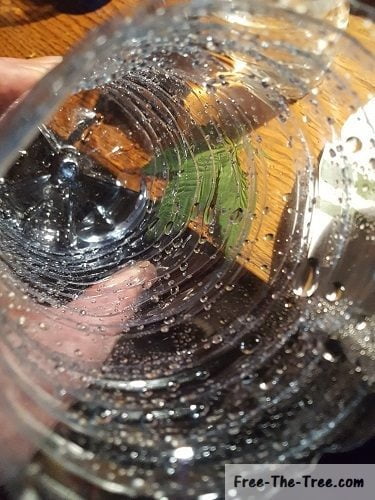
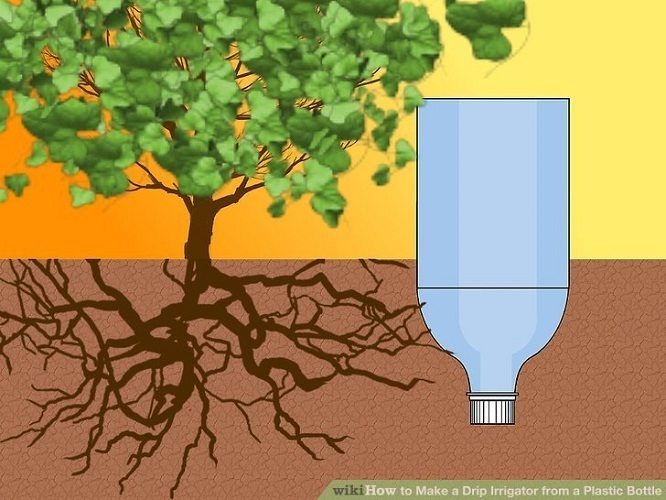
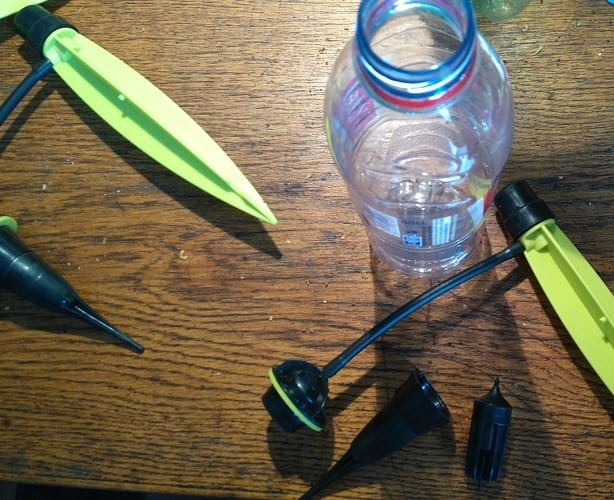
An automatic watering system can be anything that helps you water your plants without having to pour the water manually.

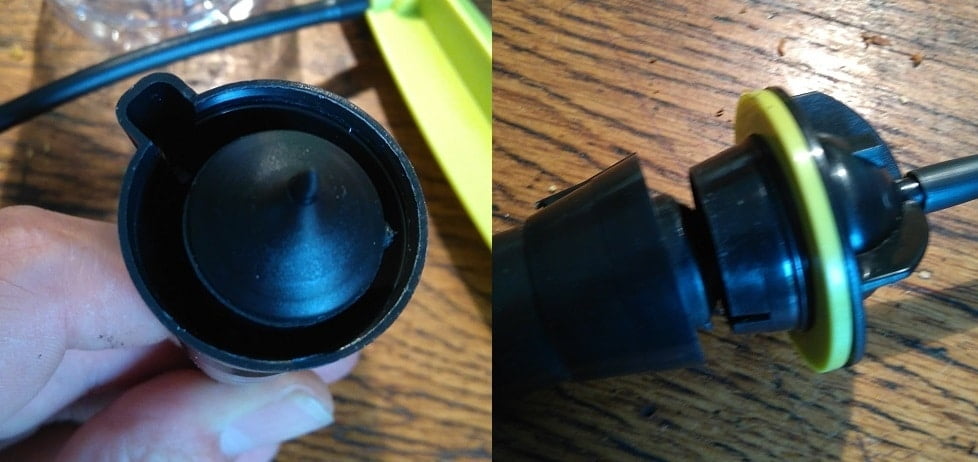
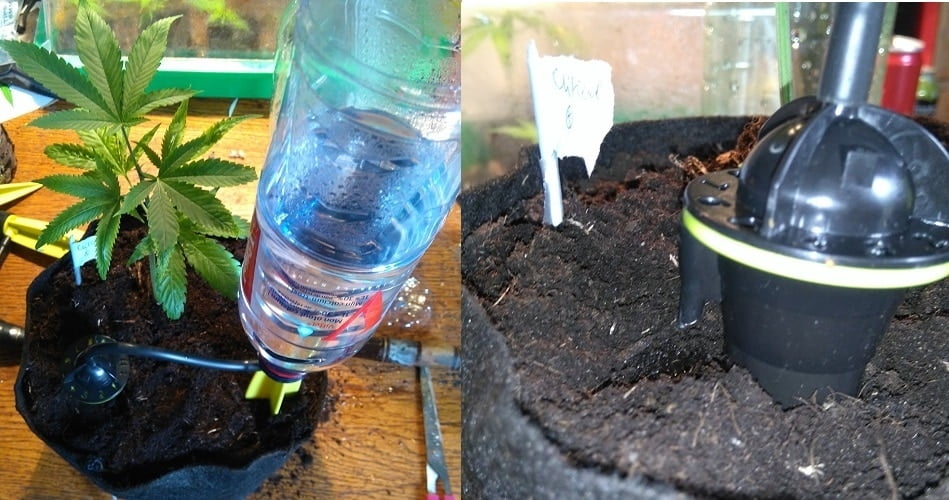
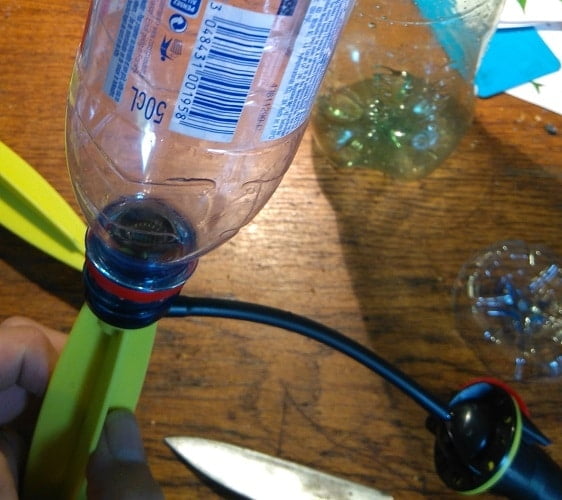
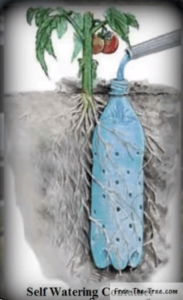
It can be as low tech as a bottle set in the soil, a water line with a couple drippers. You can also find higher tech systems using humidity sensors in the soil connected to a Raspberry or an Arduino. The watering will start when the soil levels are too low.

Pro’s and con’s of a Drip Irrigation System

Creating a Drip system actually has a lot more pro’s than cons. Whether it’s the time saved or the amount of water used, there’s hardly no down sides to using a drip irrigation system.

Let’s look at the pro’s and con’s closer

ProsCONS
  • The top levels of the soil isn’t bothered by the weight of the water (generally the case when using a container to pour it)
  • The water filters down slowly spreading by capillarity
  • Water will spreads much more thoroughly within the medium, increasing its irrigation
  • Much less water is needed. Since the medium is irrigated slowly and the water covers the whole ground you will not have 20% of access water
  • Time saved on each watering.
    Prepare your mix and let the drip begin
  • Pretty simple to set up
  • Must be careful that each plant get the same amount of water.
  • You can’t adapt the mix to each plant. If some plants show specific deficiencies you’ll have to water them manually. You will most likely have to stop the drip system flow to that plant.

Water Line Drip Irrigation System for indoor cultures

In this section were going to cover how to set up a drip system using water lines and drip systems. You’ll have to make a little investment (tops 15/20 bucks) for the materials.
After that in about an hours time you’ll have a system ready to go 🙂
To regroup here’s the different steps:

  1. Group your materials together
  2. Visualize where the water lines will go
  3. Install the water lines and drippers
  4. Test if everything works
  5. Do your first drip watering run 🙂

Let’s go through the process

1. Group your materials together

The materials for this systems are pretty cheap, for 20 bucks or less you’ll be able to set it up. Here’s what you’ll need:

What do you need for an Indoor Drip System?

  • 1 Container – The size will depend on how many plants you have and how long you want it to last. On our end we went for a 15L one.
    If possible get one where you can shut off the water flow, it’ll be useful.
  • 2 meter of watering line per plant (to be safe).
  • In-line drip systems. This will also depend on how many plants your have but our advice would be 3 drips per plant.
    This will allow you to water evenly across the medium.
  • Something to keep the water lines steady over the soil

And that’s it! Once you’ve grouped it all together you’re good to go!

2. Visualize where to place the water lines

It’s important to imagine where you’re going to place your water lines and drippers before hand.

This will help you cut the right sizes of water lines. You will see that the lines aren’t very flexible so cutting the right lengths is important.
The top image is our first version with using only end on line drippers which didn’t really work out.

3. Installing the Water Lines and Drippers

Let’s get into the nitty gritty of what you’re here for, setting up the drippers and the water lines. Here’s a step by step process :

Setting up an Indoor Irrigation System:

  1. Cut a first piece of water line long enough to go from the container into your grow room.
  2. On one side of that line take some duck tape and tape it around the tip..
    You want to get the water line thick enough to fit into the tip of the container. In later steps we’ll secure it to the container.
  3. Set up the water lines inside the grow room.
    We recommend that you set up 3 drippers around the soil and at about even distance from each other.
    We noticed that the watering is much more even that way. We’re actually going to update our current system that way.
  4. Tape the tip of the tip of the container and the water line together. Keep in mind that the dripper will move when you open and close the water flow
  5. Test it out 🙂 

4. Test out your Watering System

Once you’ve set up all your drippers and connected the water line to the water container, it’s time to test the system.
During this watering pay close attention to the water flow going to each plant.
You will most likely have to adapt the output of water on each dripper until the irrigation is even.

Now that you have your optimal setting, you’re done!
From now on watering your plants will be much easier ! All you need to do is prepare the mix in the container, open the water flow and make sure it waters evenly !

This is also a pretty good solution if you’re leaving for a while from home. Set up a very very slow water flow, which will water the soil by capillarity over time. This will keep the soil humid for much longer 🙂

Drip irrigation system – Step by step in 4 pictures

Here’s a recap in 4 pics, as always, click on the picture to see the full version

See all these pics in the permanent story called “tips” on our instagram 

Contribute to the shared knowledge base

Share your personal tips, experiences, videos to help the community

MAKE A CONTRIBUTION
Contribute to the shared knowledge base
In the following sections we will show you how to make an irrigation system with a simple bottle of water.
 
We will cover 2 techniques. The first, the classic vertical bottle planted in the soil and then the bottle placed within the soil. We’ll also quickly show something we tested out, the horizontal bottle dripper.

Bottle Watering systems – Technique n°1

 
In the following sections we will show you how to make an irrigation system with a simple bottle of water.
 
We will cover 2 techniques. The first, the classic vertical bottle planted in the soil and then the bottle placed within the soil.

If you want to skip right to the irrigation system you’re looking for, click one of the links below:

Bottle Irrigation System

The bottle watering system planted in the soil has been popular for a while now. It’s simple, easy to set up and irrigates the soil slowly.

You should definitely be setting this up in a fresh pot, where your plant hasn’t developed its root system. Digging up the soil where a plant has already been development will damage its root system.

If your plant is already full grown, consider a drip system instead or prepare this while transplanting.

Step 1. Make wholes in the cap of the bottle

The first thing you want to do is make a couple small wholes in the cap of the bottle. The number of wholes will control how fast the water will exit the bottle.

3/4 holes should be enough, you want a slow water flow so that it irrigates the medium well, without leaking out at once.

If your water flow is to fast, it will just race to the bottom of the soil, leaving dry soil pockets.

Image credit to wikihow

Step 2 .Cut the bottom of the bottle

Once you’re happy with the water flow you’re going to want to cut the bottom off of the bottle.

This will allow you to poor the water into the bottle once it’s secured in the soil.

Step 3. Plant the bottle of water

Now things get interesting, and the reason why we previously said that you don’t want to be doing this when the root system is well developed.

In other words, only do this in the pot you’re going to transplant your plant in.

The idea here is pretty straight forward, bury the bottle top down into the soil. You want to get it about half way into the soil.

Image credit to wikihow

Step 4. Test you irrigation system out

Test it out! All the preparation steps are now finished, so prepare your mix and poor it into the bottle.

Since this is a slow irrigation system you won’t need to water as much as before, bye bye that 20% run-off.

Since the water drips slowly, it irrigates it by capillarity. To put it differently, the water will seep from wet areas to dry ones. This occurs vertically but horizontally as well.

Watering plants with slow drip irrigation system

Image credit to wikihow

Compare cannabis products & prices

Make the best choice

CHECK IT OUT
Compare cannabis products & prices

A problem growing your plant ?

We help you with a free diagnostic

Contact a grower
A problem growing your plant ?

Bottle Drip System – Technique n°2

So this one isn’t a DIY solution per say but it’s definitely worth considering. It can particularly be useful when leaving for a vacation.

On average these little drippers will cost you about 3 USD a piece and can be used with any plastic bottle

Step 1. Get everything together

So the first thing is to get everything together.
You’ll need 1 drip system per plant as well as 1 bottle per plant.  Choose whatever size you want, just keep in mind that the bigger it is the longer the drip will last (make sense)

Step 2. Putting together the Dripper

The dripper itself will most likely be in pieces and you’ll have to put it together. It’s pretty simple, all you need to do is place the circular piece inside the cone and close it.

When you close the dripper make sure the 2 wholes in the top piece are aligned. The will ensure that the numbers displayed actually match the drip intensity.

Step 3. Cut the bottom out of the bottle

This step is pretty straight forward. Cut the bottom of the bottle out in order to be able to pour water into the bottle once everything is set up.

Step 4. Install the Drip System into the medium of your plant

While installing the bottle system into the soil be careful of the following points:
  • Don’t break roots: If you’re plant is already well developed be careful when install the container holder.
  • Keep the top of the container holder higher than the water dripper.
  • Make sure the drip system doesn’t touch the soill
  • Keep the dripping water towards the center of the pot.
And that’s it! Depending on the setting and container size you’re good for 5 to 20 days 😉
bottle attached to the drip system

Self Watering Container | The Hybrid between a Hydro and Soil grow

This next DIY watering system is pretty interesting and I want to try it out next in a future grow.

The idea it to place a large container with small wholes within the soil letting the top show.

Once it’s set up, all you need to do is regularly pour water in the jug. When the soil is dry, water will seep from the jug and irrigate the soil little by little.

After some root development, the root system may even grow into the container in order to access the water directly. This will allow it to receive the nutrients right away.
My first thought when reading about this is “root rot”. After thinking about it, this may only impact the roots that are within the jug, meaning it shouldn’t be an issue.

Here’s the step-by-step followed by a video made by someone who set it up for an outdoor grow

Steps to make your own self irrigating container

  1. Make some wholes on the side of your water bottle
  2. Make a whole deep enough for you bottle to fit in.
  3. Place the water bottle within the whole and cover it up.
  4. Test it out by poring water into the top of the bottle.

Couple recommendations

  • Don’t make the wholes too big, you don’t want the water to just poor out.
  • Don’t do this when you’re plant already has a vigorous root system. As you’ll see in the video below you will most likely damage them.
  • Test out how fast of a water release you have before transplanting, you might want to adjust.

Here’s a video that sums up all these steps in an outdoor garden. I find that it’s always easier to picture what to do with some good images

If you’re looking to go all the way on the Hydroponic side check out this awesome post by My Garden Plant.
It goes from the history of Hydroponics to the advantages/disadvantages, as well as the variations. It even shows you the parts you need to build your own system !

Can't find your answer?

Send us your question

CONTACT GROWERS
Can't find your answer?

Contribute to our knowledge base

Submit articles, videos or tips to enrich our library

Make a contribution
Contribute to our knowledge base

Drip Watering System Videos

You didn’t find all your answers? Or missing some visuals to clear up your doubts? Here’s a couple videos we think will help you out 🙂

Outdoor Drip System

This video shows an outdoor watering system, but the idea is exactly the same if you want to set it up indoors. The may difference is that you don’t need to worry about the sun ;).

As you can see he kind of went all out on his water tower.. and not everyone has all these tools available at home haha.
That said, the video gives you a pretty good sign on how to set up the water container and the irrigation lines.

If you’re interested in the PDF he mentions it’s over here but it’s 11 USD’s in order to receive it.. Which seems pretty expensive when you’re trying to build something yourself.

Automatic watering using an Arduino

This one is for the techies and/or data loving folks, and you should love it.
Here’s a system using an Arduino (pretty sure you could also use a Raspberry) and a couple sensors like soil humidity. With a small program the watering starts automatically using specific parameters.

On top of timing your watering depending on soil humidity, you’ll be able to collect all the data. With that data you can determine the specific watering points for each strains, pretty cool no?

Honestly I think I’m going to be starting a similar project as this as soon there’s some spare time and money. Just being able to get all that data would be awesome!
Of course, if/when this is happening we’ll post it all here to share the insights

Honestly I think I’m going to be starting a similar project as this as soon there’s some spare time and money. Just being able to get all that  data would be awesome!
Of course, if/when this is happening we’ll post it all here to share the insights 😉

Bottle Watering Systems

The following video will show you different ways to water your plants with bottled systems.

Personally we’ve only tried the capillarity watering system and what we can say is that it takes a looong time for the water to travel. After a couple tries, we dropped this.

For the defense of this technique, we may have used a little too much cloth, giving the water a lot of distance to travel.

Want updates on new articles, strains and deals ?

Alright that’s all for now folks!
In the upcoming days we’ll add different water bottle systems that can also be used in order to irrigate your soil.

Until then,
be safe and grow easy

About the author