 Search for specific products and use our comparator
 Search for a ressource in our library
Hey there and welcome (back) to Free The Tree!
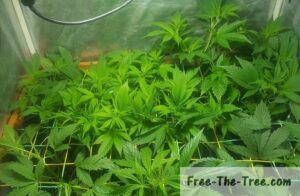
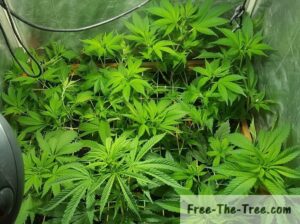
This week we finally started the Stretch 🙂 The Potassium deficiencies we were seeing totally stopped spreading which means they now have sufficient levels so we’re good to go!!
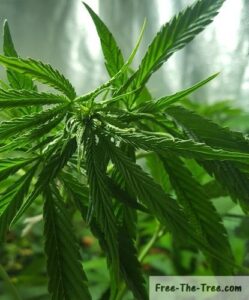
On the top picture you can see that out canopy is far from being even which isn’t great, we’re planning to do some FMIing and pruning during the stretch to get that all evened out 🙂
Here’s what we’re going to cover:
- Starting the Flowering Stage
- Vegetative growth during the Stretch
- Pruning branches and leaves
- Super Cropping the top colas
18/6 to 12/12 – Starting the Flowering Stage
In order to get the flowering stage going we need to change the photo-period from 18 hours of light to 12 hours, triggering the wanted change in behavior.
All we’re doing by changing the light cycle is imitating nature, where by the end of the summer the number of daylight hours start being as close as the number of night hours.
The most important thing here is to make sure that they’re in full darkness during the night hours, irregular lights may produce hermaphrodites, which no-one wants (except for seeds)
The days after you change the light period you’ll see your plants starting to grow strongly. By the end of the first week some pistils should also start appearing.

Mechanical Timer for Photo-period control
Week 1 of the Stretch – Strong Vegetative Growth
Over just 7 days they’ve all grown a whole lot but I think the most impressive is the Cheese plant, she’s doubled in size which is pretty cool since she was the smallest plant.
It might just be a visual thing though, since she only has 1 main coals whereas the others have multiple.
Here’s a couple pictures of the stretch
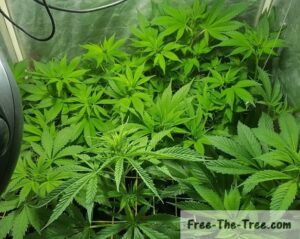
Day 0 – Tonight the light will shut off earlier
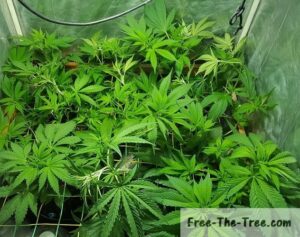
Day 6 – Strong Growth, grow room is full
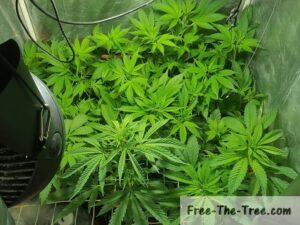
Day 7 – FMIing, Pruning and Pinching
On day 6 and 7 we decided to start pruning a whole bunch of branches and leaves (mainly branches).
Let’s get into why we did this
Pruning leaves and branches during the Stretch
Since there was such a strong growth during this first week we decided to go for a round of pruning on the 2 Big Buddha Cheese plants.
These 2 gals have produced just to many side branches. If we had kept them this way we would have a bunch of small buds instead of a nice and strong ones. In order to avoid this we’ve removed all the small branches that didn’t show potential.
Whether it’s because they had no direct access to light, better looking branches next to them had more potential or the bud sites were too far apart, they’re gone, without going overboard of course.
Here’s a couple pics (as always click on them for the full view)
Day 6 – Before first round of branch pruning
Grow Room after pruning
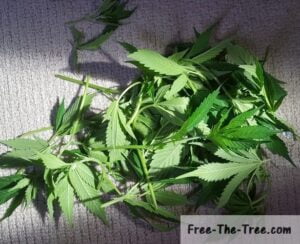
About 10 branches removed
There’s another reason for this pruning we didn’t mention above and this is the room around the Colas.
If you’re colas don’t have enough room around them they will basically race each other to the light source. This will make some lengthy and weak stems, which won’t be able to transport many nutrients, thus producing smaller buds.
You want the leaves of your different plants to overlap or touch as less as possible.
Super Cropping the top colas
As you may have noticed our Big Buddha Cheese plants are much, much bigger as the others and some of those cola’s are way taller than the others, which is an issues for the light balance..
In order to keep our canopy as even as possible we’ve decided to super crop the top Colas. This has 3 advantages
- Folding the cola reduces its height
- While she recovers growth will be slowed on that colas
- Once she recovers she’ll be able to store more nutrients within the stem.
We started writing a guide on super cropping : check it out if you have questions on super cropping weed.
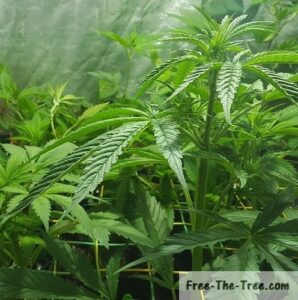
Cheese plant before super cropping
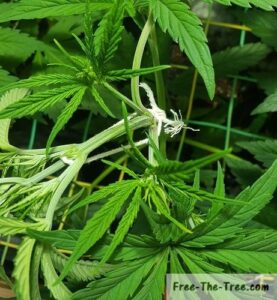
Apex Folded and tied horizontally
View of the Horizontal Apex
We repeated this process with every auxiliary branch that we decided to keep. She will be working at repairing these sections, making them more resilient.
Alright folks that’s all for this one!
Until next time, be safe and grow easy 😉
Don’t want to go yet? Check out our other Grow Reports
Check out all our Indoor Growing Tips