How to Install a Cool Tube

Free the tree content
How-to Guide: Installing your Cool Tube thumbnail

A step by step cooltube installation guide

We recently bought a Cool tube for our 400W light system. This decision came after a year long battle against heat issues, our grow room would run around 27/28°C (80/85°F) with spikes up to 32°C (89°F) at some moments!
We couldn’t go on like this, but can’t afford a LED system either, so we figured a Cool Tube would do the trick. Once we bought it we realized that it wasn’t all that straight forward install a cool tube.. So here we are regrouping all the info together in case you’re struggling too!

Installing a Cool Tube step by step

Now we’re going to go over each step into detail further down but we wanted to setup an overview of the global steps from receiving it until the full installation.

  1. Wiring up your Cool Tube
  2. Place the reflectors
  3. Adapt your air extraction system.
  4. Setting up the Tube
  5. Placing the light bulb inside the tube.
  6. Tape the extracting pipes on each side of the Cool Tube

With these 6 steps you’ll have a Cool Tube up and running withing your grow room.
The most complicated might be wiring it up, if you’re thinking to yourself “i’m not an electrician, I can’t do this”, no worries it’s real simple 😉

How to wire the plug to a Cool Tube?

So this was our biggest issue, when we unpacked to cool tube we had fully envisioned how we would set it up and ready to go.  To our surprise, there was no plug attached..

I though to myself “how the h**l am I supposed to get electricity to the light bulb with”. Playing around with it I noticed that the wires were in there, so it must be normal.

I searched around on the web and the only info I could find was how to install the reflectors, thanks but not really what I was looking for (and mainly why we did this article).

Here’s how we went about it:

Wiring a CoolTube step by step

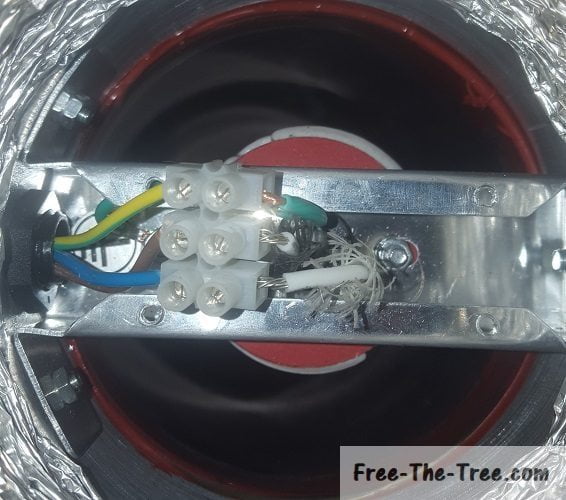
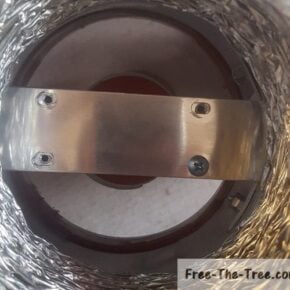
  1. Unscrew the top side of the rectangular shape cube that is inside the Cool Tube
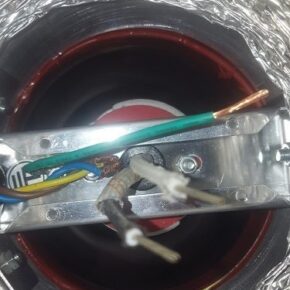
  2. Unscrew the black part on the side of the tube and slide the wire through the whole (unscrewing will make it easier to slide the wire through)Once you take the top off you will notice 3 wires:
    – A Black Wire: This is the positive side, you’ll want to connect it to the positive wire of your plug.
    – A White Wire: This is the negative side, you’ll need to attach this to the negative side  of the plug.
    – A Yellow and Green Wire: This is the ground wire, you’ll want to attach it to the steal of the cool tube or the ground wire of your plug, if it has one.
  3. Strip the top of the wires. The plastic should be pre-cut.
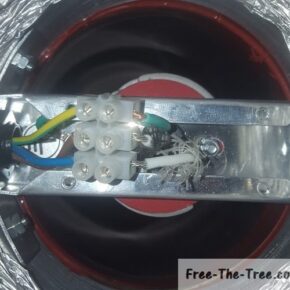
  4. Connect each corresponding wire to each other (positive with positive, etc).
    Now, you can do this either by twisting them together then attaching them to electrical tape, or as we did by using a wire connector, either or will work.
  5. If you can, place the metal plate back and place the screws back in. If not just leave it as is, don’t think it’s an issue (but don’t hold us legally responsible!)

And there you go, your tube is ready to be plugged in! Once the reflectors are set up of course 😉

Can't find your answer?

Send us your question

CONTACT GROWERS
Can't find your answer?

Contribute to our knowledge base

Submit articles, videos or tips to enrich our library

Make a contribution
Contribute to our knowledge base

Placing the reflector and Light bulb

These 2 steps are pretty straight forward, the main thing is to make sure the glass on the tube is clean, especially on the top side where you’ll be placing the reflector.

How to place the reflector on a Cool Tube?

You’ll notice that you have a blue lining when you take the reflector out of the box, this is mainly to keep it clean. Here’s how to install it:

  1. Clean the glass of tube the a tissue, if you can use Windex or something also.
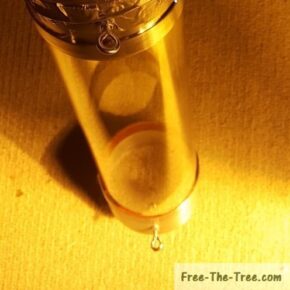
  2. Identify the top side of the tube. You should have 2 hooks on one side, these are to be use to hang the tube, meaning that’s to top!
  3. Remove the blue lining from the reflector.
  4. Place the reflector on the top side of the tube. On some models you will have a latch to keep it in lace, others it just fits.

And there you go! Now that the tube is wired up and the reflector is in place; all that’s left is to hook it up, place the light bulb and hook it up to your air filtration system!

How to place the light bulb in the tube?

This part of the tube is just like any other light out there, meaning that all you need to do is screw the bulb onto the base.
However we do have a couple suggestions while you do this:

  • Use gloves of a napkin to handle the bulb, this will avoid you leaving marks on it.
  • Place the bulb into the cool tube after it’s hung up, this will reduce the risk of breaking the bulb unintentionally.
  • Whip the bottom of the glass of the tube off once it’s installed.
  • When you connect the with the extractor pipes, keep in mind that you’ll need to change the bulb for the flowering stage!

Should the CoolTube be before or after the extractor?

The short answer is before! You want the air around the bulb, and the heat generated, to be sucked right away.

This is a question we saw all over the place, forum threads full, wondering if the cool tube should be place before or after the extractor or the air filter, which brings us to our next section

Order of air cooling system set up

Should the Cool Tube be before or after the Air Filter?

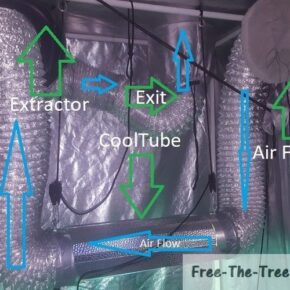
You should place your air filter after the cooltube for sure! As the picture above shows, the order you want is :
Air Filter > Cool Tube > Extractor > Output.

This setup with allow you to have a good air flow through the light and out the tent, without loosing out on the odor filtering enabled by the carbon filter or what ever you’re using.

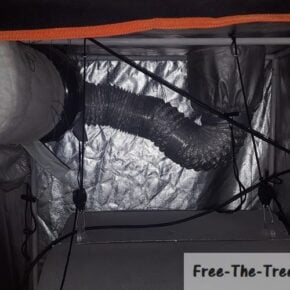
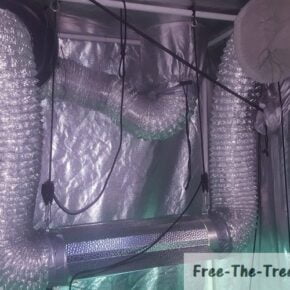
On the right hand side you can see a picture of our own setup; Keeping in mind that the most optimized air setup is to have the less curves and turns as possible, ours really isn’t all that optimized, but we did what we could.. In time we’ll figure out a way to improve it.

Air and light setup with cooltube and air flow description
Cool tube set up

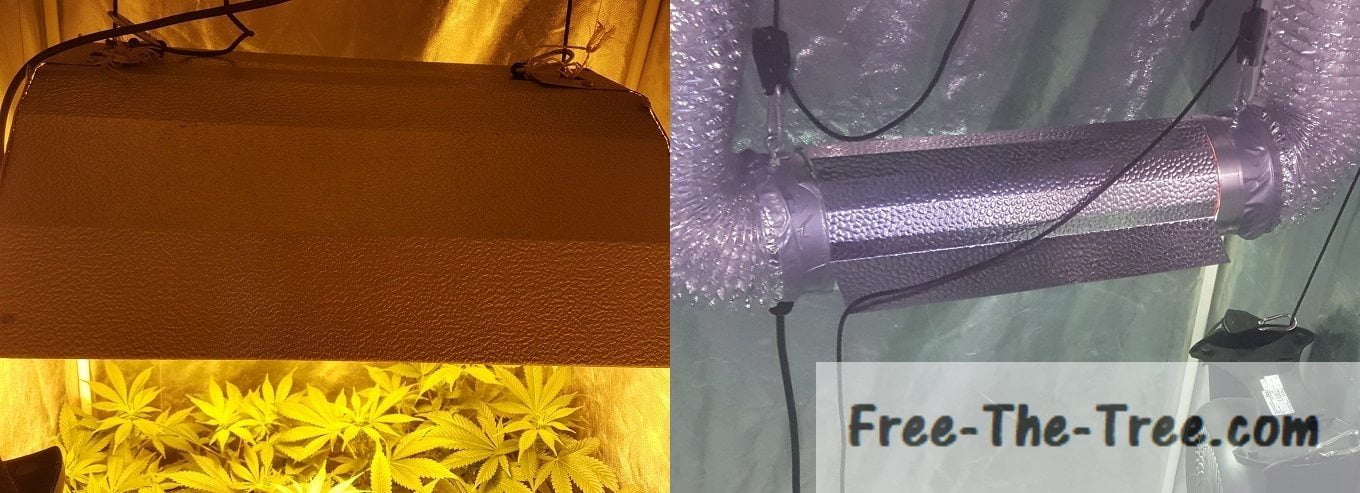
Our Setup before and after the Air Cooled System

Here’s an example of our setup before and after setting up our cooltube

Before hand we had our MH/HPS light hooked up with the reflectors you can see at the bottom and our air system was totally independent from the light system

After the installation you can see that the setup is dramatically different; We had to review our whole air filtration system in order to add our Air Cooled system. 

Want updates on new articles, strains and deals ?

That’s it for this one folks! Hope you found the answer to what you were looking for, if not send us a message and we’ll try and get you some advice ASAPUntil next time, be safe and grow easy!

About the author

Contribute to the shared knowledge base

Share your personal tips, experiences, videos to help the community

MAKE A CONTRIBUTION
Contribute to the shared knowledge base