 Search for specific products and use our comparator
 Search for a ressource in our library
Hey there and welcome (back) ! 🙂
Here we are, back at the beginning of a cycle! Can’t wait to share these upcoming weeks with all of you
Couple changes since last grow, so to start off clean here’s a recap of the strains and equipment we’re using
Grow Report 1 – Equipment & strains
- Strains: Critical+ (cuttings) & Laughing Buddha
- Seed Type: Feminized
- Seed Bank: Barney’s Farm
- Nutrients or Additive Used:
– Bio Grow NP and PK mixes
- Grow Lights:
– Vegetation Stage : 75W LED table
– Flowering Stage : 400W LED table - Grower experience: 6th grow
Alright, now that that’s out of the way, let’s get into the first steps of these little one’s lives 🙂
We’ve divided this article in 2 sections starting with the cuttings and end with the seed germinating
Critical+ Cuttings – Rooting process
As some of you are aware we’ve had a critical+ mother plant for a little while, this is our 3rd round of cuttings with her.
Here’s a couple pics of the process but, in full honesty, we slacked off a little and left them in the cups for too long, which made us lose 2 little ones and a bunch of time. If you want to know more on how to make a cutting, check out our how-to article over here 😉
Picking and cutting the branches
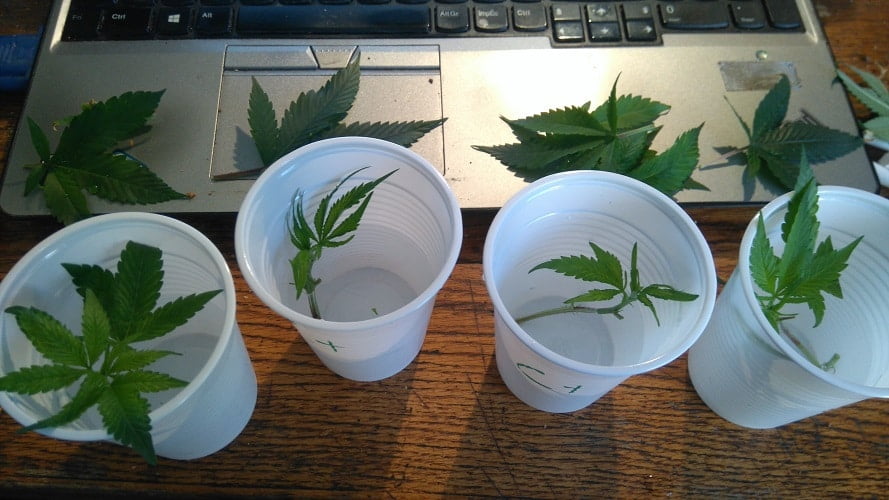
The first step to making the cuttings is obviously picking and cutting the right branches from the mother plant ^^
This round we started with 7 branches, planning that we would lose one or 2.
As we detail in our how-to article on making cuttings, the branches don’t need much light in order to root, what they do need it NOT to sweat, so don’t hesitate to chop off most their leaves (the left one still has way too many leaves) and place them in a very humid environment (aim for at least 90% humidity).
Cuttings rooting in the vegetation tent
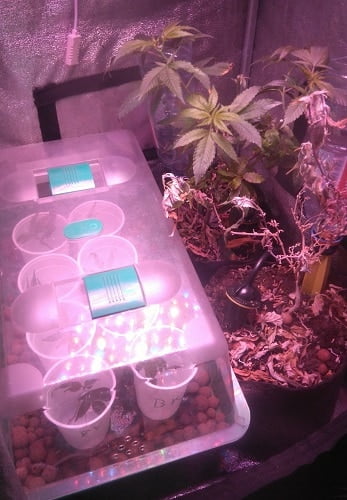
We left the little one in the cups of water for about a week, the time for some roots to grow.
At this point we lost one of the little ones, we had left the top latch open, it wasn’t humid enough and she didn’t make it… (told you we were slacking off :/)
As you can see on the pic one of our mothers isn’t looking well at all, all dried up and dying… We were so focused on the citizen lobbying tool that we didn’t water her enough and lost her :'(.
Passing the cuttings from water to soil
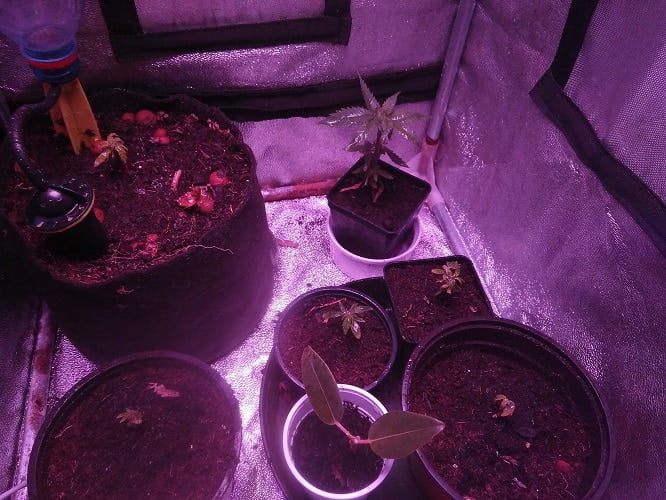
Once we had some nice roots we went ahead and transferred the cutting into our pots.
As you can see we have them in different size pots. The idea here is to keep one as a mother plant (top left). The 4 others we will re-pot and transfert into the flowering tent once they’re ready to stretch.
(Yep, we lost another little one between the 2 steps… we took wayyyy too long to transfert them into the soil)
That’s it for these little ones! As we speak they’re getting growing nicely, but we’ll tell you all about that in the next post 😉
Laughing Buddha Seed Germination
Here’s a little one we’re really excited about! First time growing it and really curious to see what it’s all about.
For a long time it was a best seller at Barney’s Farm, a coffee shop & seed bank in the Netherlands although now, unfortunately, a bit it’s harder to find these days.
Luckily, during our last trip in Amsterdam we were able to get a little seed! 🙂
(check out the trip on our insta account)
Alright, enough said, here’s some pics of the germination process of this little one
Seed Germinating – A humid and dark environment
Just like for the cuttings, we’ve made a full how-to article detailing the best ways to germinate your seeds, if you want to know more on that check it out over here
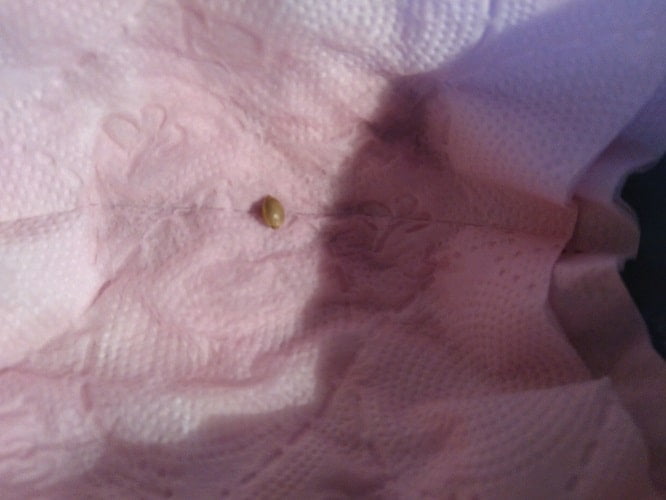
We set the little one in a humid paper towel between two bowls. At first it was wayyyy too humid in there, so we left a little crack between the bowls in order to let some humidity out.
5 days later, the tap root has broken the shell
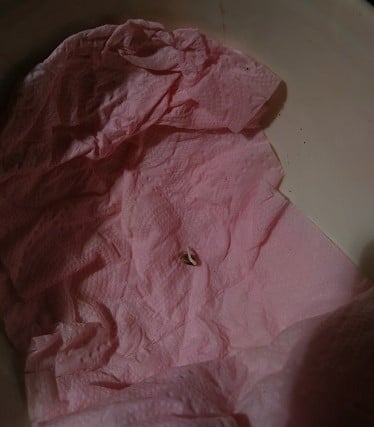
The morning after leaving the crack between the bowls we saw the tap root starting to break the shell; The picture above was taken that night and, as you can see, it’s big enough to plant 🙂
Seed you soon cotyledons 😉
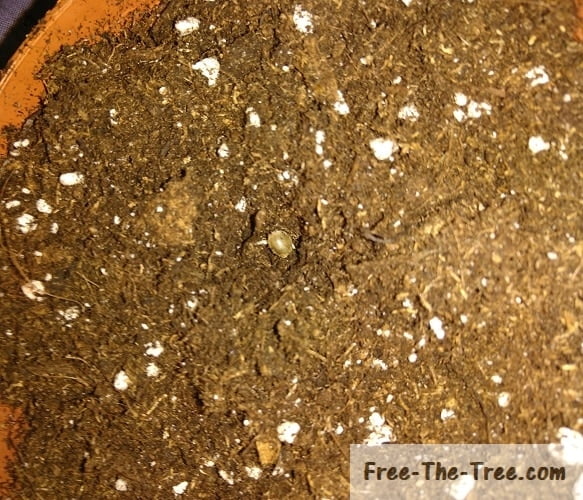
With the tap root about a centimeter long we planted the soil, about 1.5 cm deep. This depth gives it enough room to break soil and deploy the cotyledons with little effort, while the tap root can get comfortable in her new home.
As soon as we covered the seed, we set the pot in a bowl of water in order to humidify the soil without disturbing the seed.
48 hours later – Soil has been broken and the cotyledons deployed
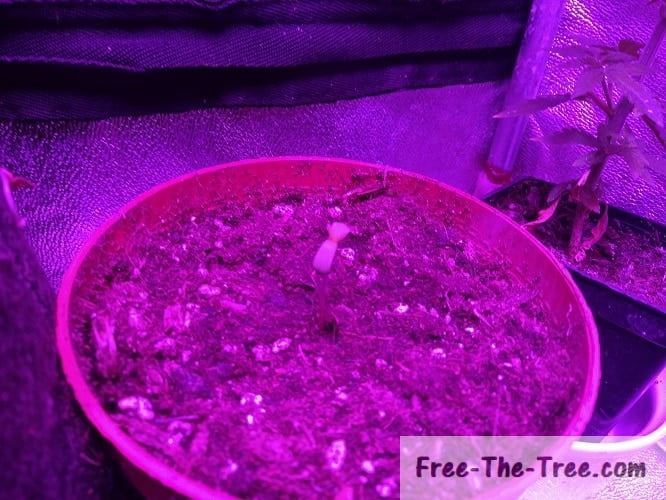
A little under 48 hours later she had broken the soil and deployed her cotyledons and, you can’t really see it but, the first leaves are starting to grow.
We actually missed the ground breaking process which sucks… so awesome to see ’em say hello to the world for the first time.
As we speak the first leaves are starting grow more and the cotyledons are starting to die out; We set the pot on a box in order to get the Apex closer to the light in order to avoid any early stage stretching, we don’t want her to get top-heavy ^^
Alright folks, that’s it for this one!
Until next week, be safe and grow easy 😉