 Search for specific products and use our comparator
 Search for a ressource in our library
Hi there and welcome to the last grow report of the series!
If you’ve been following these, sorry for the time it’s been since the last report, we’ve been working hard on getting the Price and Strain comparison tool usable and on the (soon to come) crowdfunding campaign!
We want to get the V1 of the Communities Lobbying Platform up and running by September 🙂
Let’s get back to the grow report though: this past month has been pretty full of events, we had time to harvest, dry and start curing the buds and even smoke a little since the last grow report!
In total we harvested about 250g of dried buds, pretty happy with it, but it’s not to say we didn’t make a bunch of mistakes along the way.
Let’s get into these last steps of our babies lives:

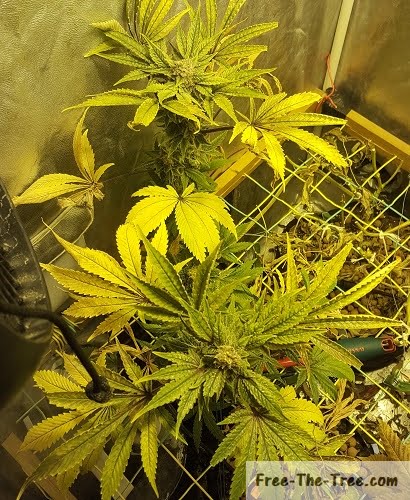
Grow room at the beginning of the Week
The Last Week – Harvesting Gradually
Since we had different strains in the front of the room, and couldn’t get well enough to into the back to be sure for the Big Buddha cheese plants we decided to harvest gradually over the course of about 10-15 days (started in previous grow reports).
Harvesting the Big Buddha Cheese Plant
We really had about 3 rounds of harvesting over the week with the BBC, first we cut a couple buds then went for the finish.
As they say, a picture’s worth a thousand words, so here’s a couple thousand words worth of bud harvesting :
Round 1 & 2
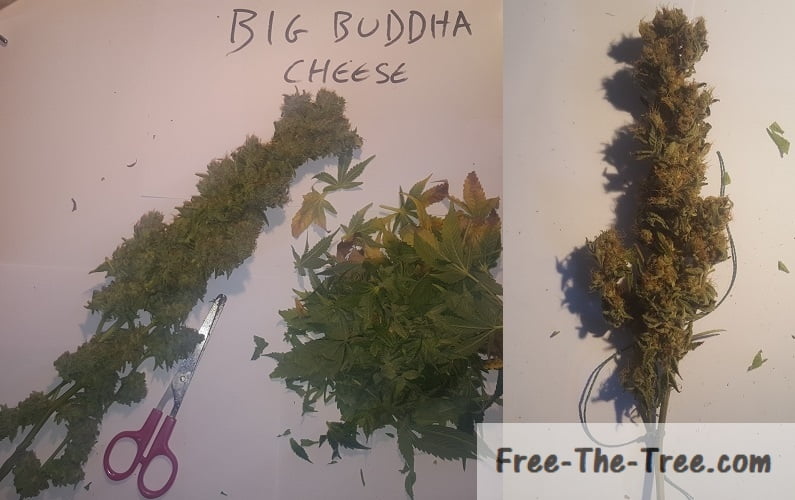
Buds harvested at the beginning of the week
Colas harvested a day or 2 later – Before pruning
Bud After Pruning
Here’s a quick picture during the middle of the week, these are all the first BBC buds and the Cheese plant drying.
After this pic some of the buds were ready to get into the jars to start curing.
Curing enables the buds to continue drying slowly. It’s really important as it helps remove the moisture, affecting the potency of your plant. Check out our full article on curing.
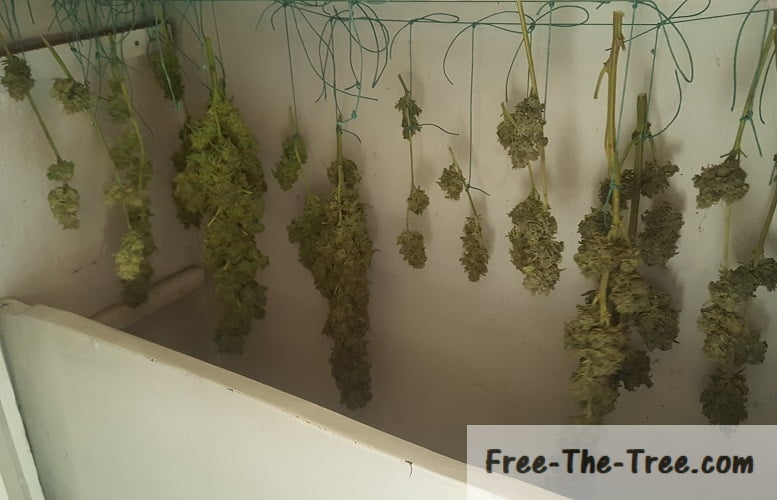
First Buds Drying in a Dark Area
Main Big Buddha Cheese Harvest
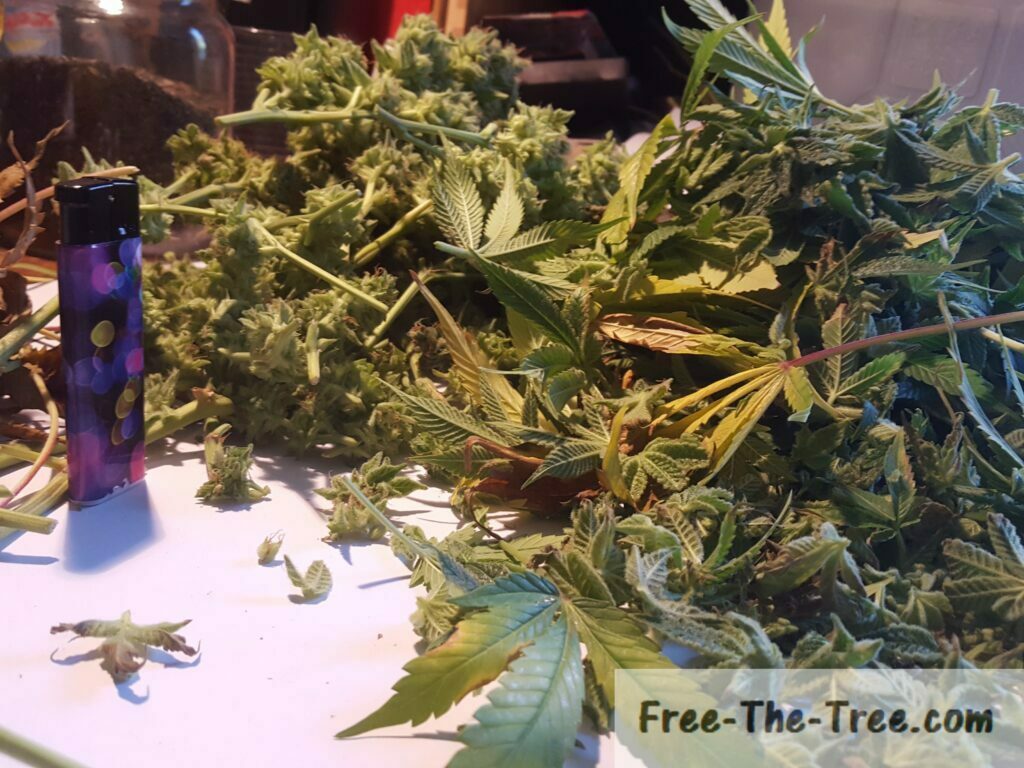
Let’s get to the real harvest for the BBC, took us about 4 hours to clean up all the buds and get them to dry. Takes a lot of time to get some nice, tasty, flowers in the end
Flower before pruning the leaves
All leaves removed, ready to dry
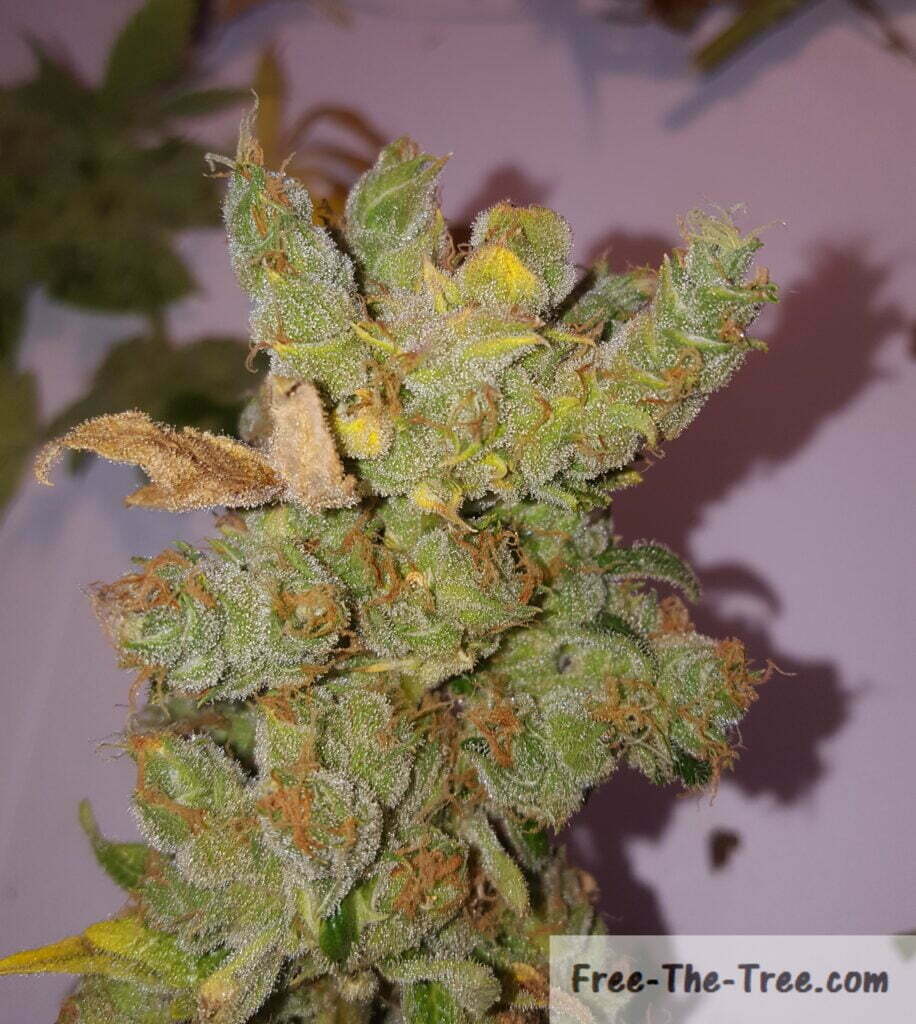
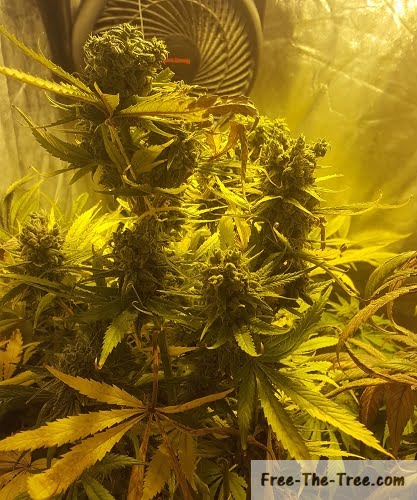
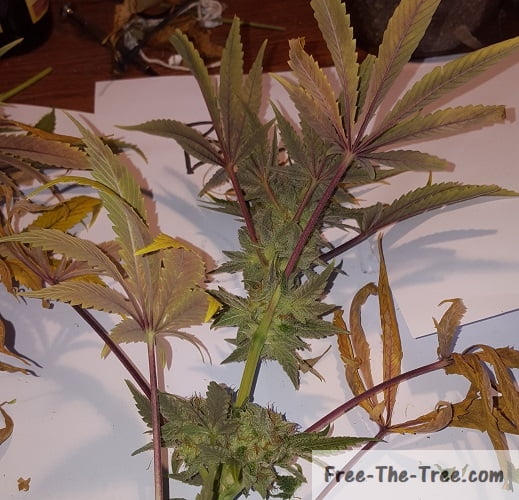
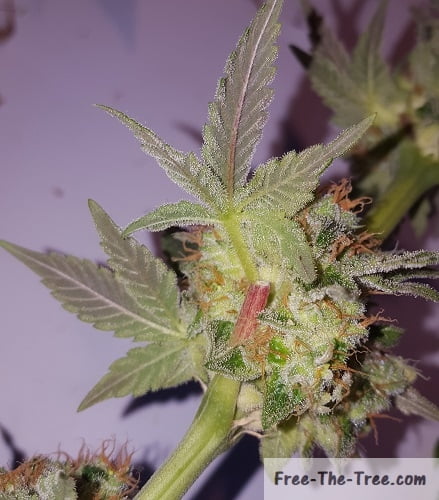
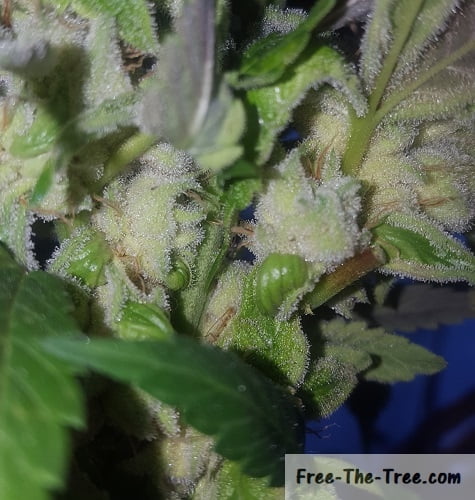
Light Exposure during Night Hours created some funny looking Apex’s
Light Exposure during the Flowering stage
This is something we hadn’t really covered since I thought it was linked to the Calcium deficiency we had. After talking with a friend she shed some light on this.
See that picture above on the right? How the flowers are growing in separate ways instead of forming the usual, cone-like, flower? This is linked to the fact that light must have been leaking into the grow room at night, stressing the plant.
Let’s get back to the Harvest 🙂
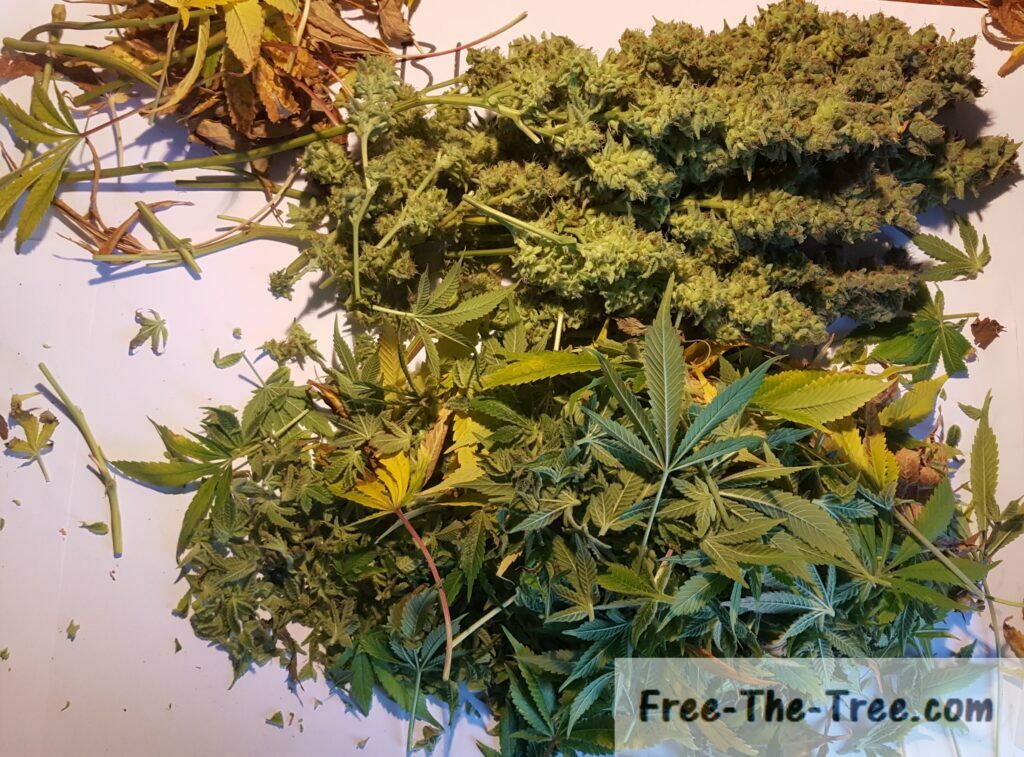
Stack of harvested BBC Buds and Leaves
Horizontal view of the stacked buds
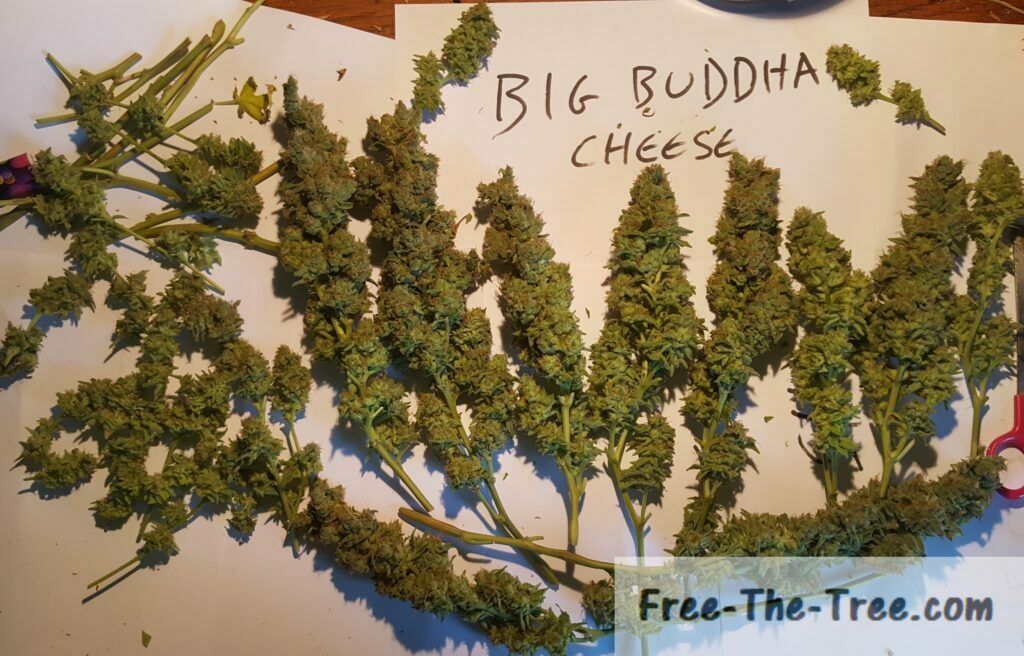
Main BBC Harvest – 10 to 15 Colas ready to dry
Once all the buds were nicely pruned, we attached a string at the bottom of the stem in order to hang them up side down to dry for about 10 days (until the moment where, when folding the stem, it cracks, without breaking).
Harvesting the Cheese Plant
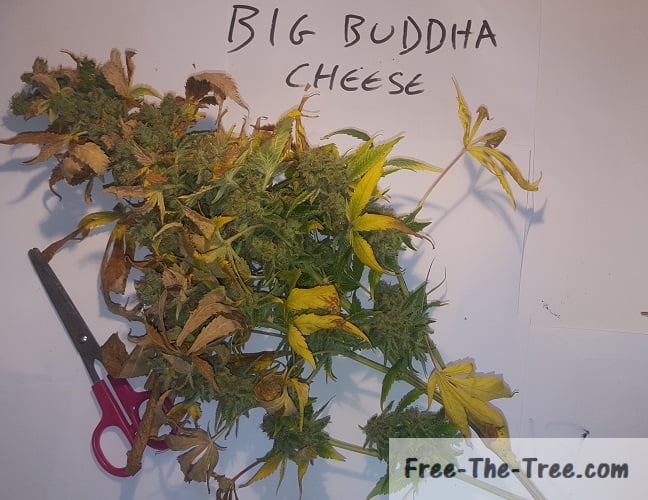
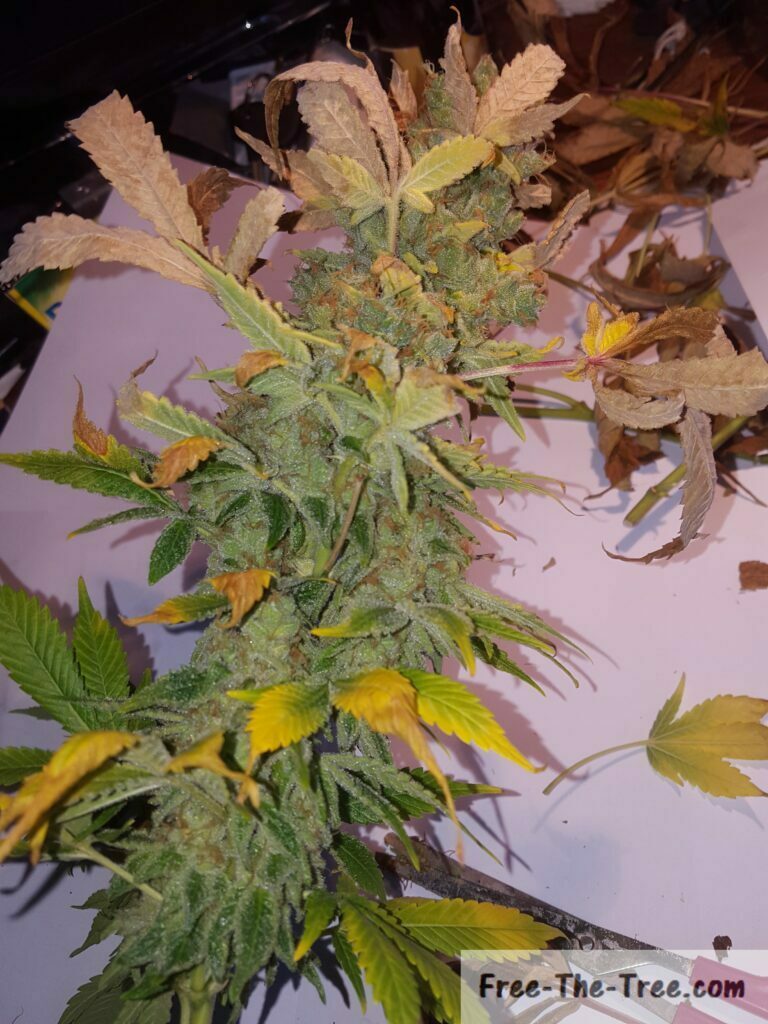
Our Cheese plant really was a tree ^^ Appart from topping her about 2/3 weeks ago due to her height we harvested her at once, her trichomes were nice and milky, think it’s one of the ones we timed the best.
Her’s what she looked like out of the grow room (as always, click on the images to have the full view)
Cheese before harvest
Freshly Harvested Tree
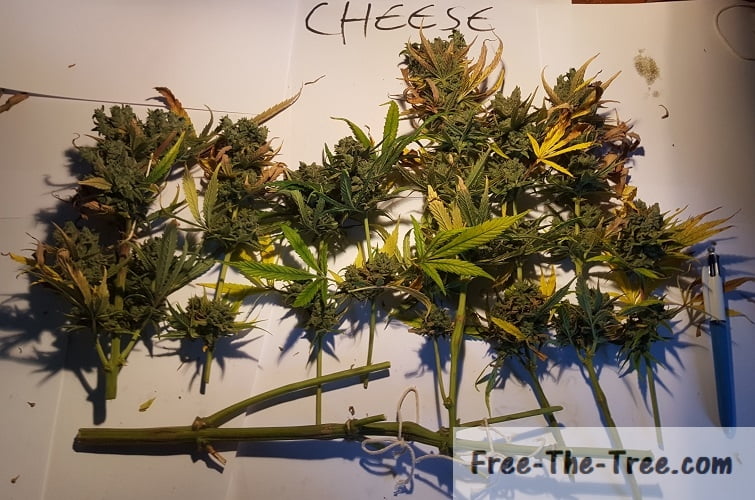
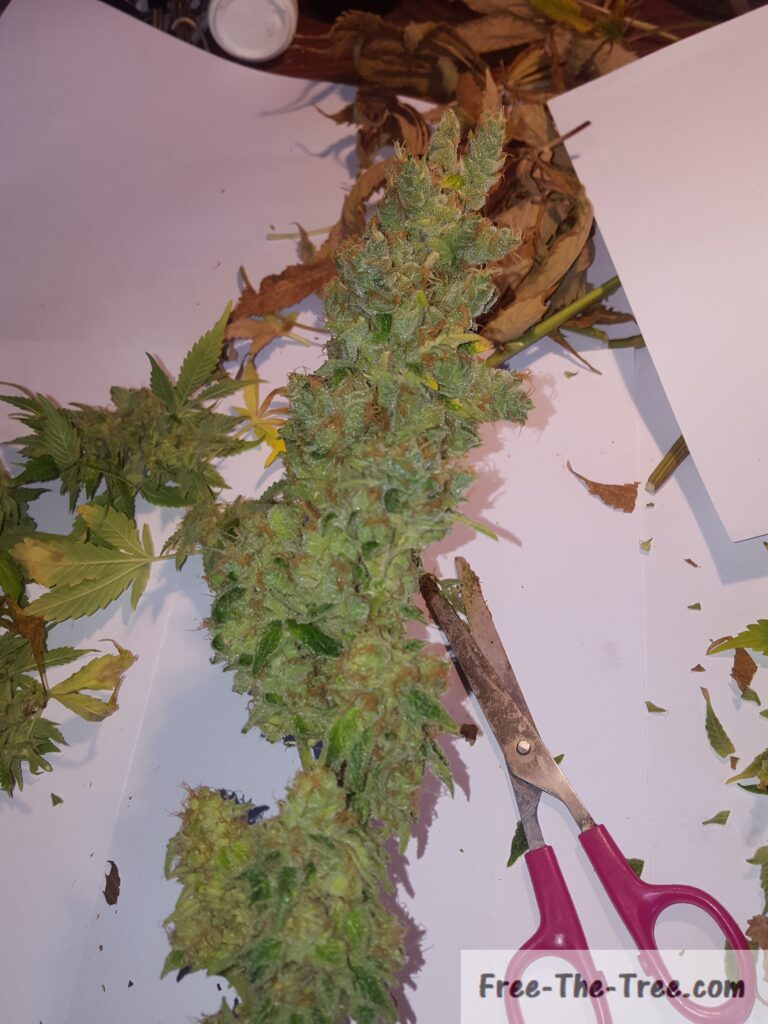
Branches cut from the tree and ready to be pruned
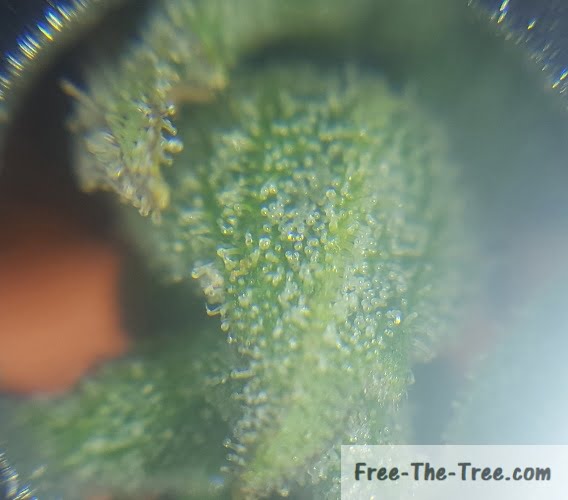
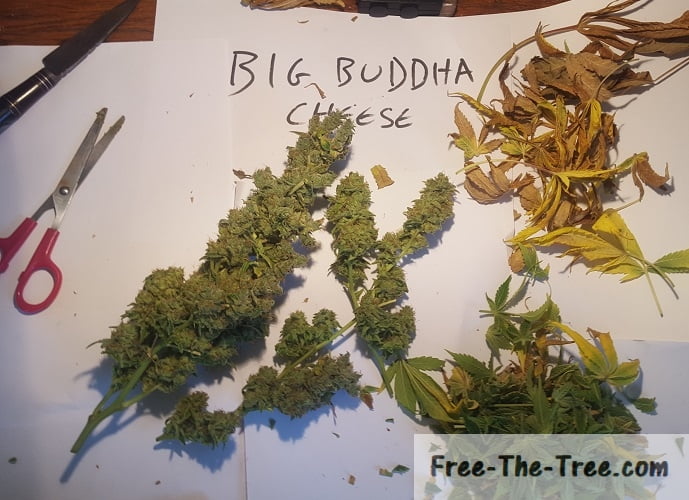
Whole bunch of nice, milky trichomes
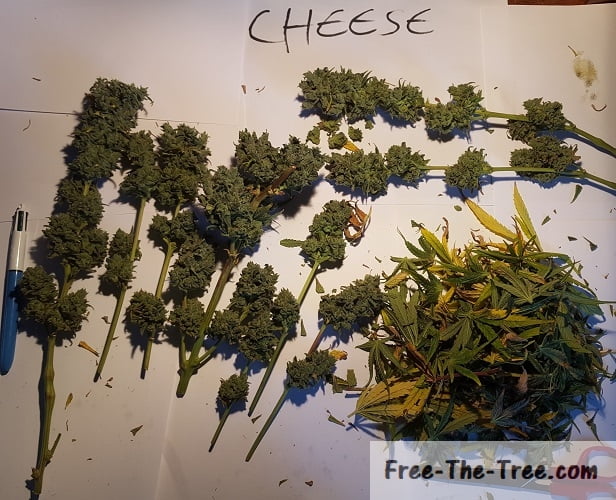
Buds pruned and cleaned, ready to dry
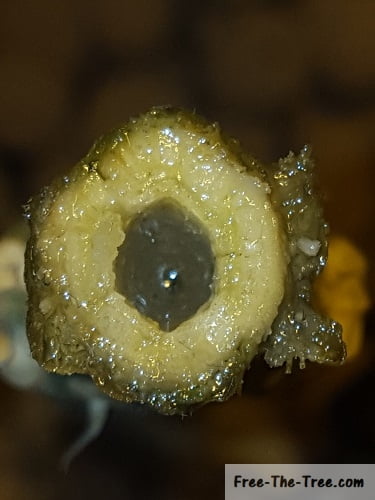
The sap kept flowering for a couple days, showing that the roots were still active!
It’s really too bad she had stretched as much as she did, I really think that she could have produced much more buds if she wasn’t as close as she was to the bulb.
We def should have scrogged her like the others in order to reduce her main height. Good to know for next round ^^
Harvesting the Blue Thai Plant
This little one was pretty small, since the cheese stretched it basically hid half the plant for getting a direct source of light so we weren’t expecting much.
Her smell is crazy though, full of spices.
Blue Thai plant freshly harvested
Branches cut from the tree and ready to be pruned
Small Blue Thai bud with purplish color
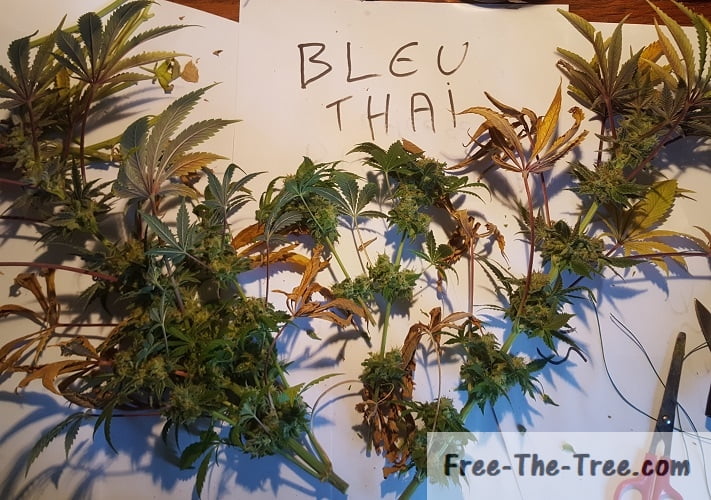
Each cola’s cut, ready to start pruning
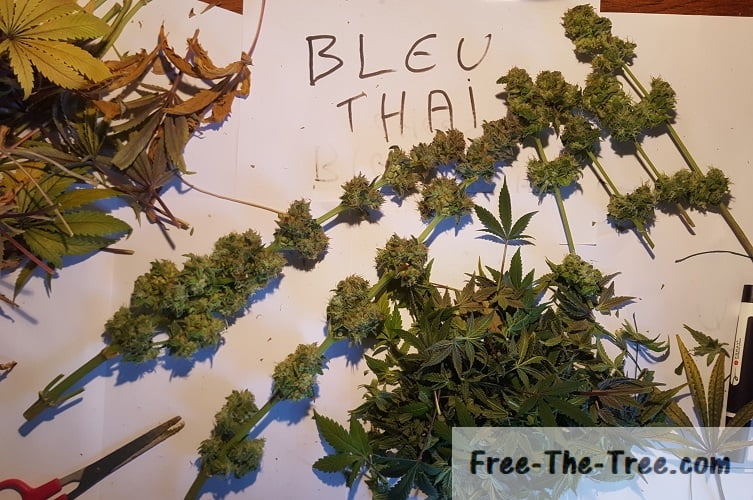
Pruned and ready to dry
As you can see the flowers aren’t that dense around the stems which is unfortunate, letting that cheese plant stretch so much really did damage to the yield of this little one.. (and to the blue kush up next)
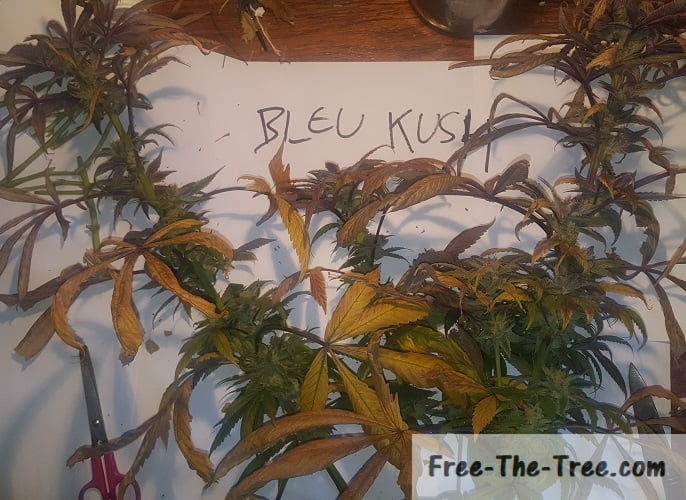
Harvesting the Blue Kush
The Blue Kush is a pretty beautiful plant, especially since we were able to get temp differences over 10°C between day and night hours, allowing the plant to get that purplish/blue color. Unfortunately, she also stretch hard due to the Cheese.. Competition for the light source doesn’t joke around ^^
As you’ll see in the images below, she really built up her stem size, producing only a few scares buds 🙁
She really suffered a lot more from the heat than the Cheese plant
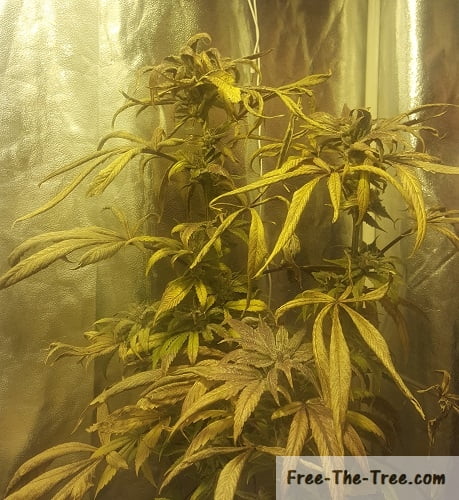
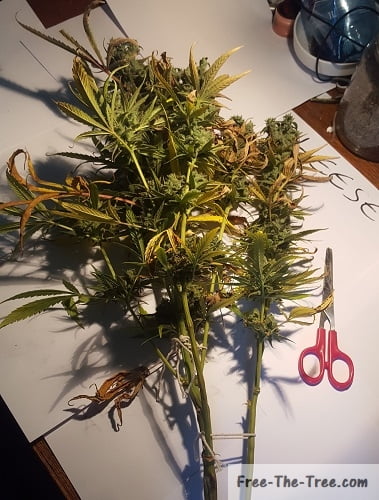
The Blue Kush’s last instants in the tent – You can see the heat stress on the Apex
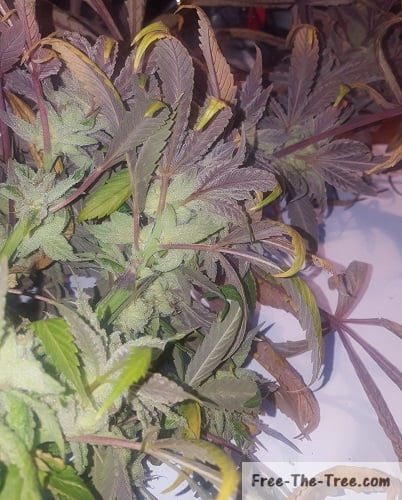
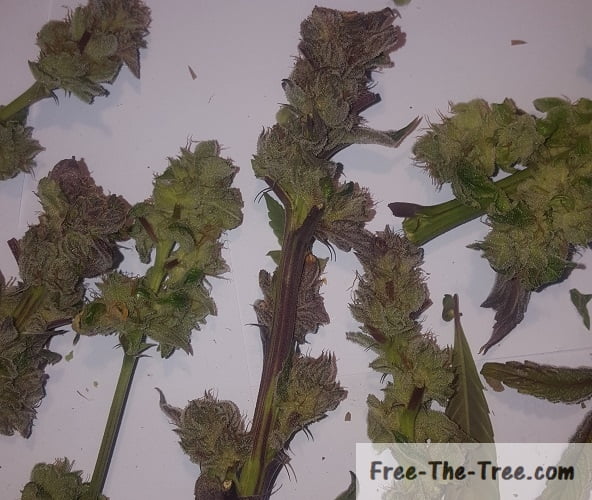
Freshly harvested Blue Kush Cola wearing her Beautiful Purple dress
Focus on bud full of Trichomes
The 3 Blue Kush Cola’s harvested. More leaf and stem than bud
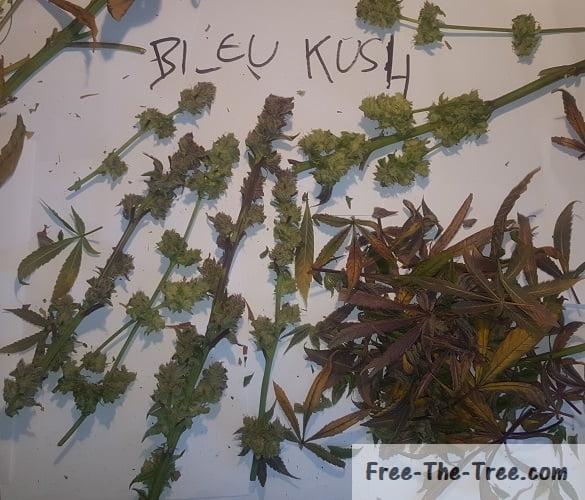
Pruned and ready to dry
Close up on some of the purple flowers
Between the stretch for light and the heat stress generated from being so close to the light this “little” one really didn’t produce a lot of buds, although she really was beautiful.
I don’t feel as bas as the Blue Thai since we’ve germinated 3 seeds of this one for the next round, we’ll get another crack at her 🙂
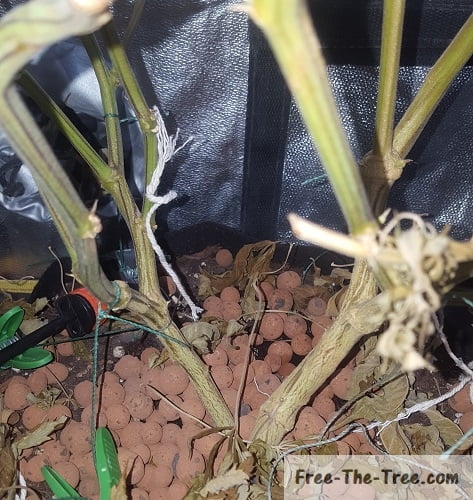
Remaining Stems & Roots
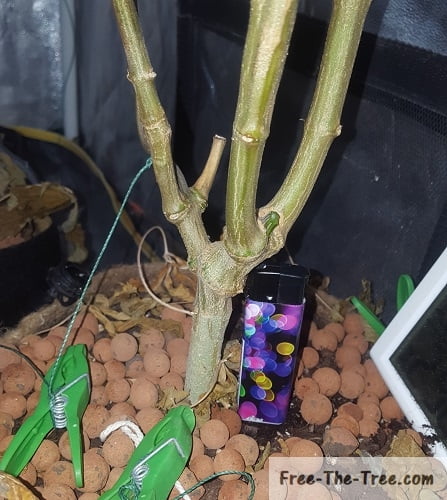
Before we get to drying and curing of the buds, check out the nice stems and root systems these babies had developed
V Stem used as base for SCROG
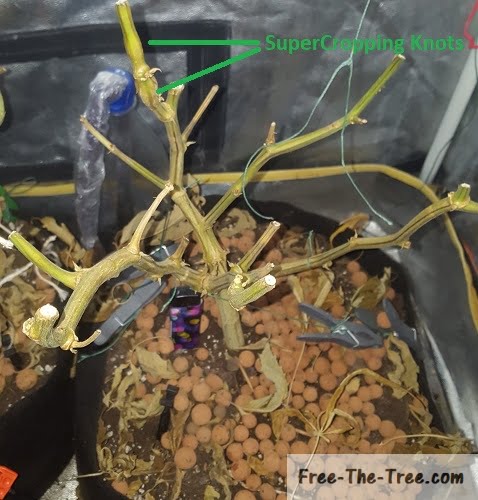
2nd Scrogged Big Budha Cheese Plant
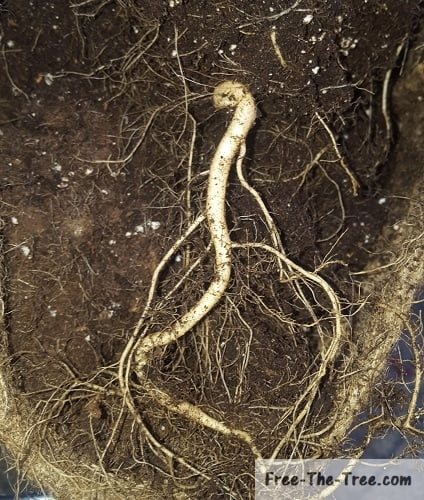
Main tap root (yeah, same one that broke the seed shell ^^)
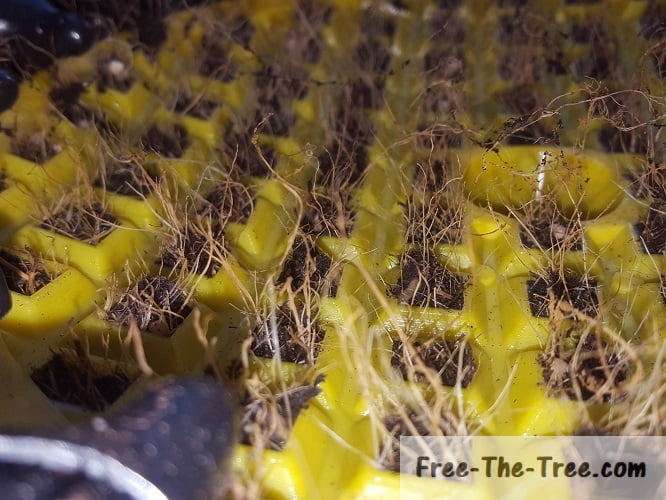
Naturally pruned roots at the base of the Air pot
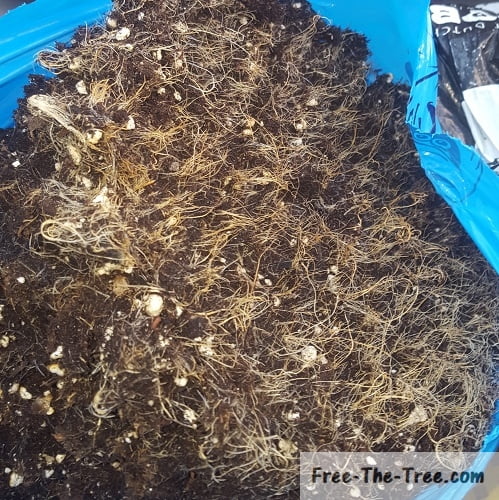
Root system developed when using an air pot
Aren’t the root systems awesome? Between the thick tap root and the thousands of mini roots, no wonder they kept producing sap even days after harvest.
The Blue Kush had even grown so much into the fabric bag that it tore when we tried removing the soil, crazy ^^
Seeing this I definitely see why it’s an issue to be using plastic pots, and definitely won’t ever be using them again.
Drying and Curing the buds
Now that all our plants are harvested and pruned we’ve done about half the work, the most crucial steps of the whole process still lie ahead.. Drying and (especially) Curing your buds.
We did a whole article over here if you want all the details, here we’ll mostly just show you the pics of this round’s drying and curing, since we had a bit more than we could handle we had to get inventive ^^
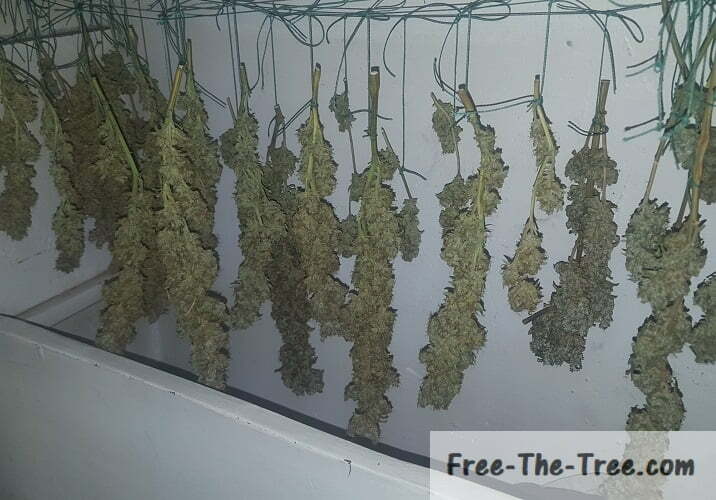
Cheese and Big Buddha Cheese buds drying in cupboard
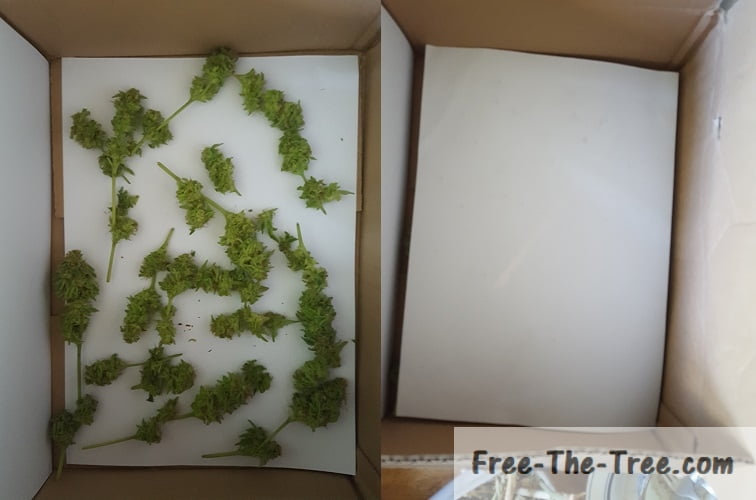
Buds drying between sheets of paper in a cardboard box
If you can, definitely avoid the cardboard box solution, the buds at the bottom may finish flattened due to the weight of the buds on top. If you must go for this, rotate regularly the layers of buds.
The important here is to keep your buds in a dark and dry space. Personally I do this until your hear a little crack when bending the stem, at which point they go into some jars to start the curing process 🙂
Key points during the drying process:
- Keep your buds in a dark area; Light will attack the trichomes
- Keep the buds in a dry space.
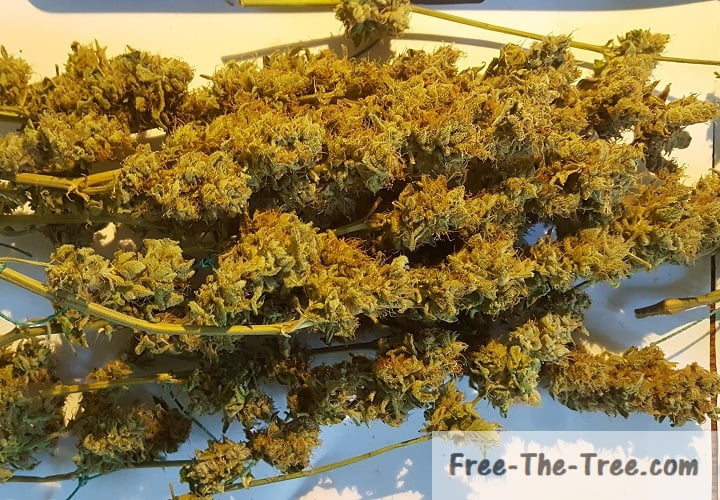
Buds done drying – Ready to weight and cure
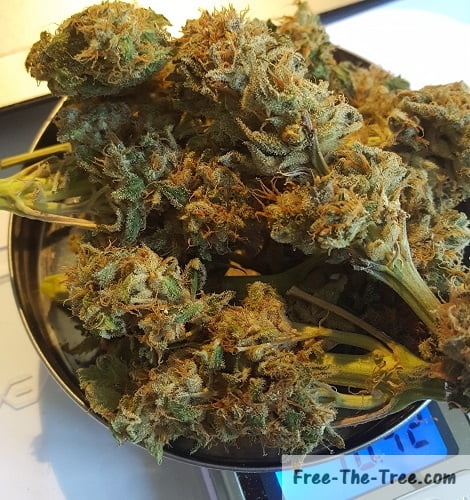
Blue Thai buds on the scale

3 of the Big Buddha Cheese jars
Now that your buds are in the jars the process is almost over!
The flowers should still be pretty humid, so for the next 2 weeks you’ll want to open them at least a half hour a day.
Once they start to be crispy, you can add a humidifying packet (~50% humidity) and open them every other day or so.
Key points during the curing process:
- While the buds are still humid, open the jars regularly.
- Store in a dark area. Just as it’s true during the drying process, light will attack trichomes.
- Regularly rotate the buds inside the jar. Since the ones on top will dry faster, you’ll want to even it out.
- Curing can go from 2 weeks to 2 years, just like wine taste and smell will improve with time.
If you go for a long term cure, remember to add humidifying packets. if you don’t the buds will be so dry that they break like dust.
Before we wrap up this final grow report of the series we wanted to go over the main teachings that came to our mind while writing this piece, so here we go
Key Teachings of this Grow
- You must nurture your soil
We all agree that trashing your soil every other grow isn’t a long term solution. That said, plants suck out all nutrients from the soil and the nutrients that are given generally only contain NPK, whereas the plant actually needs over 20 macro and micro nutrients which got us thinking.. how do we get this working long term?
After a bunch of research we found alfalfa and nettle manure which feeds the soil with all these nutrients. That discovered, we decided to plant a bunch out side and start making our own to regenerate our soil, we’ll keep you posted! 🙂 - Thrips are a bitch
Yeah, these suckers followed us since the end of last grow, throughout this one, and we still have signs in the next one.
If you have signs of these suckers, nuc’em!!! - Keeping a flat canopy is key
If you’ve been following this grow you’ve seen that since the stretch our canopy is far from even, and as you saw, especially with the Blue Kush and Blue Thai, this had a very significant impact on the final yield of each plant. - Don’t wait too long to harvest!!
By waiting too long the trichomes start to deteriorate too much and the THC&CBD levels actually go way down. I think we weren’t too far from that with the Big Buddha Cheese - Super Cropping seems to work very well
Alright folks that’s it for this one!
Hope you enjoyed the last post of this series, see you soon with the first months worth of the our 3 Blue Kush’s and 1 Critical plants that are currently nearing the stretch 🙂
Until next time,
be safe and grow easy