Growing Cannabis - Frequently Asked Questions

Free the tree content
Cannabis Growing Frequently Asked Questions – Community knowledge to help you out thumbnail

Find your answer within the community's FAQ

Been searching all over for an answer to your questions on indoor growing?
You’re at the right spot, we’re gathering all the info we have right here, hope you find what you’re looking for.

Cannabis - Frequently Asked Questions

Use keywords to filter through the FAQ to easily find your answer 🙂

What is Nitrogen deficiency

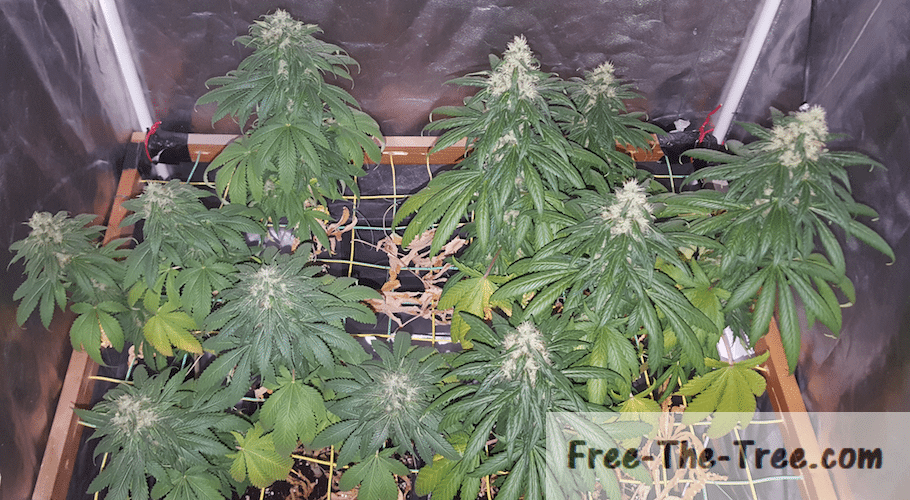
Basically you’re plant needs nitrogen to make new leafs and branches. If she doesn’t have enough in her environment then she’s going to take in her stock, the leaves.
Since the bottom leaves have less chances to get direct sun light, they’re the first ones to go (makes sense).

Now during the Vegetative Stage this is definitely something you want to avoid, you need her keeping as many leaves as possible! During the mid/late flowering stage it’s actually normal and something you want.

How to spot Nitrogen Deficiencies?

  1. Are the bottom leafs dying first?
  2. Are the leafs turning yellow then brown before dying?
  3. Is it starting from the tips of the leafs, center first?

If you’ve said yes to all 3, it’s most likely it!

How to fix Nitrogen Deficiencies?

Get Vegetative stage growing mix

  1. At you’re next watering add a little more than the minimal brought forward on the label to your water.
  2. Check the pH of the water. As long as your pH is over 5.5 nitrogen will be absorbed, but remember that the sweat zone is between 6 and 7.
  3. During the next days keep an eye out, if the spreading has stopped you’re good.

Now remember:

  • Check the pH after adding the ingredients but before you thoroughly shake the mix, although you should have mixed it with a stick a wood or so.
  • The leafs that suffered damage won’t recover. Although you might want to remove them I wouldn’t do so except if they just fall off.
    Why you say? They still have some stock in them, so the day your plan has another deficiency she’ll take from this one instead of attacking one of your clean leafs.

Now at the other end of the spectrum, nutrient burn… I’m covering this right after the Nitrogen Deficiency since that’s how it happened, by fixing that issue I had open a whole other one, and what a pandora’s box

What is Nutrient Burn?

Just like taking too many vitamins is harmful to us humans, too many nutrients in the soil is harmful for your plant.

The roots, doing their job, will take in all these ingredients and send them up to the “out of the ground” section of the plant where it is used for different tasks, if the plant doesn’t need it she stores it in here leafs. When there’s no more “room” within these leafs, well that’s when the issues arrive. The access ingredients having no where to go from there start killing the leaf.

This is the reason why we see it start from the extremity of the leaf and slowly grow inward.

How to spot Nutrient Burn?

  1. Did you recently water your plant with extra nutrients?
  2. Are the tips of the middle of your leafs starting to become black/brown?
  3. Does it progress from the middle down through the leaf
  4. Do you start to see it appear at different area’s of the plant and spreading quickly?

If your saying to yourself, yeah that’s exactly it, chances are you’ve given her too much nutrients, and now they’re killing her.

Do you feel like all is lost? No worries here is how to get out of the situation.

How to fix Nutrient Burn?

In order to fix nutrient burn you’re going to need to flush your soil, that’s the only way. What do I mean by flushing your soil? I mean at least getting 2 times the volume of you’re container in plain, pH’ed water through your soil.

You heard me right and it’s important, you can’t just add a couple of liters in there, or else you’re actually just going to let more nutrients out, causing more harm then good.

What do you need to flush your soil?

  • A recipient that can hold 3/4 times the volume of your container in water
  • 3 times the volume of your container in plain, pH’d water. Get your pH around 6.5
  • An area where you can have everything near

Once you’ve got all of this ready get flushing.

How to flush your soil?

  • Place your plan within the empty recipient
  • Poor 3 times the volume of your container with the pH’d water you’ve prepared
  • Get your plants back into the grow room

During the next few days you might see your plant get droopy with signs of over watering but it’s normal. They’ll get better as the medium dries out.

How to water your Marijuana plant?

We did a full guide on watering your plants, but basically what you want to remember:

  • Keep your water pH between 6 and 7.
  • Water with about 1/3 of the volume of soil.
  • You should see about 20% run off.
  • Water evenly across your soil.
  • Water when your plants are drooping, or when an in within your soil is dry.
    You can also use the weighing method.
  • Add a little Nitrogen during the vegetative stage and Phosphorus and Potassium during the flowering stage.

Can springtails do damage to my plant?

Springtails generally appear in dark humid spots at night and if the bottom of your pots are humid. 

I've seen a couple of them chilling around our bathroom also. As much as i've read on them they don't seem to bother in any way the growth of your plants.

Can't find what you are looking for?

Tell us how we can help out

Make a request
Can't find what you are looking for?

Can't find your answer?

Send us your question

CONTACT GROWERS
Can't find your answer?

Growing Cannabis

How to water your Marijuana plant?

We did a full guide on watering your plants, but basically what you want to remember:

  • Keep your water pH between 6 and 7.
  • Water with about 1/3 of the volume of soil.
  • You should see about 20% run off.
  • Water evenly across your soil.
  • Water when your plants are drooping, or when an in within your soil is dry.
    You can also use the weighing method.
  • Add a little Nitrogen during the vegetative stage and Phosphorus and Potassium during the flowering stage.

Read the full guide:

Generally you want to keep your grow room around 25°C (77°F). Now depending on sativa and indica’s, and within the strain themselves the plant may like warmer or cooler temperatures, but around that temperature you’re good.

Under 19°C (66°F) or over 30°C (80°F) for long periods of time you will start having issues so track this!

The Humidity levels measured in percentage of water in the air will evolve during the different stages of the plants life.

During the early stages they need higher humidity levels, on the other hand during the flowering stage if the humidity levels are too high you’re going to have problems with mold.

Here’s a sum up of the levels you’re going to want:

StageHumidity level
Early vegetative stageAround 70%
Vegetative stageBetween 55% and 65%
StretchAround 55%
Flowering stage
  1. Keep your seeds in a dark space
  2. Keep you seeds in a dry environment. Humidity will wake them up
  3. Generally it’s said to keep them in your refrigerator, but really I just keep them at room temperature and it’s fine.

And voilà! You can keep your seeds until you’re ready to get them started!

  1. Get 2 plates or saucers and 2 sheets tissue.
  2. Get the tissues moist.
    It is important to get this part right, if the tissue is too wet, the root won’t need to exit the seed.
    To dry though and the baby root won’t have enough to survive
  3. Place the seeds between the 2 sheets of tissue and on a plate.
  4. Place the 2nd plate over the first in order to keep the seeds in the dark and store them between 20°C and 25°C
  5. During the next couple days, keep an eye on the humidity of the paper.
  6. You will need to drop a couple drops of water regularly.
  7. Once you have a nice little root, carefully remove the seed.
  8. Place the seed between 5 and 10mm in your soil.
    It is important for the root to be facing downwards.

Learn more about seed germination:

  1. Prepare your soil by making a whole to the depth and width your roots or cube.
  2. Place your Cannabis cutting into the whole you’ve prepared.
  3. Fill in the gaps with soil if needed.
  4. Prepare a water mix with a Ph around 6.5.
  5. Water the soil favouring the outsides. You want the roots to start conquering the new soil, best way to do so is have more humidity there.
  6. Let her do her thing.

Learn more about cloning

  1. Get soil into your new pot
  2. Once you’ve gotten to the hight of your old pots, take one of them in order to make enough room in the soil for your plant. Using an old pot will make sure there’s juuuust enough room for her 🙂
  3.  Tap with your nails along the sides of the pot, on all 4 sides and all levels. This will get the roots loose in case they’re stuck to the pot.
  4. Turn the plant up side down and tap on the bottom of the pot. It should come pretty easily, but don’t hesitate to tap multiple times on it.
    If your plant really doesn’t slide, just go back to step 2.
  5. Place the roots into the space you’ve made in the new pot.
  6. Place an extra layer of soil on top of it all. This will get it all together + getting soil around the stem will increase her stability, and enable her to grow roots at that level

It’s important to note that the best time to transplant is between 2 waterings, when the soil isn’t too humid, but not all dried up either

The pro’s
  • Short lifecycle and a quicker Harvest
  • More flowering cycles during the year
  • Your plants will be small and compact
  • No change in photoperiod needed. The plant will enter the flowering stage “automatically” (more info below on that).
    This can be helpful especially for outdoor growers.
  • Since these are OGM seeds they generally have better resistance to issues, whether this is heat, cold, nutrient burn, etc
The con’s
  • Smaller plants (a pro for some, con to others).
  • Lower handle on the length of the vegetative stage.
  • Much harder to control when the flowering stage starts.
  • Lighting: Since you don’t have to change the lighting from 16/8 to 12/12, you can keep 16hours of light, increasing your electric bill.
  • Generally auto flowering plants yield less buds.
  • Generally, they also have less THC content than other strains.

Globally, if you’re growing indoor i’d stick with non auto-flowering seeds, switching the timer to 12/12 once you want to get your flowering stage going isn’t that hard. I’m personally regretting doing these right now, all though it allows us to learn about them.

So since these plants don’t base themselves on the photoperiods, how do these plants know when to get into the flowering stage? We basically just took away their internal clock, so it needs to be replaced.
What did they take? The roots!  As soon as the main root hits the bottom of the pot that’s her signal to start making her sweat buds.
So be careful and don’t make the mistake we did, plant your auto-flowering seeds directly into your flowering pot in order to make sure you don’t have baby plants that start the flowering stage.. like us.

So to recap:

  • The photoperiod is the plants internal clock.
  • Auto-flowering plants start to enter the flowering stage once the main root hits a resistance (bottom of your pot, or blocage in the soil)
  • After germination, get your plant in the flowering pot right away (~11L pots) so that you’re sure that they don’t flower early

Characteristics of Cannabis and the different strains

 IndicaSativa
Flowering period45 to 90 days70 to 120 days
Tempature and HumidityWeaker resistance to heatStronger resistance to heat
EffectsChill high
Good after a long day working or chilling
at home
Hyper/Laughing high
Good for going out or having a
bunch of friends over
The StretchAbout 2 weeks long,
plants with an Indica dominance will grow between 80% and 150%
during the stretch.
Same time period as its cousins, Sativa plan wills grow from
100% to 250% of its size during the stretch.
Do not underestimate this!
Orelse you might just have
your flowers touching your light
Growth during the
Flowering stage
Indica plants stop growing in hight once the stretch period
is over.
Sativa plants will keep on growing after the stretch,
although this growth is much slower.
What will the buds
look like
Generally Indica weeds have more compact buds.
This is due to the fact that they originate from colder
parts of the world.
Since Sativa plants originate from warmer area’s
of the world its buds will be fluffy and 
aired out.
What you will see
Growth Steady growth during the period. Make sur to cut the branches that won’t get enough light as the plant grows. Better to have a few strong branches than a bunch of week ones
Branch and leaf density In sequence she will produce 2 new leaves, 2 new branches
Humidity Going down over time, it should start at around 65/70% humidity, ending around 50%
Temperature Really during her whole life you should aim around 25° I know, I know, not easy….
Nutrients During this stage you will need to give her mainly Nitrogen. She use and store it in her leafs in for photosynthesis as well as back up energy when she creates  her bud creation later on.I would also keep giving her root nutrients all the way up until the stretch.
Light cycle Keep about 18hours of light and 6 hours of night
Length in time As long as you want. As long as you don’t switch the length of light exposure they will stay in this mode
 
 What you will see
 How to start itChange you light pattern from 18/6 cycle to 12/12 cycles.
GrowthVery rapid! Depending on Sativa or Indica strains it can vary from 70% to… over 200%!
Sativa’s grow the most during this time, so get a meter out and start measuring to max hight in your space
Length in time2 weeks long
Humidity40% to 50%
TemperatureAround ~ 25°C. Be sure to measure at the level of your Apex’s!
NutrientsReduce the levels of Nitrogen given over time
Increase the levels of Potassium and Phosphorus.
Light cycle12hours of light and 12 hours of night
Branch and leaf density The Apex and branches will take in high very rapidly, keep an eye out in 2 weeks time you won’t recognise her anymore!
The leaf mass at this point won’t vary, and that’s a good thing, you want her focusing on the buds by the end of this

Contribute to the shared knowledge base

Share your personal tips, experiences, videos to help the community

MAKE A CONTRIBUTION
Contribute to the shared knowledge base

Contribute to the shared knowledge base

Share your personal tips, experiences, videos to help the community

MAKE A CONTRIBUTION
Contribute to the shared knowledge base