 Search for specific products and use our comparator
 Search for a ressource in our library
Hey there and welcome (back) to Free the Tree!
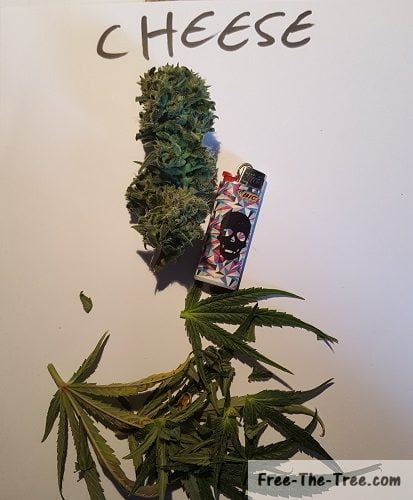
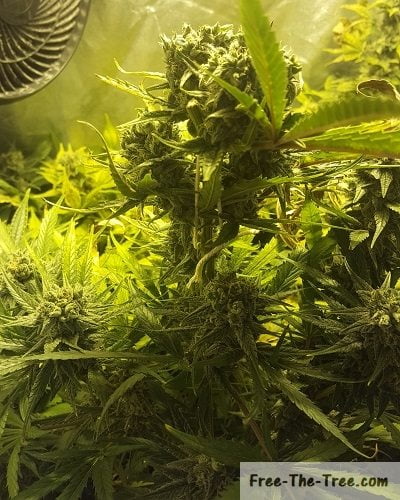
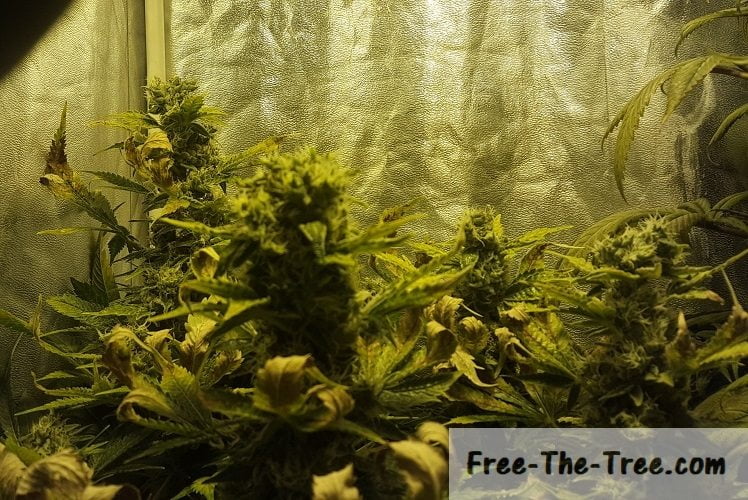
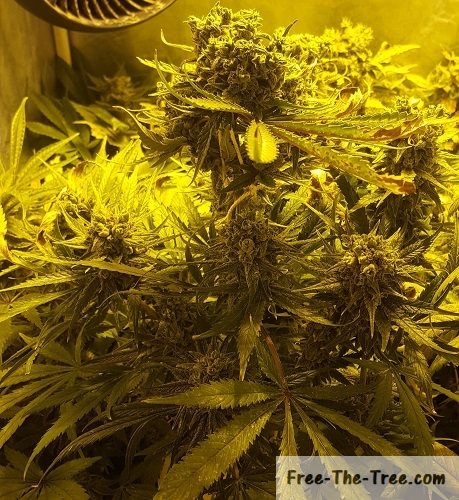
This week was pretty exciting, most of the trichomes have started to show, we decided to go ahead a cut down one of our Colas (way too early to do so), we started back building the buds aaaaand we finally got an image of a live, grown thrips (find pleasures in small things right ^^)
Let’s get into it
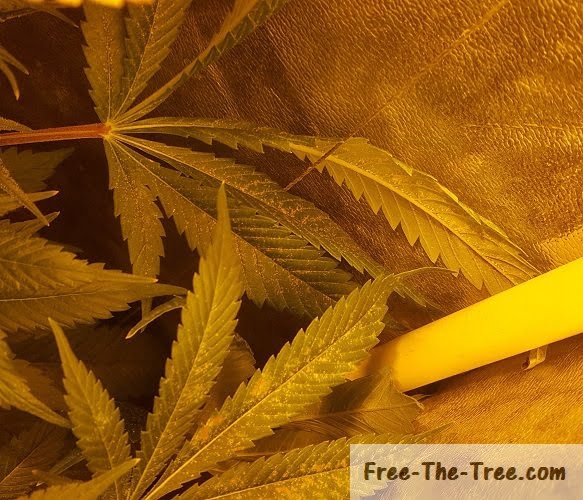
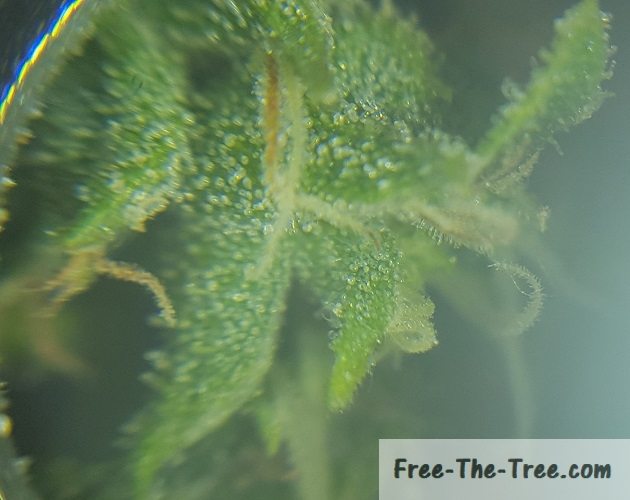
Trichomes turning milky
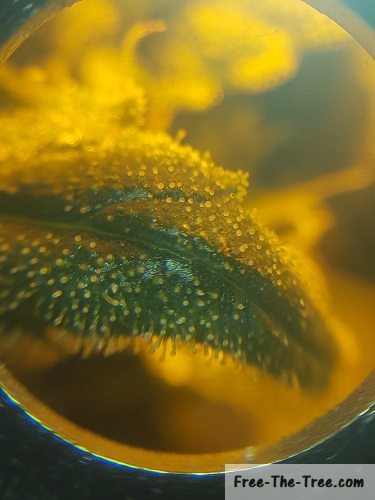
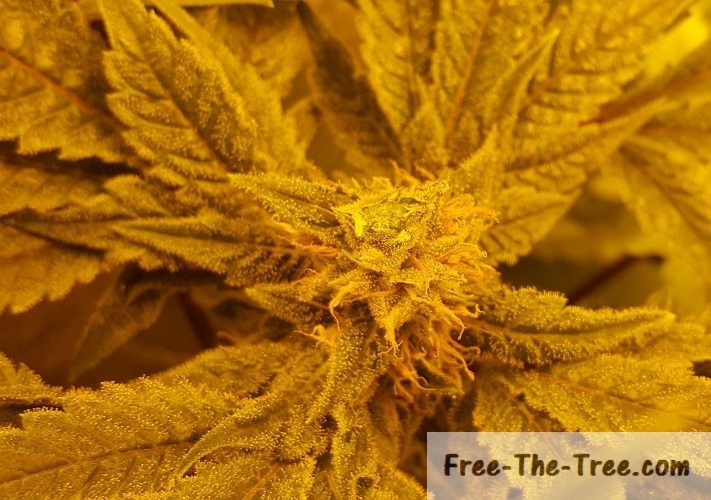
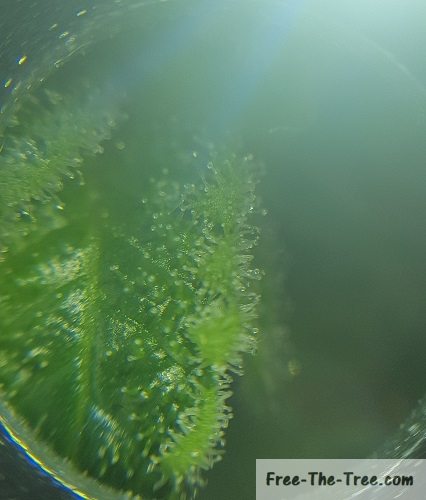
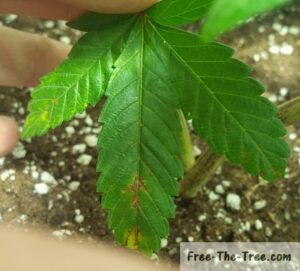
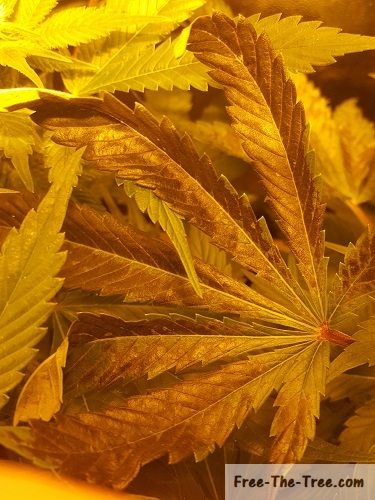
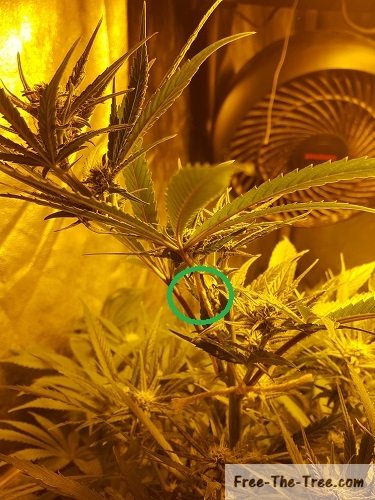
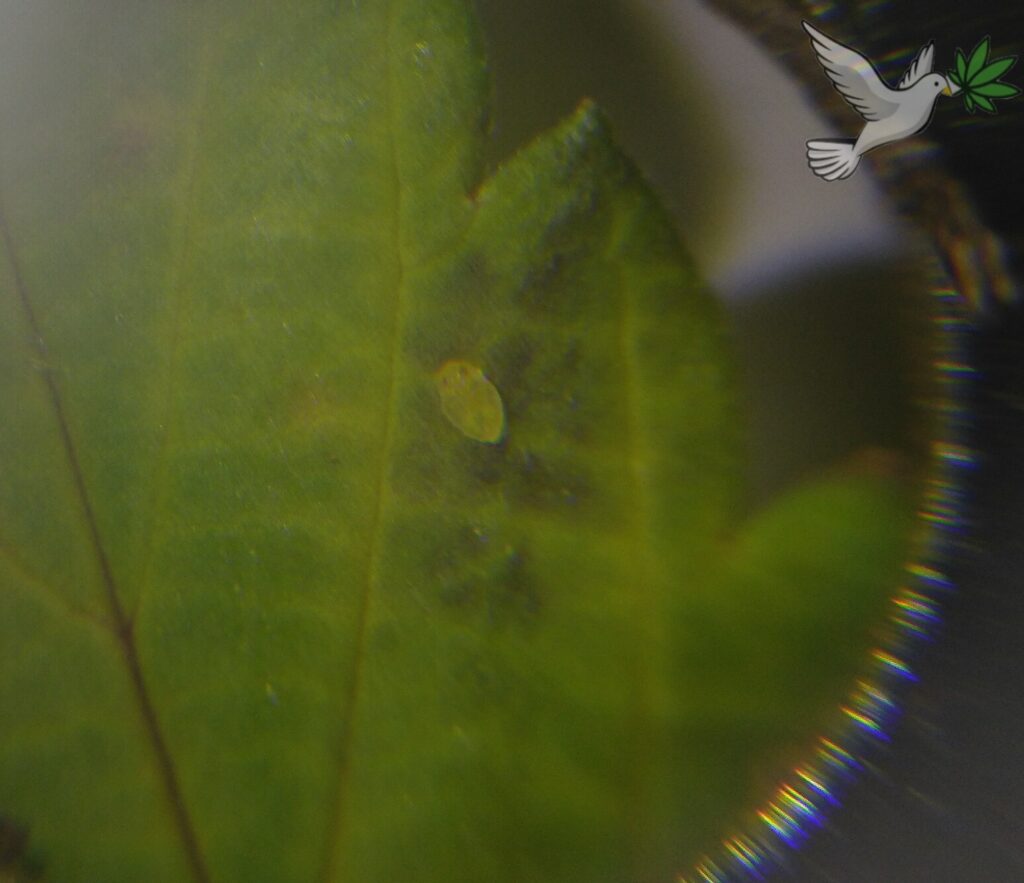
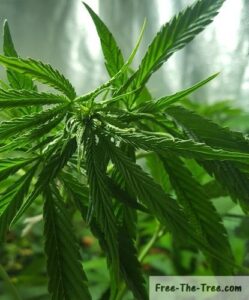
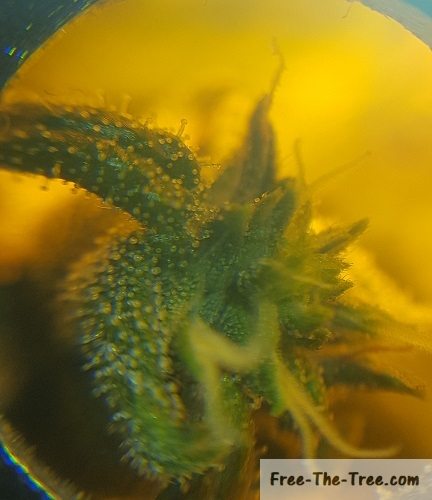
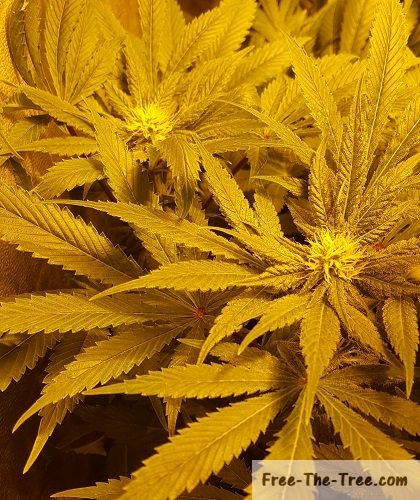
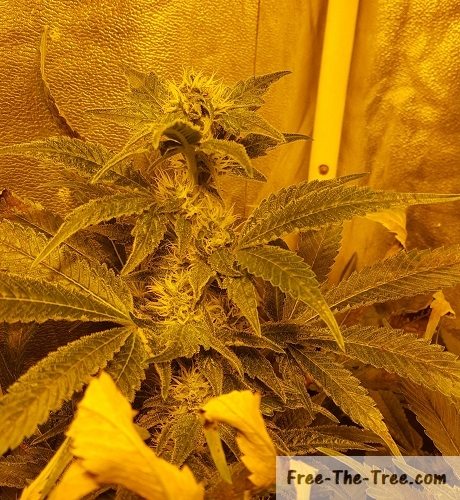
We’ve been watching the trichomes closely for the past couple weeks and they’ve been starting to get nice and milky, especially the ones on the side leaves.
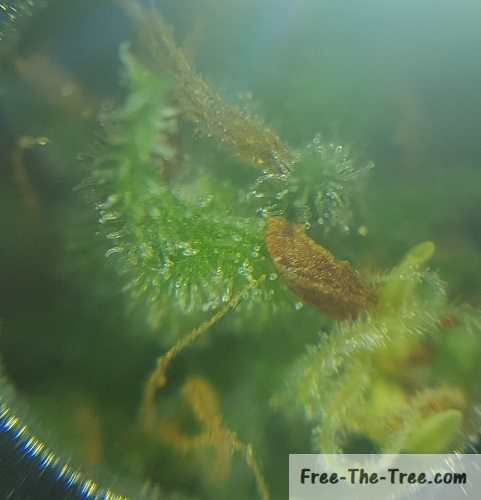
You can see on the image on the right hand side that the trichomes are mostly milky with a couple still clear.
Since we’re looking for more of a upper effect we really want to harvest while the THC levels are at their highest, meaning when they’re all milky and have just started turning milky. Seems like harvest is coming up soon 😀
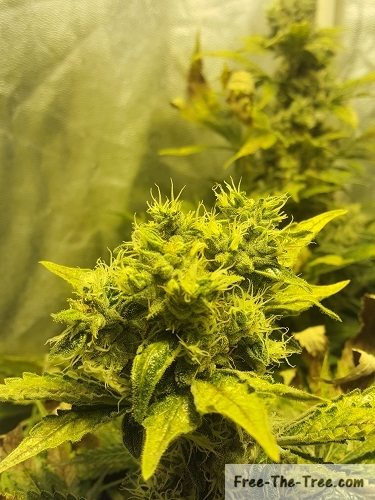
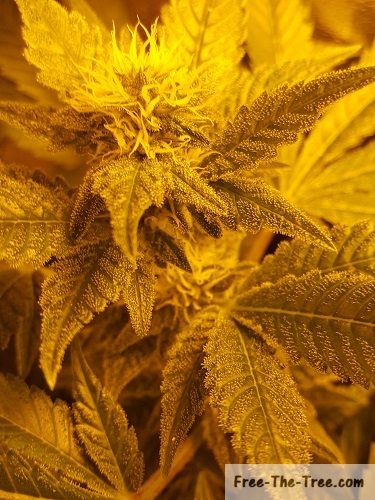
Important note: Something we discovered by the end of the week, but in order to measure readiness looking at the leaf trichomes isn’t reliable. You must look at the flower trichomes or the ones that are are the very small leaves sticking out of the buds.
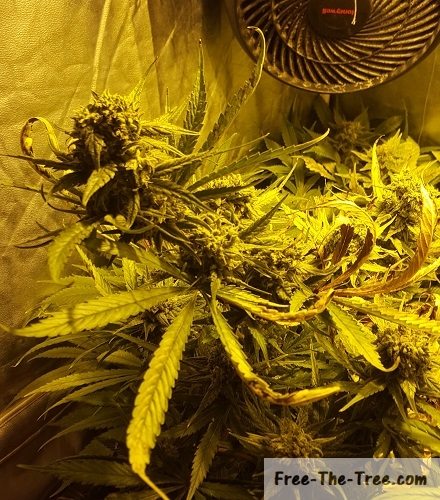
First Big Buddha Cheese Harvest
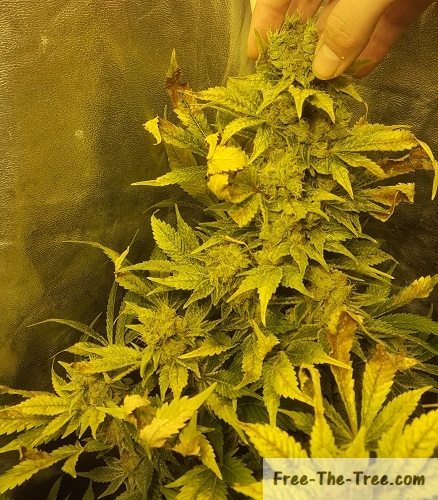
By the end of the week, after looking at many trichomes we decided to harvest a first cola.
We did this for two main reasons
- It seemed to be at that THC peak
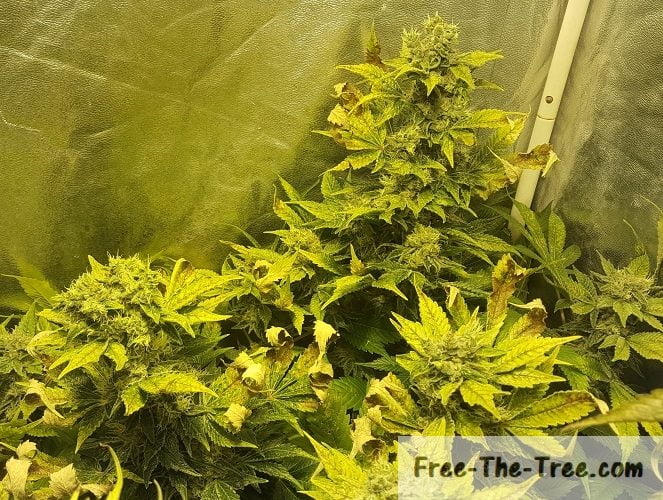
- That cola was really pressuring the Blue Thai, which doesn’t have enough room and isn’t looking too great
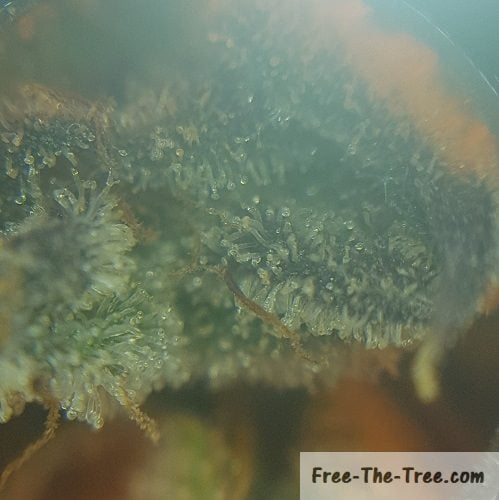
Turns out, we really harvested her too early, as we said most of the trichomes are milky but there’s still many clear ones.
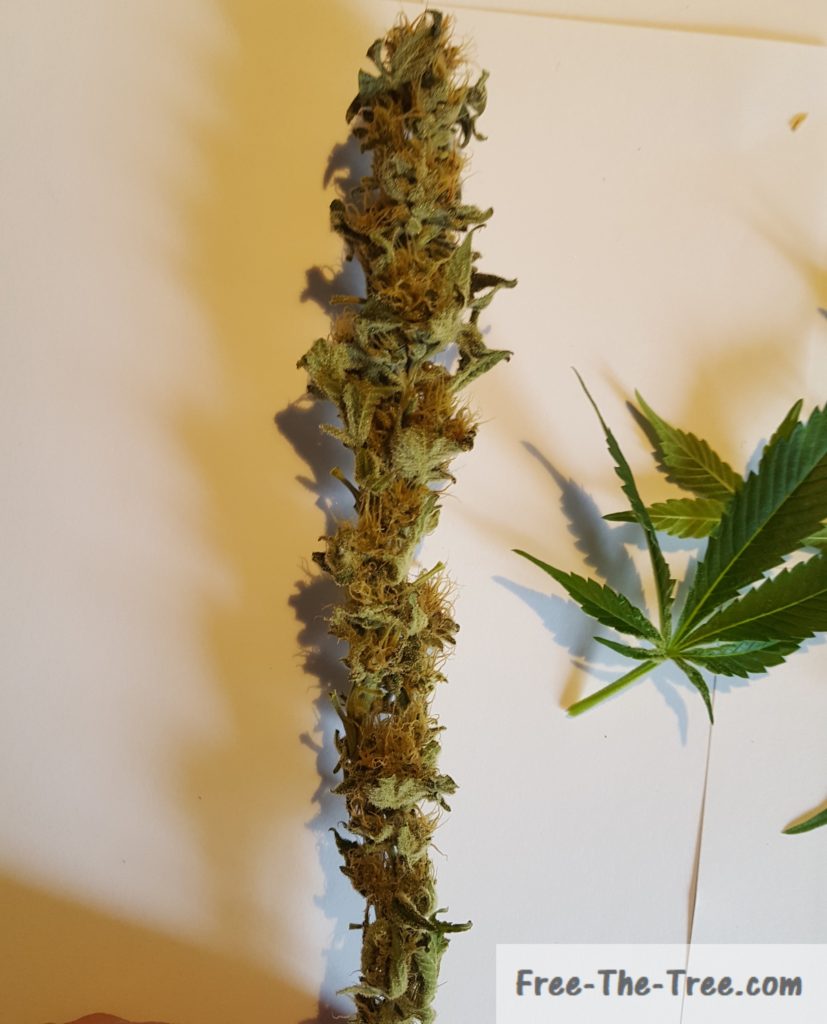
This bud definitely would have been much more massive if we had waited about 10 days before harvesting her… But at least we have a clear view of the development stage of the Big Buddha Cheese.
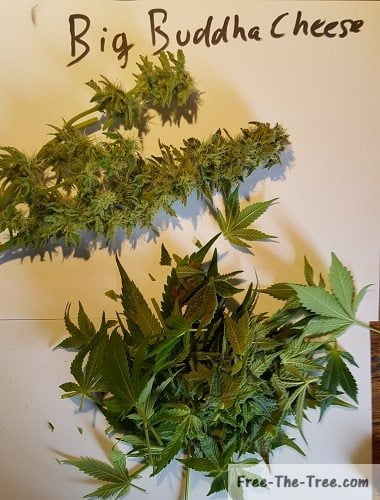
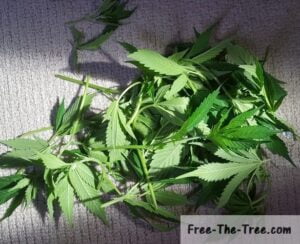
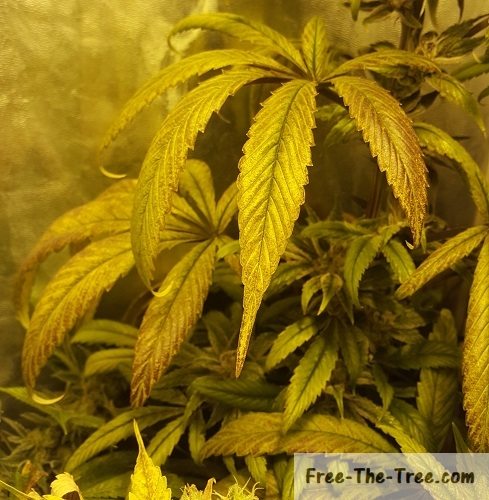
Harvested cola after pruning
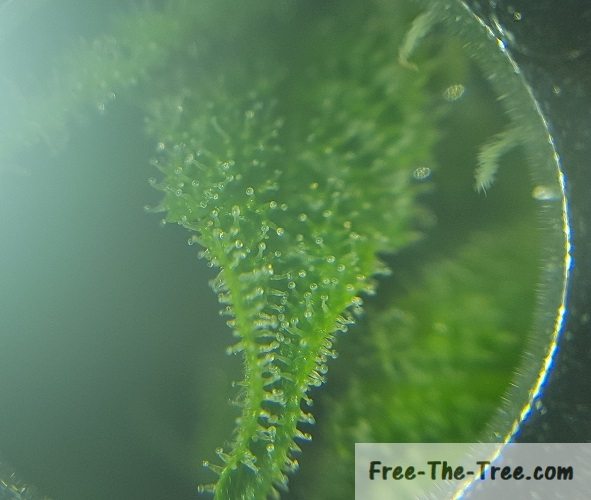
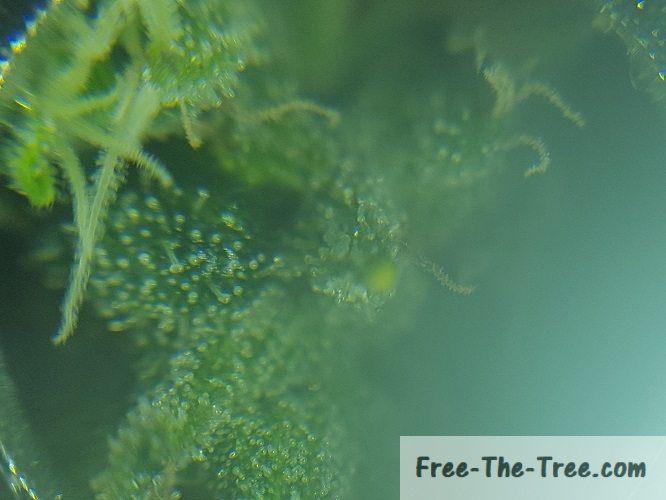
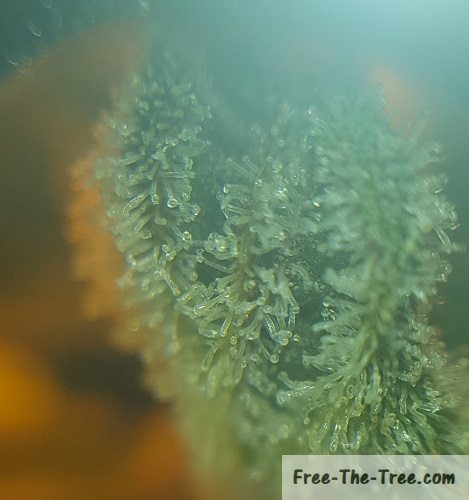
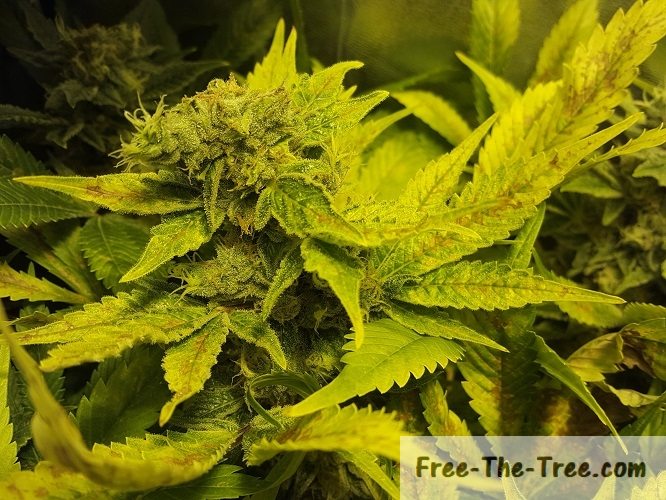
Clear and Milky Trichomes – Harvested too early
As you can see on the image on the right hand side some of the trichomes are still clear, we really cut this bud too early.. oh well it’ll be a soft taste of the rest of the BBC plant.
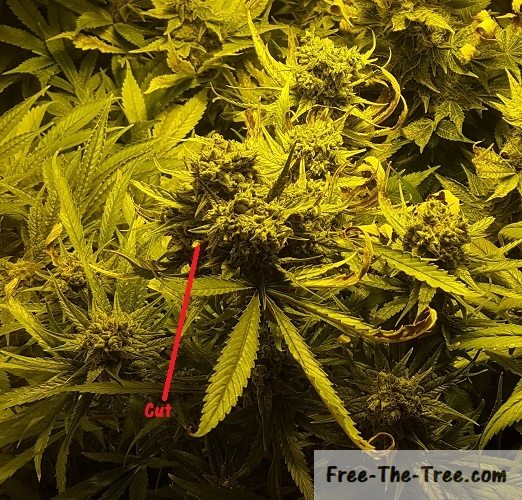
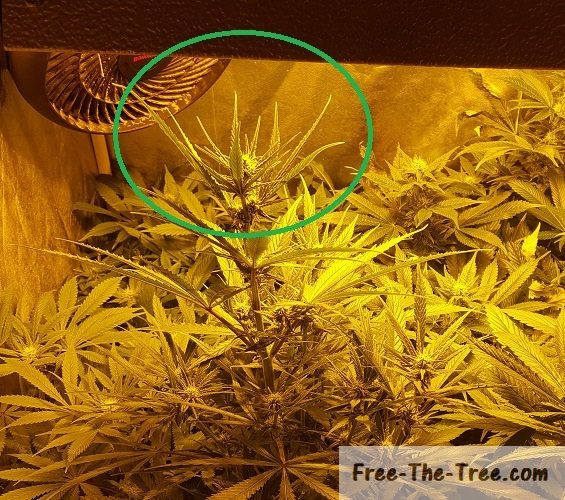
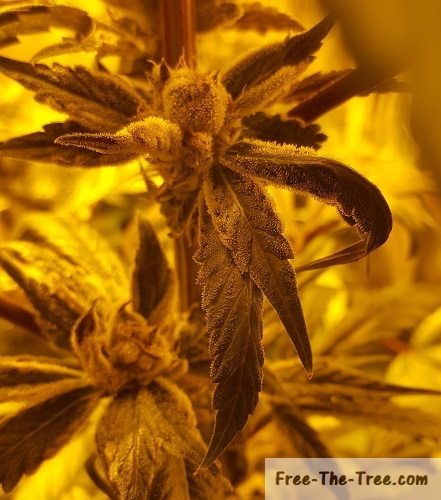
Back Building the buds
After cutting that the BBC bud we started looking into different ways to improve yield during the last weeks and crossed the “Back Building” technique. After reading into it seemed to be pretty effective, tested by many people within the community so we figured let’s try it out ^^
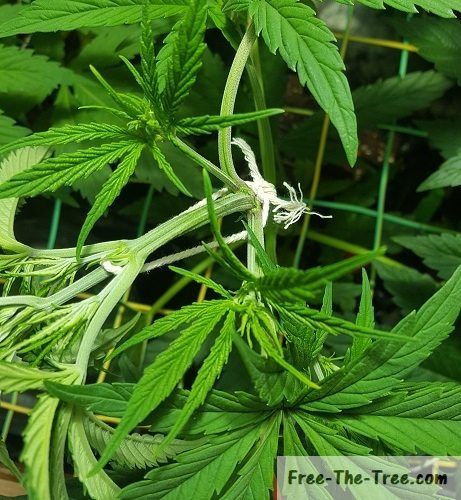
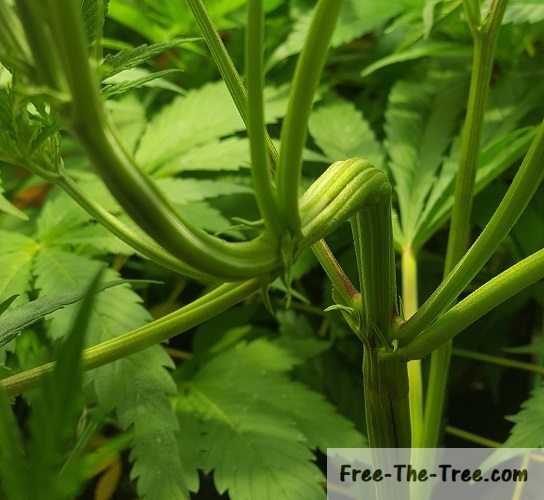
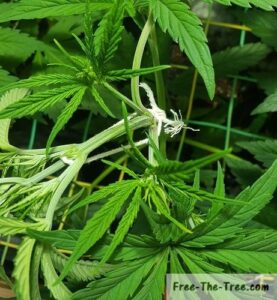
Basically the idea is to remove the top tip of the flower. The way marijuana flowers response is to stop growing in height and start getting thicker and fatter. Here’s a good video we crossed that shows how to do it pretty well.
Hopefully it’ll get the buds much fatter 🙂 keep you updated in the next reports
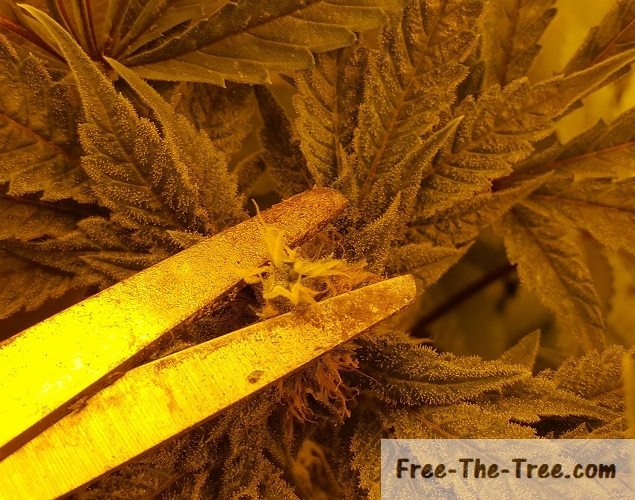
Back Building marijuana flower
Top tip of the flower cut off
Thrips Thrips Thrips
While pruning the bud we harvested today we noticed one a couple thrips larvae and one adult thrips fall off.
Here’s two pictures of the adult thrips, if you want think you have a Thrips issue we’ve grouped everything together over here.
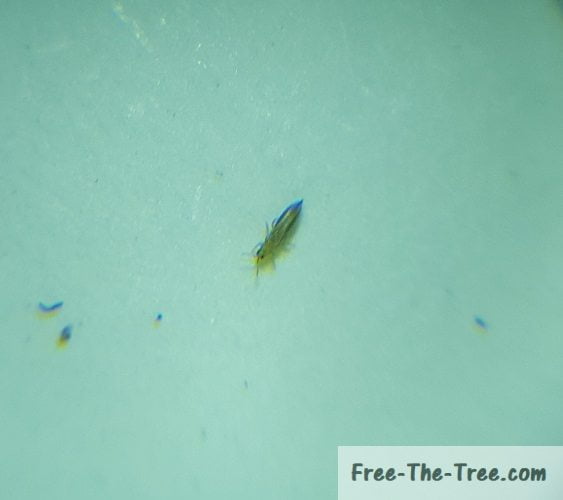
Front side of Thrips – Black streaks visible
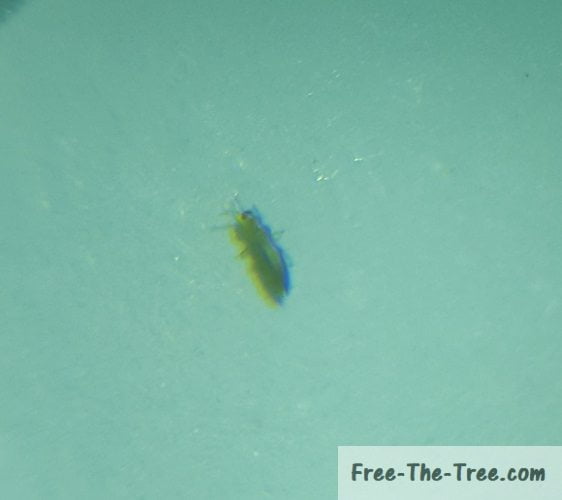
Back side of adult Thrips – Looks whiter
Alright folks that’s it for this week.
Until next time, Be safe and grow easy!
Miss a couple episodes? Here’s all our other Grow Reports
Read up on our Indoor Growing Tips!
During the vegetative stage your going to need to transplante you plant at least once. The question is when to do it, and how to do so.
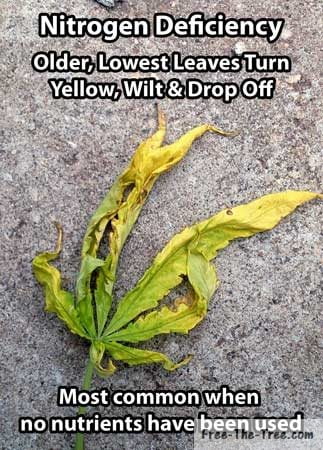
The second thing you will encounter are nutrient issues, most likely Nitrogen deficiency. It is the most common issue during the Vegetative stage, luckily easy to fix too.
Let’s get into it
Transplanting your Marijuana plant
Here we’re going to cover
When to transplant your plant
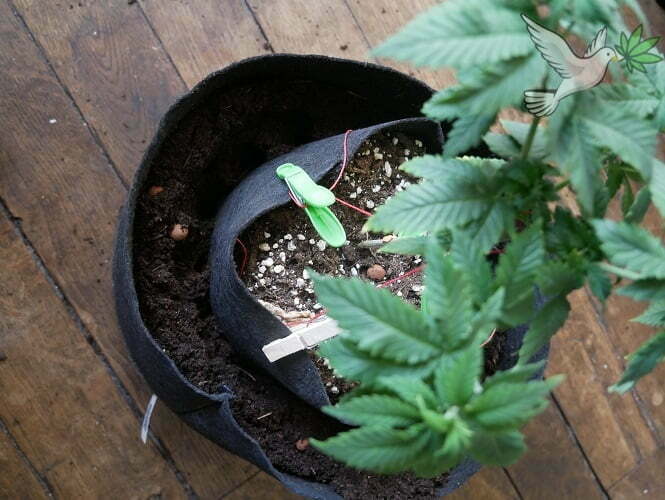
You want to transplant to a new pot when the roots have fully invaded the soil and are ready to grow into a new space.
How to find out when to transplant easily?
I find that the best way is to track how often you have to water your plant. If you’re watering every day or two then the roots have invaded the space and you should be transplanting soon.
How to transplant your Marijuana plant
- Make enough room in the soil for your plant.
If use one of your current pots to make the whole your plan will fit juuuust perfectly 😉 - Tap with your nails along the sides of the pot, on all 4 sides and all levels. This will get the roots loose in case they’re stuck to the pot
- Turn the plant up side down and try to slide the pot off, it should come easily. If it doesn’t don’t force it, just go back to step 2.
- Place the roots into the space you’ve made in the new pot.
It’s important to note that the best time to transplant is between 2 waterings, when the soil isn’t too humid, but not all dried up either
What to do after transplanting your plant
The most important thing here is to mainly water the new soil. Just like when you got the cuttings into the soil, you want your roots to invade the new soil as quickly as possible.
The best way to do this? Keep that soil more humid than the older one, so when you water your plant focus on it.
I find that adding a little more root booster at this times give a nice little boost to it.
During the next week or two you will see the effects of having more room, she’s going to love her new home!
Now that you know how to transplant you Cannabis baby, let’s get into the deficiencies and other issues we encountered during her vegetative stage.
Deficiencies during the Vegetative Stage
During this time period we got 2 main issues. The first, Nitrogen Deficiency, is one of the most common deficiencies during growth. The second, Nutrient Burn, is pretty common when you’re a noob, and even not so noob, when you don’t know your strain.
Here’s how to spot each and recover:
But before we start, ask your self these 3 questions:
- Has you pH been around 6 and 7 your last waterings? (N°1 source of problems)
- Has you’re grow space been under 30°C (85°F)?
You’re good on both fronts? Alright let’s get going.
In this section we’re going to cover:
- How to spot Nitrogen deficiencies
- What is Nitrogen deficiency
- How to fix Nitrogen deficiencies
- How to spot Nutrient burn
- How to fix Nutrient burn
- What is Nutrient burn
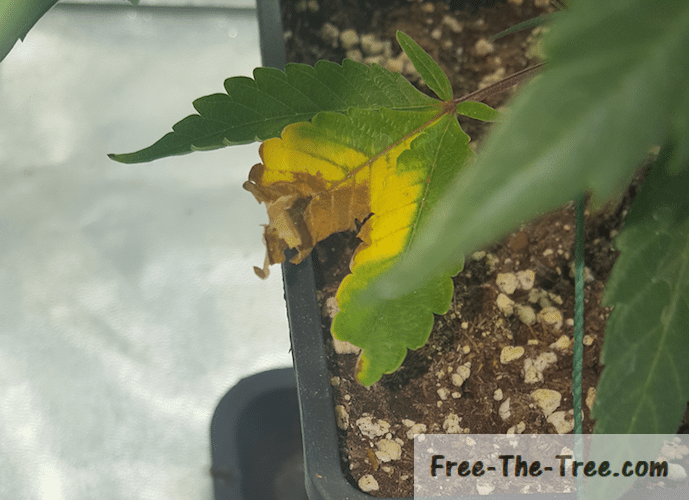
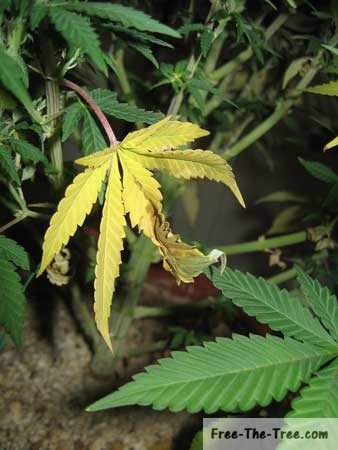
How to spot Nitrogen Deficiencies?
- Are the bottom leafs dying first?
- Are the leafs turning yellow then brown before dying?
- Is it starting from the tips of the leafs, center first?
If you’ve said yes to all 3, it’s most likely it!
So why does this happen?
Basically you’re plan needs nitrogen to make new leafs and branches. If she doesn’t have enough in her environment then she’s going to take in her stock, the leafs.
Since the bottom leafs have less chances to get direct sun light, they’re the first one’s to go (makes sens).
Now during the Vegetative Stage this is definitely something you want to avoir, you need her keeping as many leafs as possible! During the mid/late flowering stage it’s actually normal and something you want.
Wondering what all the stages of marijuana’s life are? Check out our article about it
How to fix Nitrogen Deficiencies?
- Get Vegetative stage growing mix
- At you’re next watering add a little more than the minimal brought forward on the label to your water.
- Check the pH of the water. As long as your pH is over 5.5 nitrogen will be absorbed, but remember that the sweat zone is between 6 and 7.
- During the next days keep an eye out, if the spreading has stopped you’re good.
Now remember:
- Check the pH after adding the ingredients but before you thoroughly shake the mix, although you should have mixed it with a stick a wood or so.
- The leafs that suffered damage won’t recover. Although you might want to remove them I wouldn’t do so except if they just fall off.
Why you say? They still have some stock in them, so the day your plan has another deficiency she’ll take from this one instead of attacking one of your clean leafs.
Now at the other end of the spectrum, nutrient burn… I’m covering this right after the Nitrogen Deficiency since that’s how it happened, by fixing that issue I had open a whole other one, and what a pandora’s box
How to spot Nutrient Burn?
- Did you recently water your plant with extra nutrients?
- Are the tips of the middle of your leafs starting to become black/brown?
- Does it progress from the middle down through the leaf
- Do you start to see it appear at different area’s of the plant and spreading quickly?
If your saying to yourself, yeah that’s exactly it, chances are you’ve given her too much nutrients, and now they’re killing her.
Do you feel like all is lost? No worries here is how to get out of the situation.
How to fix Nutrient Burn?
In order to fix nutrient burn you’re going to need to flush your soil, that’s the only way. What do I mean by flushing your soil? I mean at least getting 2 times the volume of you’re container in plain, pH’ed water through your soil.
You heard me right and it’s important, you can’t just add a couple of liters in there, or else you’re actually just going to let more nutrients out, causing more harm then good.
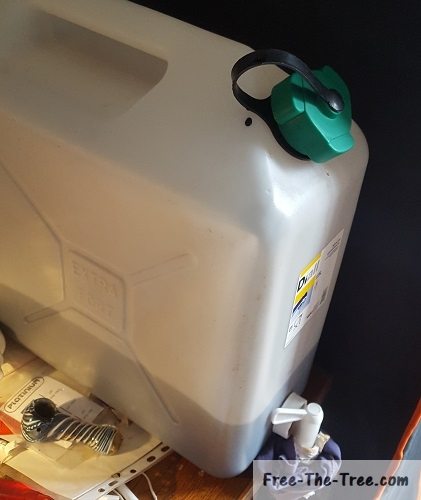
So, what do you need to flush your soil?
- A recipient that can hold 3/4 times the volume of your container in water
- 3 times the volume of your container in plain, pH’d water. Get your pH around 6.5
- An area where you can have everything near
Once you’ve got all of this ready get flushing.
How to flush your soil:
- Place your plan within the empty recipient
- Poor 3 times the volume of your container with the pH’d water you’ve prepared
- Get your plants back into the grow room
During the next few days you might see your plant get droopy with signs of over watering but it’s normal. They’ll get better as the medium dries out.
Now that you know how to identify and fix this issue with your Marijuana plant, let’s look into what this is exactly
What is Nutrient Burn?
Just like taking too many vitamins is harmful to us humans, too many nutrients in the soil is harmful for your plant.
The roots, doing their job, will take in all these ingredients and send them up to the “out of the ground” section of the plant where it is used for different tasks, if the plant doesn’t need it she stores it in here leafs. When there’s no more “room” within these leafs, well that’s when the issues arrive. The access ingredients having no where to go from there start killing the leaf.
This is the reason why we see it start from the extremity of the leaf and slowly grow inward.
Well folks that’s all for this one, be safe and grow easy!
Hi there and welcome to the 8th week of the flowering stage!
Sorry for being late posting the grow reports, we’ve been working hard on getting the Strain&Seed comparison tool up and running 🙂 We’re still working on the styling and getting many more stores, strains and characteristics but soon enough it’ll be awesome ^^
I’m getting off topic here, this past week a lot has been going on in the grow room. The smell is just crazy (my neighbors started to complain…), the buds are getting thicker and thicker, just looking beautiful. We’ll also get into the topping of Cheese plant and harvest a BBC bud.
On the negative aspects, we’re still manually hunting thrips manually, which is oh so fun… and the Calcium deficiency is still spreading a little, which was expected.
This week we also decided to germinated 4 seeds for the next batch. Their seedling stage will overlap with the flowering stage of our other buds allowing us to save about 3 weeks time.
Next round we’ll be growing 3 Blue Kush’s and 1 Critical + plant
Here’s some links if you want to skip straight to a section:
- Calcium deficiency spreading
- Topping the Cheese Apex Buds
- Harvesting first BBC Buds
- Buds Fattening up
- Starting Seeds Germination
Calcium Deficiency still Spreading
We’ve been treating the plant for a little under 10 weeks now and as you can see on the image on the right, the deficiency is still spreading.
Since Calcium is an immobile nutrient it depends on the plants transpiration is order to move around. Within the next couple days the spreading should stop.
This deficiency definitely gave the plant a hard hit leaf mass wise..
Topping the Cheese’s Apex Bud
If you’ve been following this grow then you’re aware that our cheese plant’s stretch was pretty massive and we’ve had to deal with a very un-even canopy ever since.
Although we had super-cropped the Apex, the plant was still was still waaaay to tall and shading the two on each side, and now that the trichomes are starting to be nice we decided to go ahead and top the Apex.
It could of definitely grown more, and denser, but now all the buds underneath have direct access to light AND she isn’t shading as much the Blue Kush and the Blue Thai
Cheese before being Topped
Cheese after being Topped
Nugget harvest and Pruned, ready to be dried & cured
I won’t lie, it did kind of hurt to chop down this bud, especially since the Apex generally’s the best bud on the plant ^^
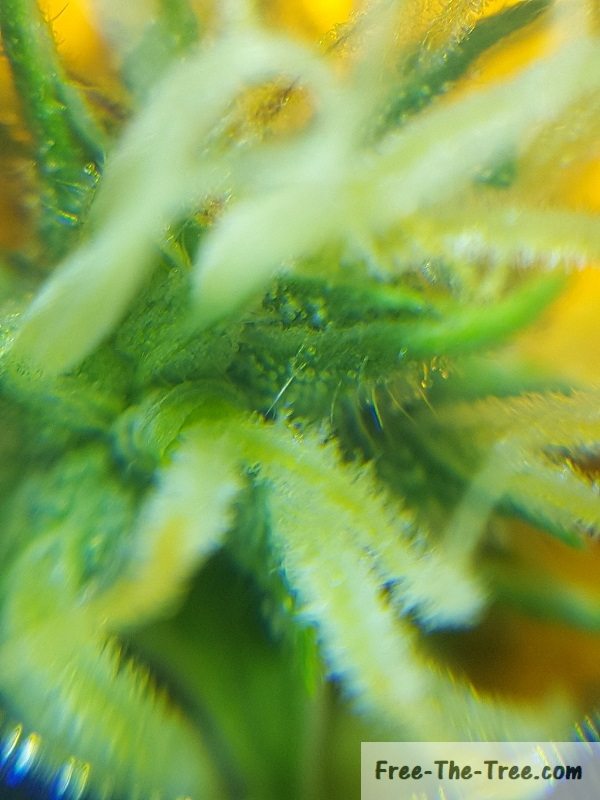
It’ll give us an early taste of this cheese, although it isn’t ready.. Here’s what her trichomes looked like
Mostly Milky Trichomes of the Cheese Strain
Trichomes under the Scope
Harvesting the First Big Buddha Cheese Bud
Our 2 big buddha cheese plants are really massive and it’s difficult for us to really be able to see the trichomes. Normally within 55-60 days of flowering she’s ready and were nearing the 60th day now.
With all the deficiencies they’ve had we’re pretty sure that they’re no where near ready but we still decided to go ahead and harvest a bud.
We chose one that’s near the Blue Thaï, compressing her and not giving much room to breath. This move will at least have the benefit of giving a little more room for her.
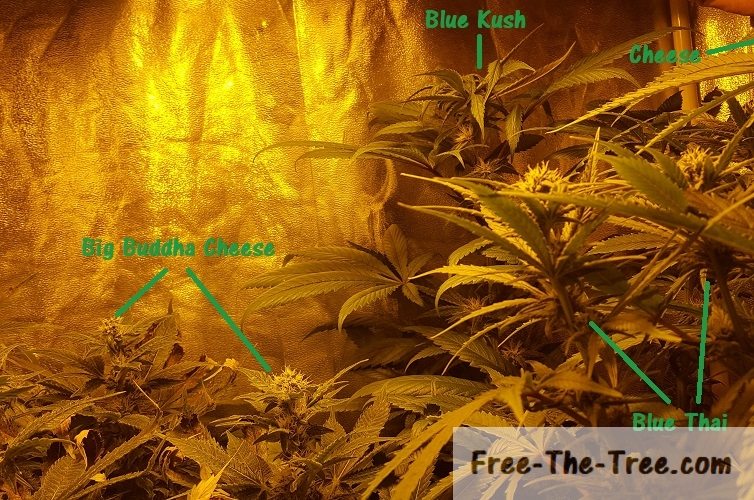
Big Buddha Cheese 8th week of flowering stage
Small BBC Flower harvested
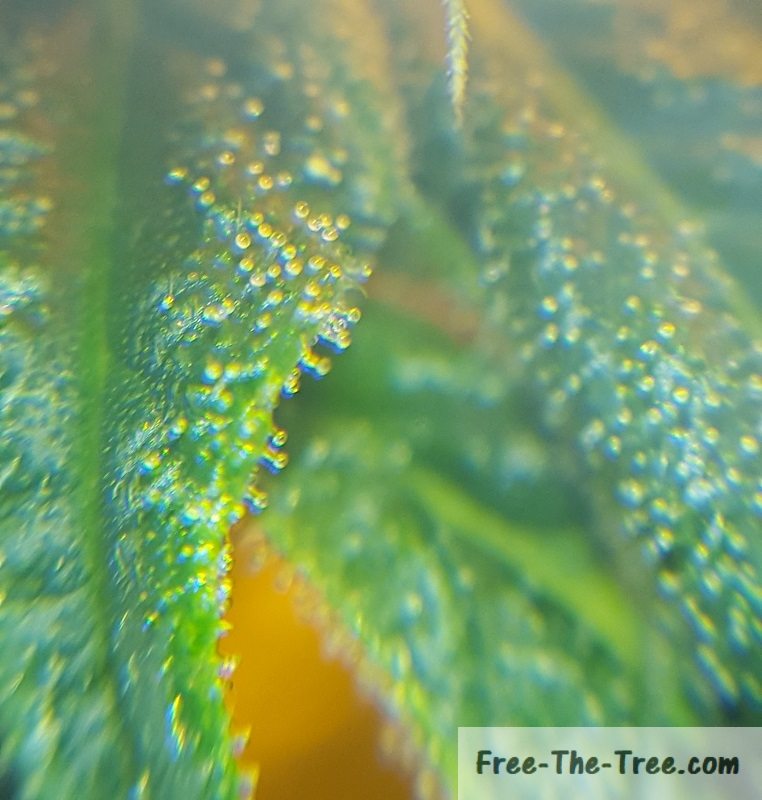
Trichomes all over the Pistils
Trichomes on the leaves
Buds Fattening Up
During the past couple weeks the buds have been getting fatter and fatter, the pistils keep growing, the smell is getting extremely strong and really they’re looking awesome 🙂
Looking at the small bud further up as well as the others, I think that we’re about 2 weeks out in order to harvest the Cheese and the Big Buddha Cheese and maybe a week more for the Blue Kush and Thai. With this in mind we’ve decided to start flushing the plants little by little.
For the next watering or two we’ll reduce the amount of nutrients (except for the Calcium), then just give them pure water (still keeping the molasses though)
Here’s a couple picture of them at the end of the week
Cheese Buds fattening after topping
Horizontal view of Big Buddha Cheese multiple Cola’s
Close up on BBC flower developing
Germinating the Next Seeds
Since there’s about 2/3 weeks left in the flowering stage of the current grow we decided to go ahead and start the germination of next round in order to save some time.
Since plants don’t need that much light during the seedling stage, we’ll keep them under a side light for the first couple weeks, until we harvest this round.
Kush and Critical Seeds Germinating
Tap root breaking the seed shell
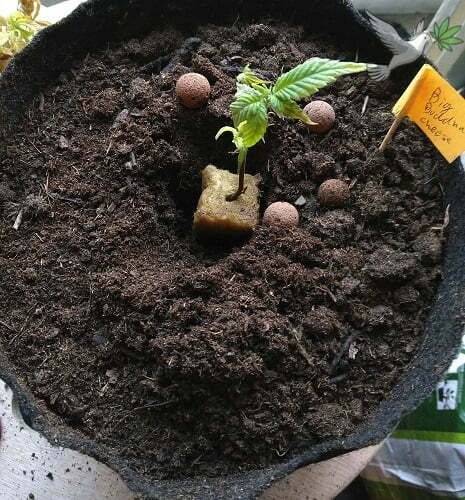
4 Germinated Seeds planted into medium
We decided to germinate 3 Blue Kush’s and 1 Critical+.
We’re going to do a quick round with those, do a LST and try to get some little fat bonsai’s for that round 🙂
Alright folks that’s it for this week.
Until next time, Be safe and grow easy!
Miss a couple episodes? Here’s all our other Grow Reports
Read up on our Indoor Growing Tips!
Hey there and welcome (back) to Free The Tree!
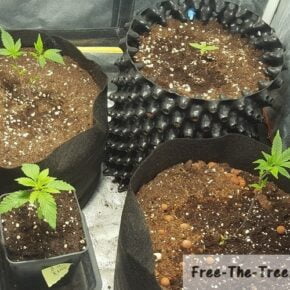
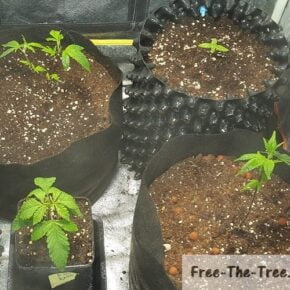
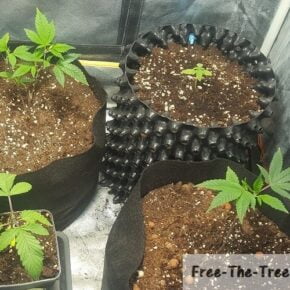
Today we’re going to go over the 3rd week of our current culture. The two main things that happened this week is the fact that we transplanted our 2 Big Buddha Cheese plants into fabric pots and… Thrips started showing their faces again!
We had the issue during our previous culture and hadn’t seen their faces in over a month.. Really though we had dealt with all those suckers.
We’ve already done a couple articles on Thrips so we won’t go in depth about it but here’s a couple links if you want to know more about them.
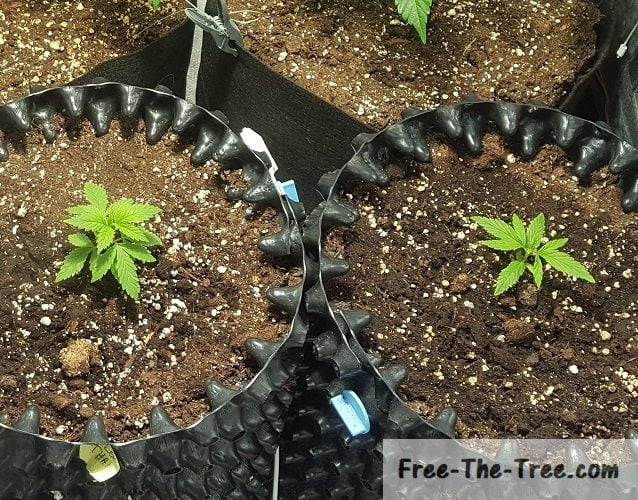
Transplanting the Big Buddha Cheese Cuttings into Fabric Pots
You may have noticed that in our previous report we placed our Cheese and Blue Thai strains in Air Pots. With these 2 Big Buddha’s and the 1 Blue Kush remaining we decided to go for fabric pots, allowing us to test out the differences between each and maybe determine which is best. We’ll see in a couple weeks of one or the other performs best.
On the transplantation side, we already did a full guide on Marijuana Transplantation this way if you want to know more, here we’ll just share a couple pictures of the process.

BBC before transplantation

BBC in its new soil
Cured plant after transplantation
As you can see we decided to cure the plant as soon as we transplanted her and we didn’t go easy on them.
The reason behind this is that all her previous leaf mass was damaged due to stresses on travel. Bear in mind that these were branches not that long ago.
The objective of this cure is for her to grow a nice, new, leaf coverage that will allow her to photosynthesis the light in the optimally.
Here’s a before/after curing our other plant
BBC before curing
BBC after curing
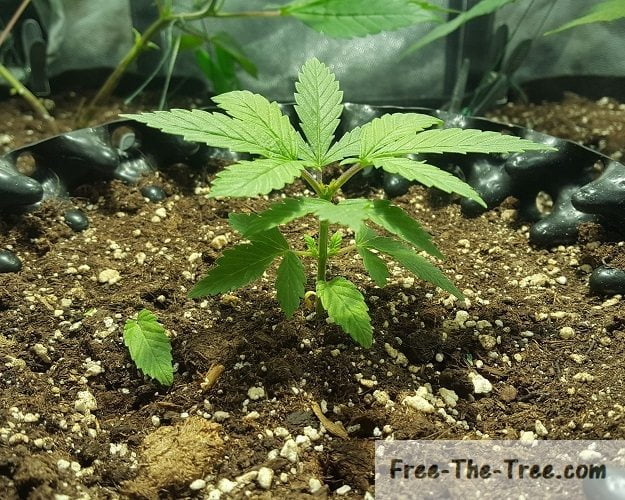
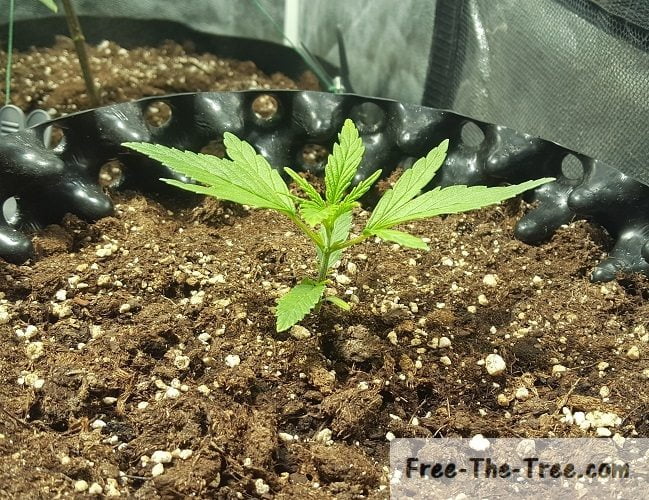
Now you might be thinking “they’re crazy, those plants don’t have enough leaf mass”, especially for that first one. You’d be surprised how well marijuana (aka weed) adapts are grows, here’s a couple pictures just days after the transplantation (as always, click on the picture to get a full view)
2 days after transplanting
5 days after transplant
(leaves are wet)
7 days after transplant
You see? in just a week both plants grew back enough leaf mass to get back to growing, some new branches are starting to come out, they’re going to be perfect for our scrog! 🙂
Sidenote: The droopyness of the Blue Kush (bottom left) are the first signs are the roots being blocked, this is what happens when you wait too long to transplant.)
Thrips are back!
During this week we also got a pretty nice come back of Thrips, we killed at least 15 larva’s by hand and removed the Apex of the most infected plant.. Thankfully we’re going for a scrog so it was necessary anyway.
Our preferred option to deal with Thrips is by using Neem Oil since it’s totally natural and easy to use.
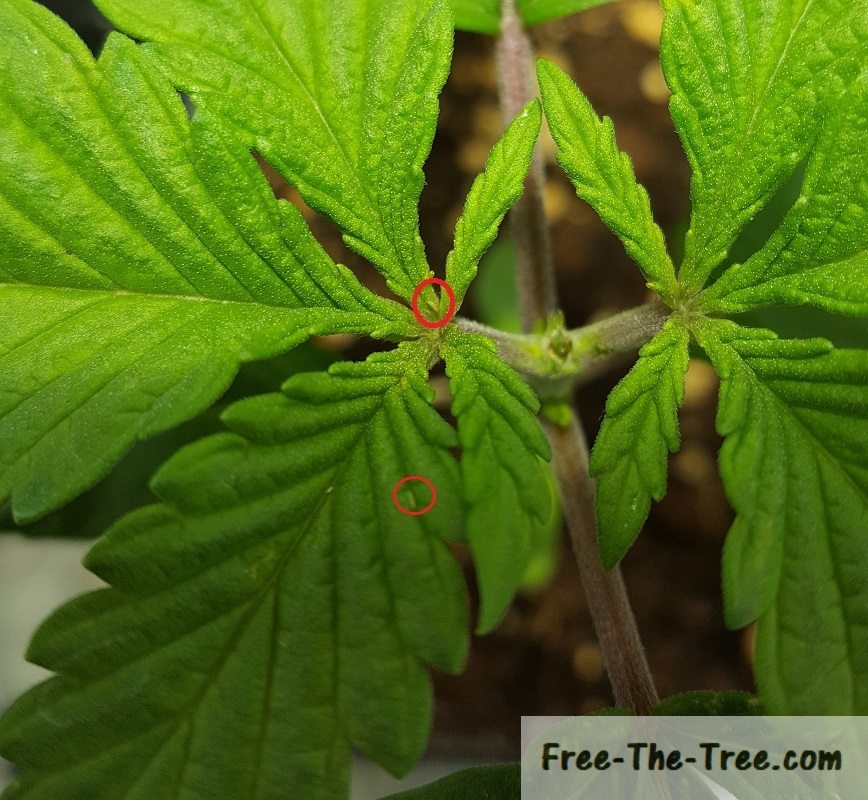
2 thrips larva’s on leaf
Neem Oil sprayed on Marijuana plant
Since we didn’t have any on hand we had to wait a little week in order to receive it my mail. While waiting for it here’s what we did in order to prevent spreading:
- Increase the humidity and drop the temps: As we’ve covered in our other articles linked above, Thrips like warm and dry weather.
We kept the grow room at at least 50% Humidity and tops 23°C - Get it windy: They also like still environments so we got our fans pointing of the leaves of our plants.
- Hunt: We decided not to wait, as soon as we’d spot a Thrips larva we’d kill it.
Every time it’s one less eating up your plant and laying eggs. - Spray your plants with warm water. About 15 minutes before lights out we’d spray warm water all over (and under) our plants.
These steps won’t get rid of all the Thrips but it’ll definitely slow down their spreading and the damages done to your plants.
Once we received the Neem Oil we’d repeat step 4 but adding the Oil in the water. This was done 3 days in a row, then we waited a couple days and re-sprayed the plants.
Haven’t seen more signs of those nasty suckers since.
Alright folks that it for week 3!
See you guys for next weeks update, until then be safe and grow easy!
Don’t want to go just yet? Check out our other Indoor Growing Tips
Check out our Babies! Every week there’s a new grow report 😉
Hey there and welcome (back) to Free the Tree!
This week we finally got enough soil to transplant the Blue Kush plant which started showing some Phosphorous issues which got us a little worried.
Apart from that we also finally received the Neem Oil to start application on the plants and get rid of these nasty little Thrips; Let’s get into it.
Blue Kush Phosphorous issues and Transplantation
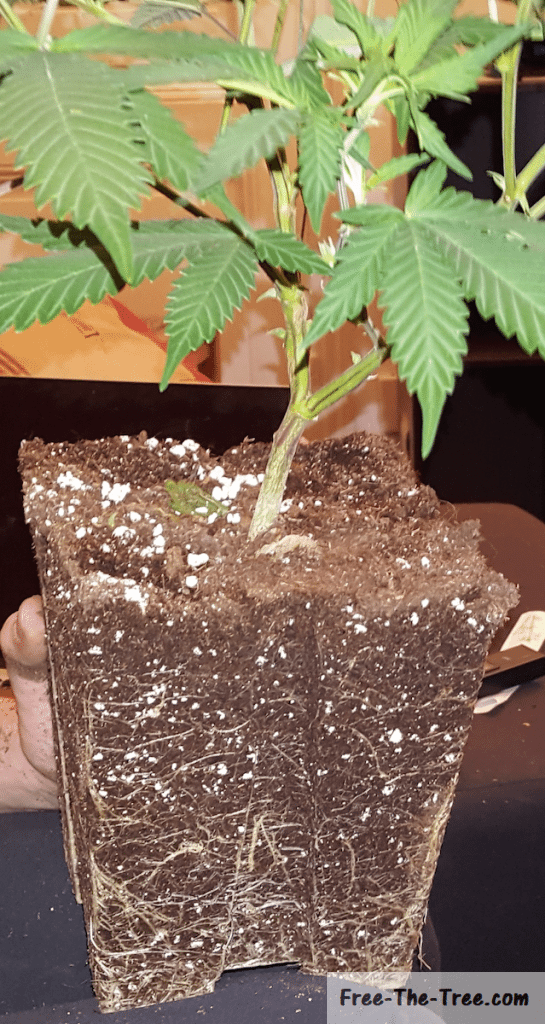
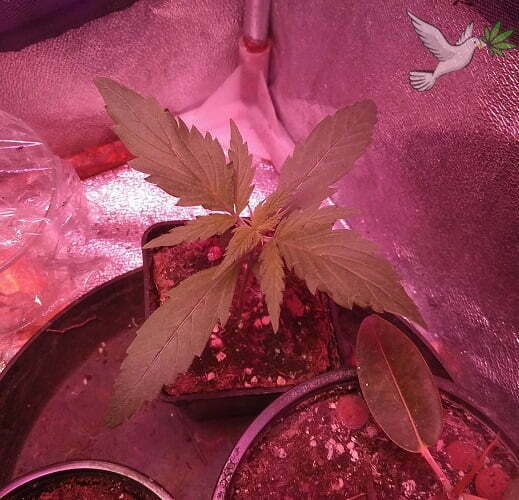
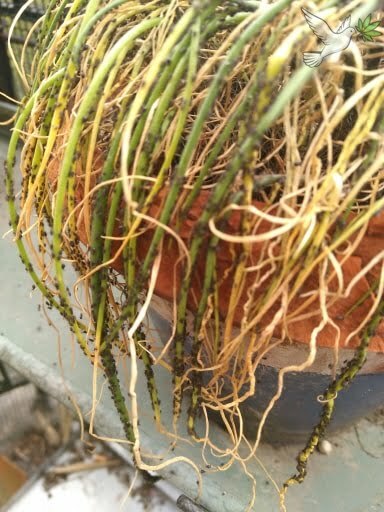
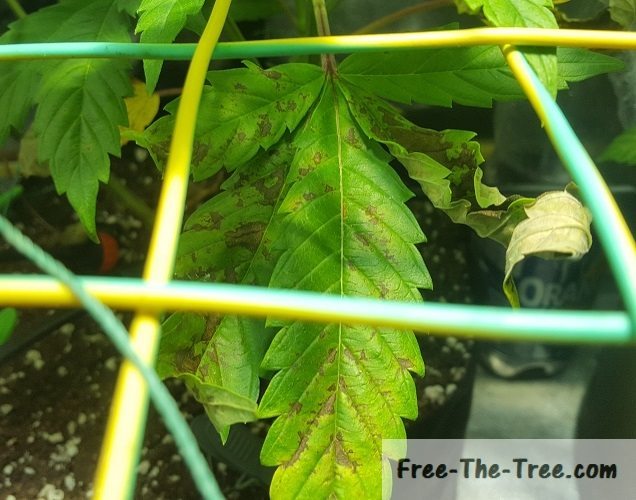
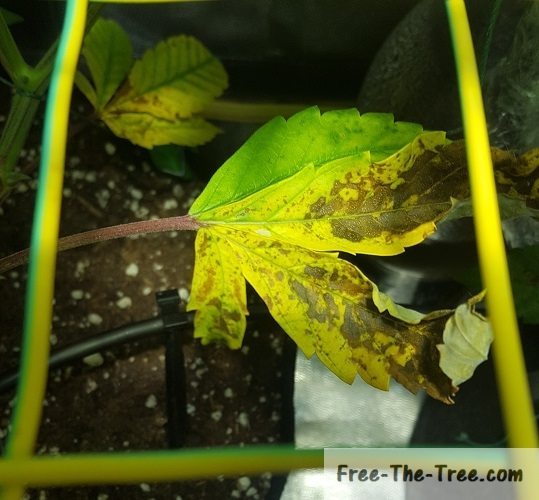
We had definitely waited way too long to transplant this little one, the roots started coming out the bottom of the pot, the veins of the leaves were turning purple, safe for the underside…
She also had totally stopped growing which really had us worried. He’s some images, but before that check out our article on transplanting a weed plant if you want to know more.
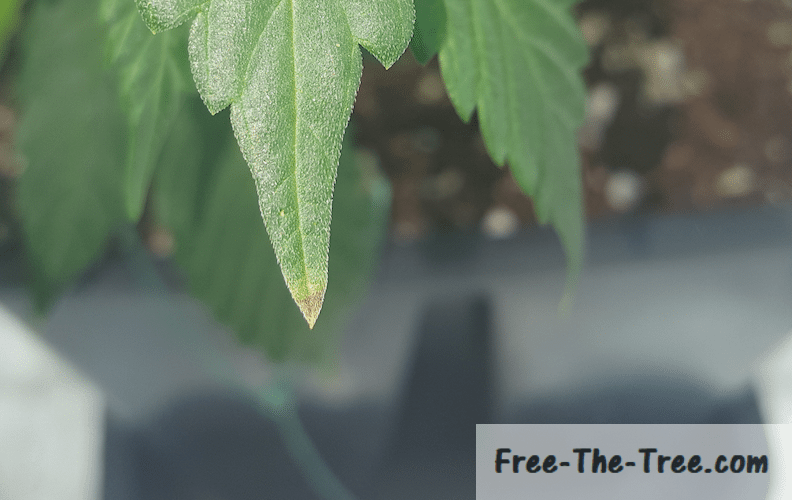
Blue Kush Phosphorous issues
So this was the first time it had ever happened to us, the plant had stopped growing, the veins and the bottom side of the leaves were turning purple.
Here’s a couple pics, as always you can click on them to get the full view.
Leaf turning Purple – Signs of Phosphorous issues.
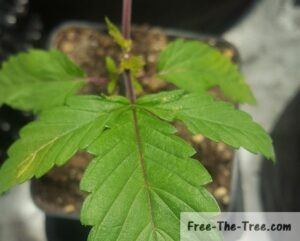
Main vein turning Purple and stopped growth.
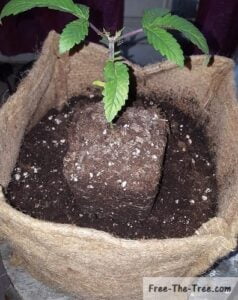
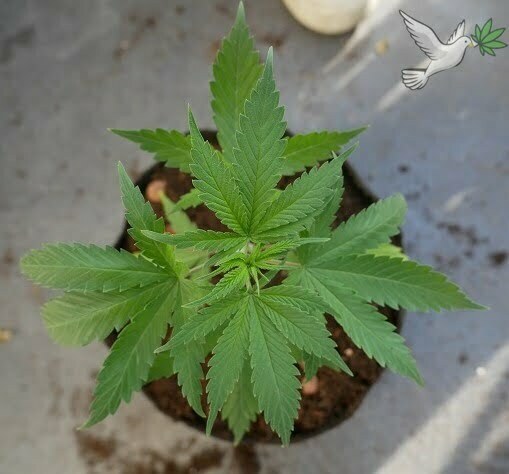
Growth starting back up after Transplantation.
Transplanting our Blue Kush
We definitely waited waaaay to long to transplant this little one. The main reason why was that I didn’t have enough soil so really couldn’t..
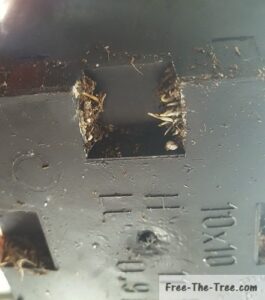
Roots starting to stick out of the bottom of the pot.
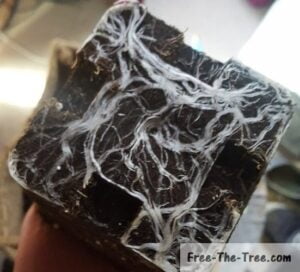
Well developed root system of the Blue Kush
Well developed root system of the Blue Kush
As you can see with in those 2 first pictures the roots were definitely blocked and compressed, which easily explained why the plant had stopped growing and the Phosphorous issues.
Since the roots of the plant is her only way to get nutrients from the soil to the top of the plant, by having them so compressed there was no way she could develop well.
During the couple days following the transplantation she started showing signs of growth right away which definitely reassured us.
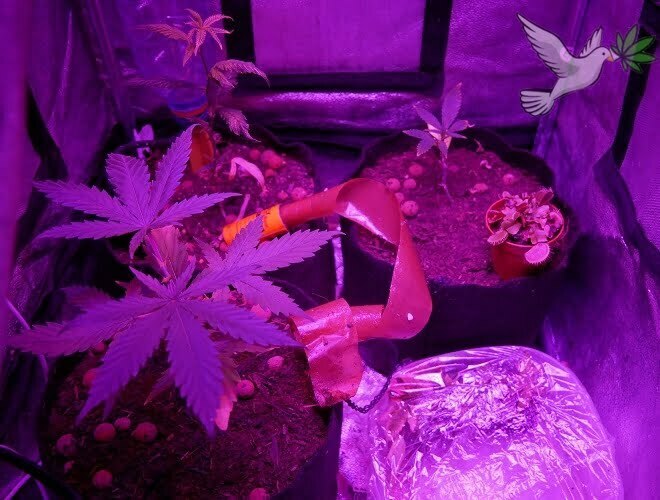
Thrips Treatment continuing
During this week we’ve been spraying the plants about 15 minutes before lights out every other day. The objective of this is to kill any survivors or newly hatched Thrips that could start the infestation back up.
Since the first treatment we’ve only seen 1 larvae on the plants so it seems to be working pretty good. Really hoping that this is the end of this infestation, but just to be sure we’ll be spraying neem oil every couple days for the next 10 days.
We grouped together all the info on how to kill Thrips over here if you want to know more.

Bottle of Organic Neem Oil
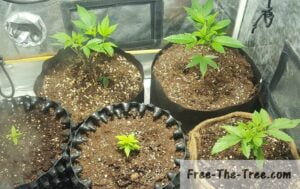
5 Plants at the end of 4th week
Alright guys that it’s for this one, until next time
Be safe and grow easy!
Don’t want to go yet? Check out our other Grow Reports
Check out all our Indoor Growing Tips
Hey there and welcome (back) to Free the Tree!
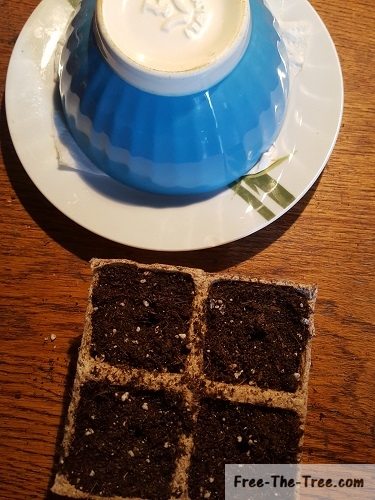
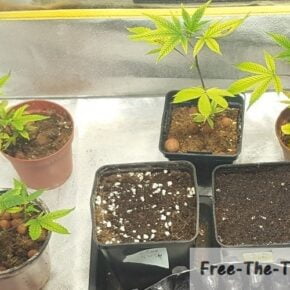
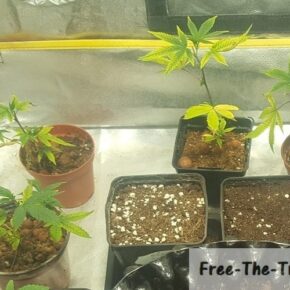
This week was pretty cool, we received 4 beautiful Big Buddha Cheese cuttings, most our seeds broke the ground and we transplanted most our plants into air and fabric pots. Let’s get into it.
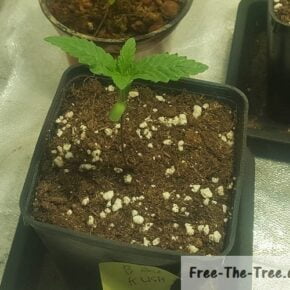
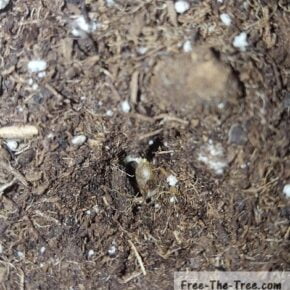
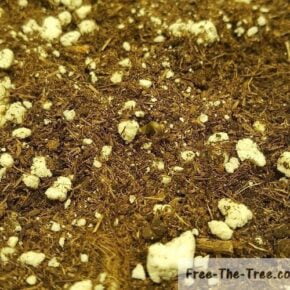
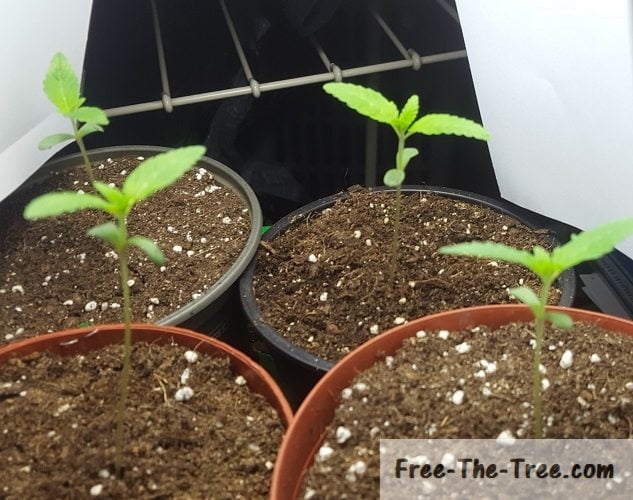
First Cannabis plants sprouting
Within a couple days after planting the seedlings, the first plants started to sprout. As we started to say in the previous post, we weren’t going to make the same mistake as last time so we got these little guys straight into the grow room.
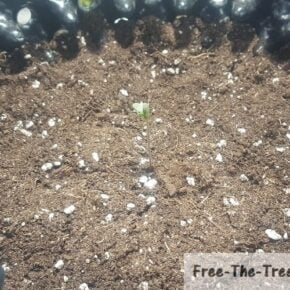
We installed a CoolTube since last grow so our heat issues are under control and not an issue anymore. Here’s a couple pictures of them breaking the ground
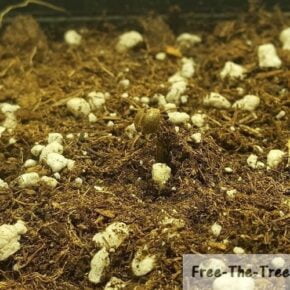
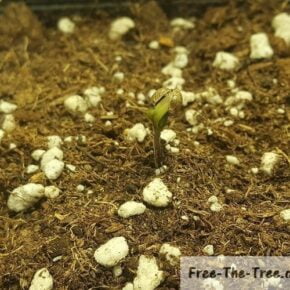
These 3 pictures were took within 24 hours, isn’t it crazy how quickly things happen at this point in time?
Down under the soil, their root system are starting to grow and conquer the space.
Big Buddha Cheese cuttings
A friend of ours that lives in the state next door has been nurturing a BBC strain for a couple years, increasing its strength and Render.
Our first plant was a cutting from her, you can check out the couple articles we’ve done on that grow here, needless to say we’re really excited to get another crack at her 🙂
He had really we prepared them for us, although they did have a couple deficiencies going since we waited a little too long to get out there.
Here’s what they looked like during the first couple days (as always, click on the picture to get the full view)
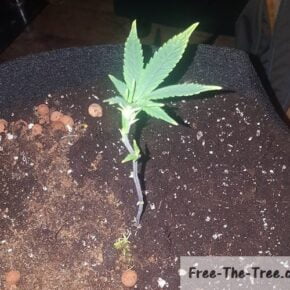
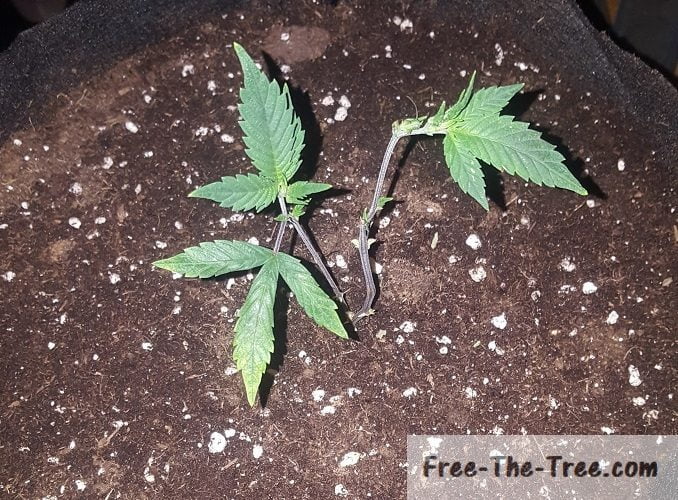
After receiving these little ones we needed to give them a couple days to get recover from the stress of the transport and all, after which we will select 2, transplant to larger pots and defoliate them so that they quickly grow new and healthy leaves.
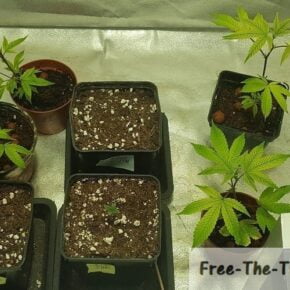
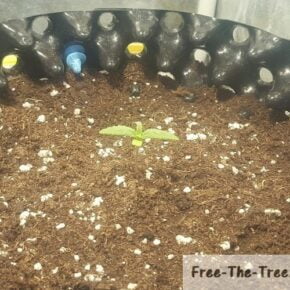
Air pots and last sprouts
By the end of week 2 all our seedlings had sprouted apart from the two seeds that died (RIP).
We also decided to get 2 of our plants into our air pots right away. We also hesitated to transplant the BBC plants but decided to wait another day or two.
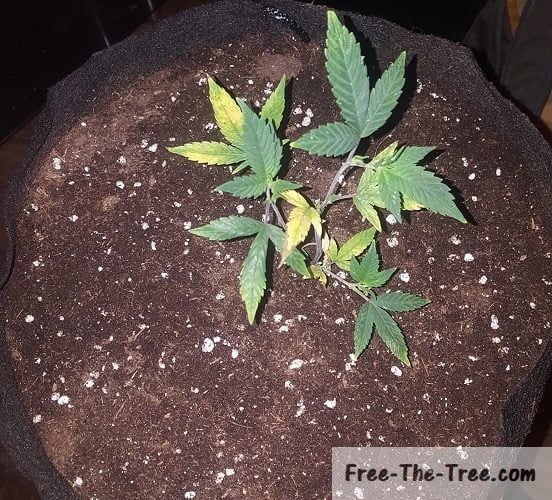
On the other hand, the Blue Thai (BT) and Cheese plants are really growing slowly, whereas the Blue Kush, that sprouted after the BT had already grown nice first leaves.
We’re not sure if it’s due to the fact that they’re in the Air pots while the BT is in regular pots, but that would seem logical.. We might have been better to wait a little before getting them in those pots. Check them out
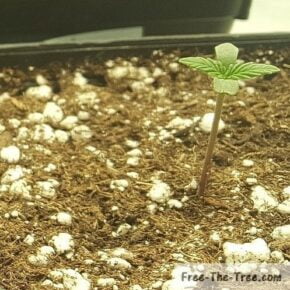
Cheese plant just breaking the ground
Blue Thai growing first stage leaves
Blue Kush in the early Vegetative Stage
Now like we said, that Blue Thai had actually broken the ground before the Blue Kush, see how much of a difference?? I really feel like it was an error to get them that quickly into the air pots that quickly.
Well folks that brings us to the end of week 2, see you guys next week 😉
Until then, be safe and grow easy!
Don’t want to leave just yet? Check out our other Grow Reports
A question? Check out all our Indoor Growing Tips
Hey there and welcome (back) to Free the Tree!
So this is the first post of this new grow journal series, it’s going to be an exciting one 🙂
Here’s what we got in store for this report:
Marijuana Strains: This time around we’re going to grow 4 different strains. Now generally this isn’t the best idea since flowering times and nutrient needs can, and generally are different.
So we made sure that the flowering times were all about the same and hopefully their nutrient needs will also be about the equal.
Here’s the four strains were going with this time around:
- Blue Kush
- Blue Thai
- Big Buddha Cheese (cuttings)
- Cheese
We should have some beautiful plants and pics for you by the flowering stage.
Here’s the context of the grow:
Soil: Still using the a non-enriched medium
Types of pots: We’re doing a test on this one, we’re using Air Pots, Fiber Pots and regular pots. We decided to do a test between each to see what the renders of each are.
Lighting: 400W HPS for the vegetative stage, then we’ll switch to a Sodium light
Let’s get into the nitty gritty of this post, the germination of the seeds and the first days in the grow house
Germinating the marijuana seeds
We did a full “how-to” on germinating your marijuana seed a little while back so we won’t go back over each step in detail, don’t hesitate to go check it out if you need more info than what’s given here.
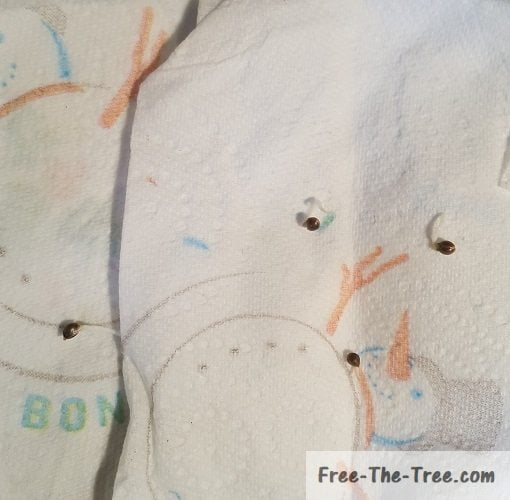
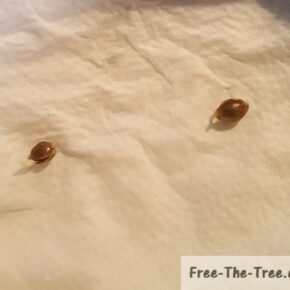
The tap root of each strain really didn’t come in the same time. The Blue Thai’s tap root broke the seed in less than 2 days, whereas the cheese plant took about 3 days.
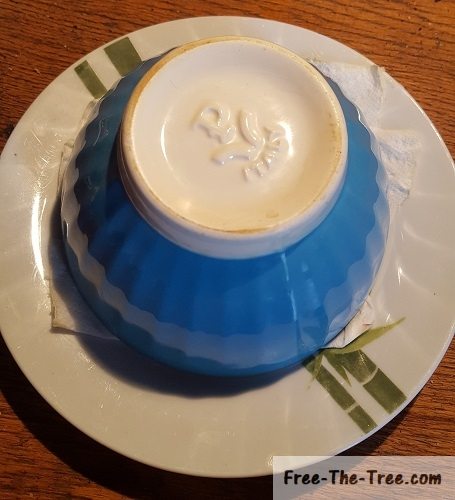
Here’s a couple pictures of each step of seed germination, as always you can click on them to have a full view.

Seeds just set in wet paper tower
Tap root breaking the shell
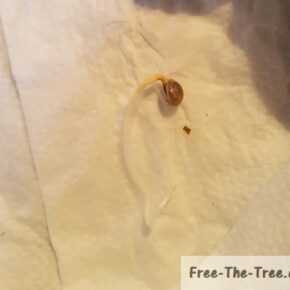
Blue Thai’s Huge Tap Root
As you can see, we waited a little long with the Blue Thai seed and it developed a huge tap root. To be honest it kind of scared us but it the end definitely not an issue 🙂
Planting Germinated seeds
Once the tap root is a little over a centimeter long it’s time to get them into the soil, about 1cm down.
Within a couple days you’ll see the sprout breaking the ground. As soon as that happens within 24 hours you’ll see it stand straight, get rid of the shell and fan out her first leaves to capture the light. It’s pretty beautiful to watch.
This time around we didn’t make the same mistake as last time when we left the light source too far away for the sprout, making the plant stretch for the light source.
Here’s these steps in image:
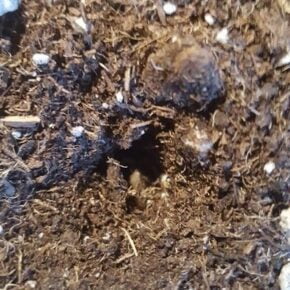
About 2cm Hole for the Seed
Cannabis Seed in soil
Blue Thai’s Huge Tap Root
Most of the seeds broke the ground within 2 days after planting them, although we did lose one Cheese and One Blue Kush seed that died in the soil… The cheese taproot had started to dry up within the paper towel, giving it little chance to develop within the ground. The Blue Kush one I think we mismanaged the watering of the soil, killing it within the ground.
By this the time the last picture above was taken it had been exactly 7 days since we had placed the seed in the soil, closing the first week of this grow.
Until next time, be safe and grow easy!
Don’t want to leave just yet? Check out our other Grow Reports
A question? Check out all our Indoor Growing Tips
Hey there and welcome (back) to Free The Tree!
This week was pretty full of events, possibly too much to cover in just one post.
We kept on training our smaller plants for the ScrOG, did a cutting on the Blue Kush for a friend, started implementing automatic watering solutions and installed the Screen to start weaving the branches!
While all this was going on, our BBC’s started showing signs of Potassium deficiency and these darn Thrips keep on coming back.. pretty intense for just a week no?
Let’s get into it, but before that here’s some links if you want to go straight to the section that interests you.
- ScrOG plant Training (Part 2)
- Installing the screen of Scrog
- Signs of potassium deficiency
- Blue Kush Cutting
- “Automating” our watering system
Keep in mind that we won’t go into each section in depth, but we will link to our articles where we do cover these subjects in depth if you want to know more, let’s get started!
Plant Training Continues
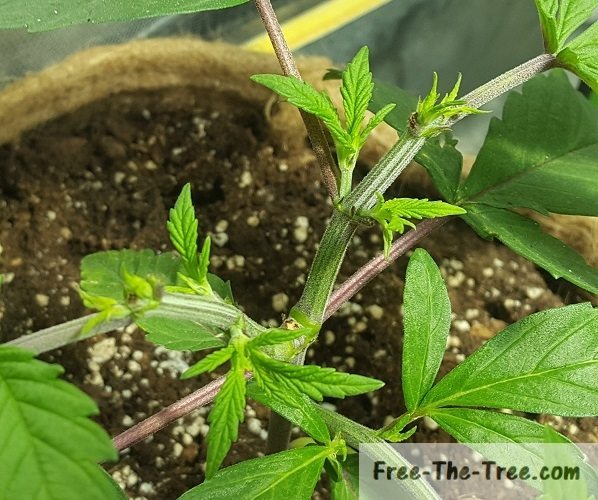
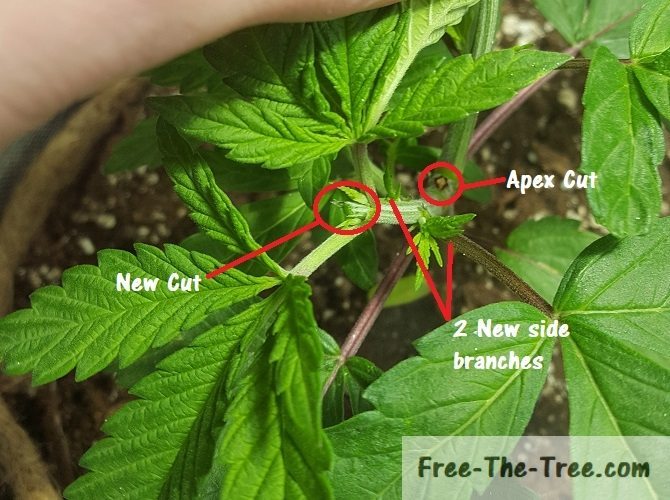
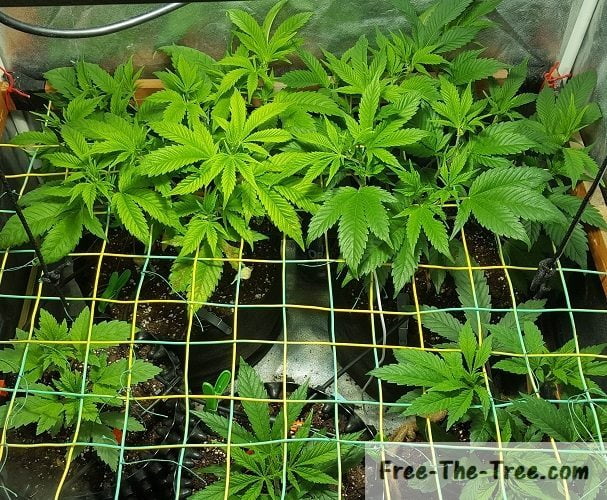
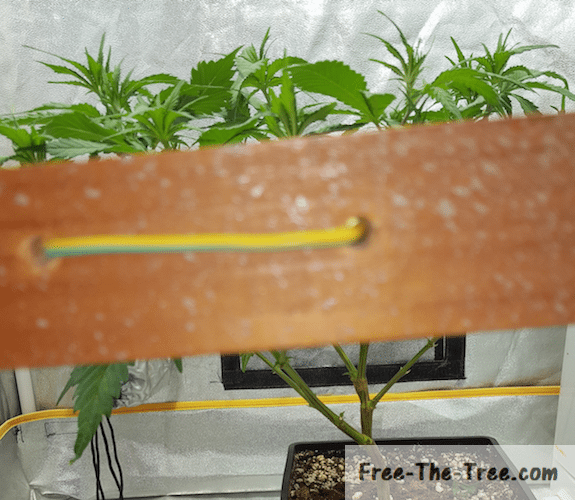
As a reminder, at this point we had just recently cut the tip of the 2 new branches. Doing this increases the energy sent to the 2 side branches growing at the spot where the knot is.
We decided to stop here, but you can keep of cutting the tops at each new stage for her to keep dividing and producing more side branches.
Step 5 – Wait until the branches reach the screen
Once you’ve decided that you have enough branches you’re going to have to wait for them to grow up and reach the screen in order to start weaving the branches.
You should try and pass the branches and leaves through the screen as soon as she can reach, this will push her to grow faster 😉
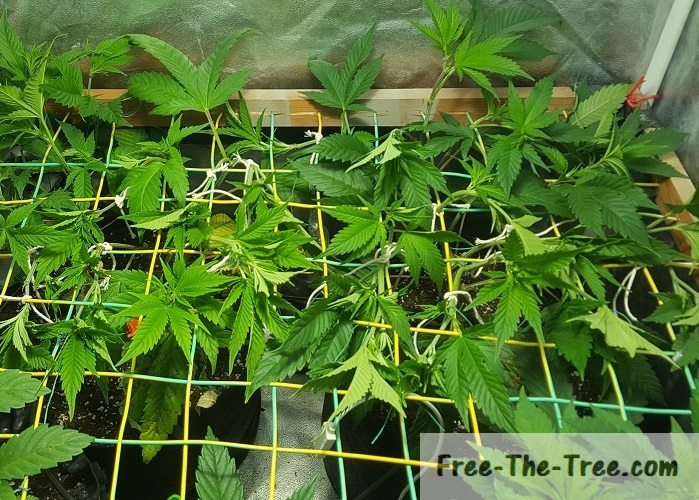
Step 6 – Weave the branches on the Screen.
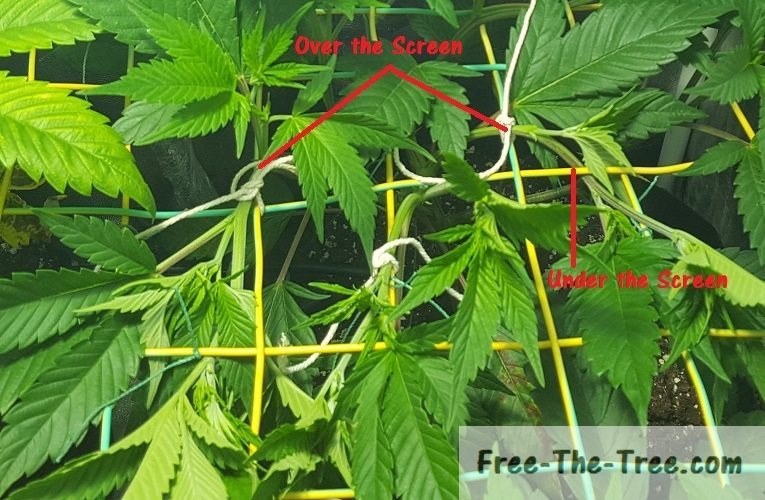
After a couple days your plant will have grown enough and will start passing through the screen. At this moment you’re going to want to start guiding the branches over and under the screen.
This will allow the plant to develop some more branches that will grow vertically, increasing even more your final yield.
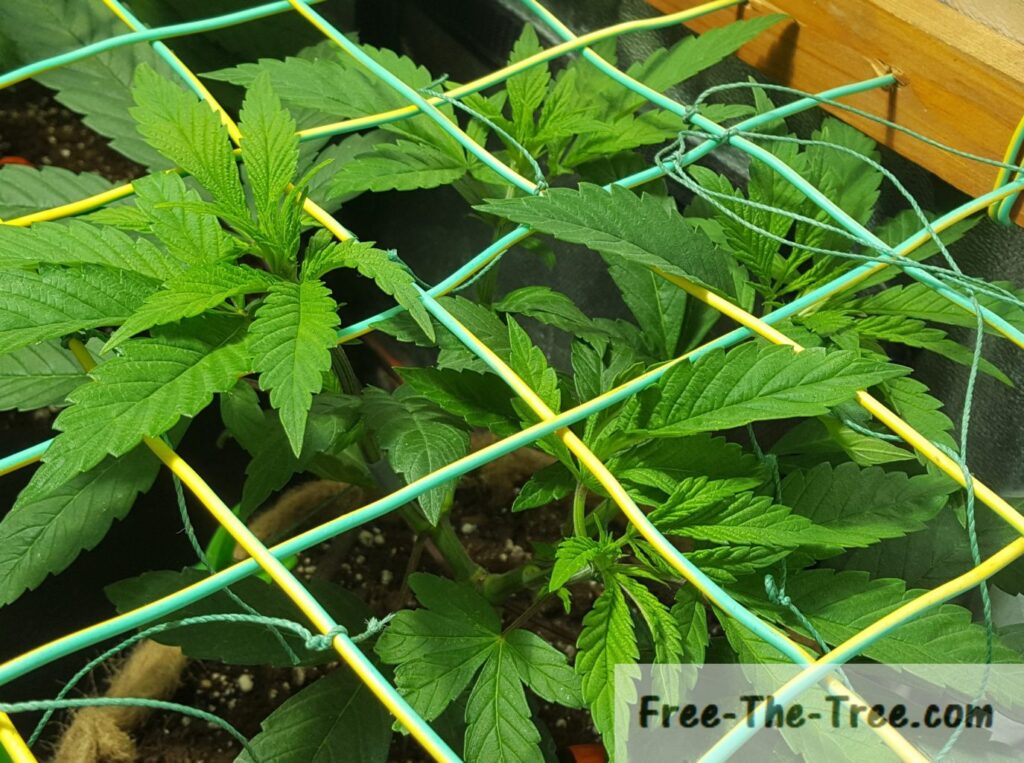
Installing the Screen for the SCROG
Although half our plants aren’t really tall enough to weave, the Big Buddha Cheese plants so far ahead that we need to get them scrogging;
The main issue being the height difference between the plants, if we hadn’t done this, by the end of the stretch we would have to choose between light burn on the BBC’s of not enough light penetration for our other plants.. Hard decision.
To avoid this we started to weave the plants on the screen, and clipped any branches that are growing too high up.
We went in depth on attaching the screen over here if you want to get the step by step process.
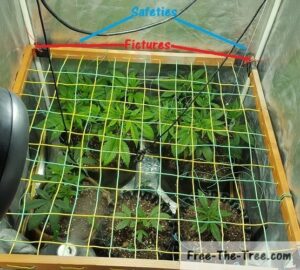
Screen attached in the grow room
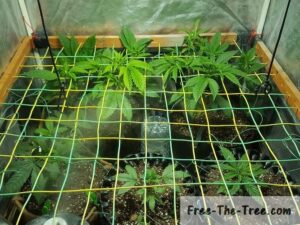
Screen lowered to Apex level
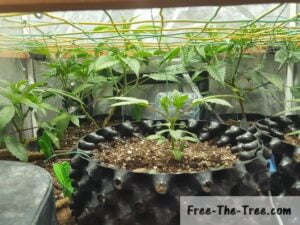
View under the screen
First signs of Potassium Deficiency
During this week one of our Big Buddha Cheeses plants started showing the first signs of Potassium Deficiency which isn’t cool.
We wanted to get the flowering stage started within a week, but since Potassium is one of the Nutrients that push the plant to flower, we must solve this deficiency before doing so.
We did a full guide on potassium deficiency, linked below, but basically in order to solve this issue you need to increase the amount of potassium given to the plant during the next waterings.
Making a Cutting from the Blue Kush
I don’t know if you’ve noticed in the previous posts, but we had kept a strong side branch the whole time without ever mentioning why.
The reason behind this is that we want to make a cutting from it for a friend so that he can have one of these beauties also.
We’ll just put a couple pics of this cutting here, but check out our article on doing cuttings if you want to know more
Tools needed to make a cutting
Removing the branch for the plant
Cutting growing in the tent
Unfortunately this cutting didn’t take, we couldn’t keep the humidity level high enough for her, so she started sweating and died.
Once the plant reaches the screen we’ll prune the top of one of two branches in order to give it another run.
Automating the watering of Marijuana
Automating our watering system is really something we’ve been thinking about for a long time since it’s so time consuming. On top of that, this time around we’re using much bigger pots than before, meaning even more time to water… And honestly, we just didn’t have the time anymore to do it well.
We tested different techniques, that we’ve grouped together over here.
We’ll only show you our final setup that is now fully functional, saving us a looot of time
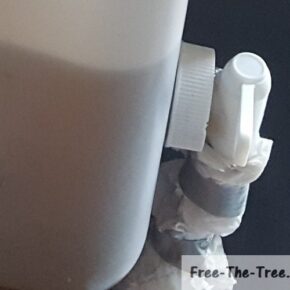
Watering mix in the container
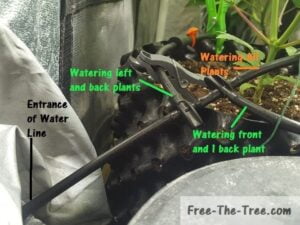
Water line entering the room
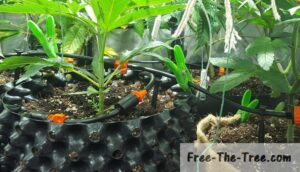
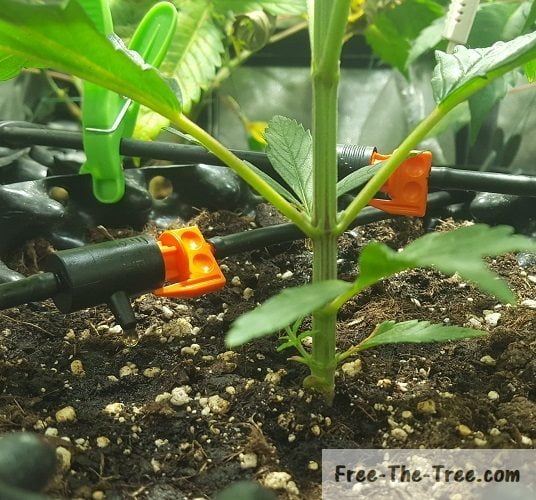
Drip System watering the plants
On top of saving time, this type of system actually waters your plant much more efficiently. Since the water flows much slower it irrigates the soil by capillarity, spreading much better across the medium.
This means 2 things:
- The roots receive more water
- You use less water at each watering (no need for the 20% run-off
Alright folks that’s all for this one!
Until next time, be safe and grow easy 😉
Don’t want to go yet? Check out our other Grow Reports
Check out all our Indoor Growing Tips
Hey guys and welcome (back) to Free The Tree!
This week is pretty weird. On one hand we’ve got 2 plants that are growing real quickly (the 2 BBC’s) and 2 plants growing reeeal slow (cheese and Blue Thai). We’re already trying to figure out how we’re going to deal with the different sizes in time in order to avoid issues during the flowering.
That said, in this post well go over the plant training that we did in order to prepare for the SCROG, as well as the reasons why these two little one’s have been growing slowly.
Let’s get into it!
Training Marijuana Plants for ScrOG
Setting up your ScrOG is something you need to prepare for pretty early on in the life of your little one. I’m not saying that you can’t decide later on, but the best moment to start training your plant is at the 3rd stage of leaves.
Little pointer before we get into it, we won’t have the last step on the training since it takes a little more than a week to grow. The last step will be in our next post 😉
Training Weed for a Scrog Easily
So we’re going to go through each step in order to train your Marijuana for a scrog.
As a reminder, these are the steps before setting up your screen. If you want to go to the screen set-up check out our ScrOG guide.
The first picture will show the plant just before we started to train her, after which we’ll get into each step.
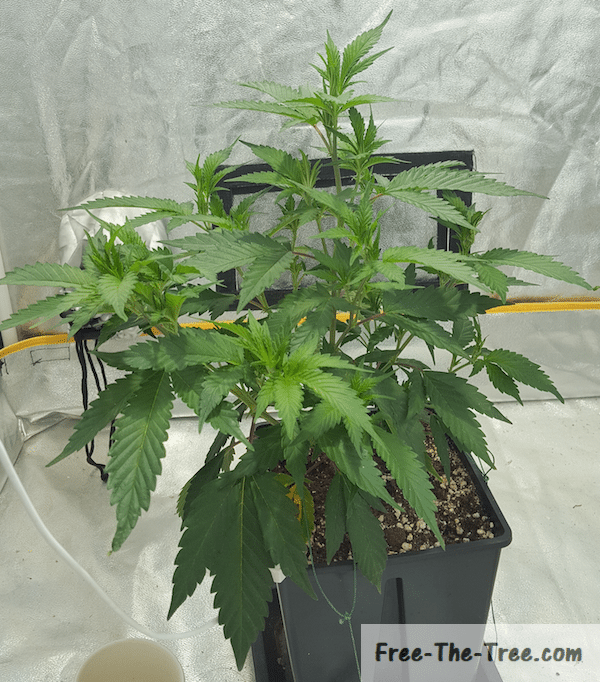
Plant 1 – Young Blue Kush Weed Plant
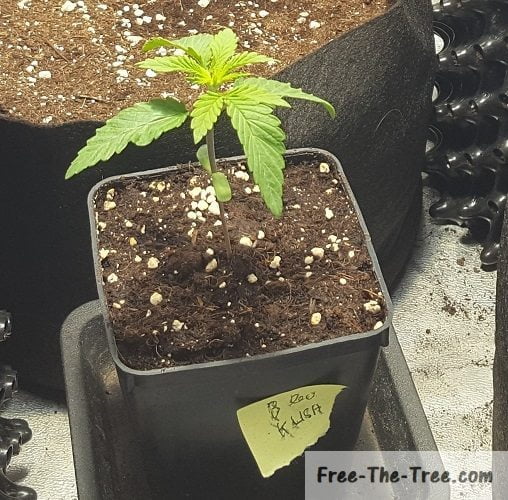
You want to wait until the 3rd stage of leaves before doing anything. In the picture above we must wait a little before starting to train this one.
Step 1 – Pruning the Apex
Once your plant has grown her 3rd stage you’re going to want to cut (prune) the top section of the plant with a pair of clean scissors or a blade.
As we show in the picture below, you’ll want to do this just above the knot, be careful not to damage the side branches that are forming!
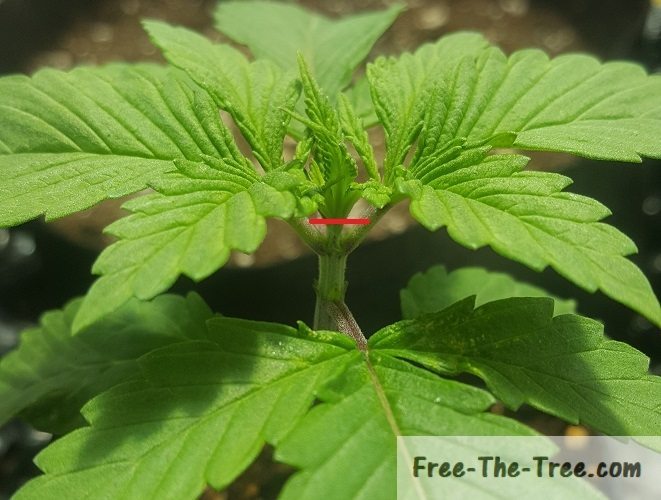
In the next step you will be able to see what it the plant will look like without the Apex. If you’re worried about the fact that the Apex is supposed to be her strongest and best bud, don’t worry, you’ll get that bud x10 😉
Step 2 – Let the 2 new Branches Grow
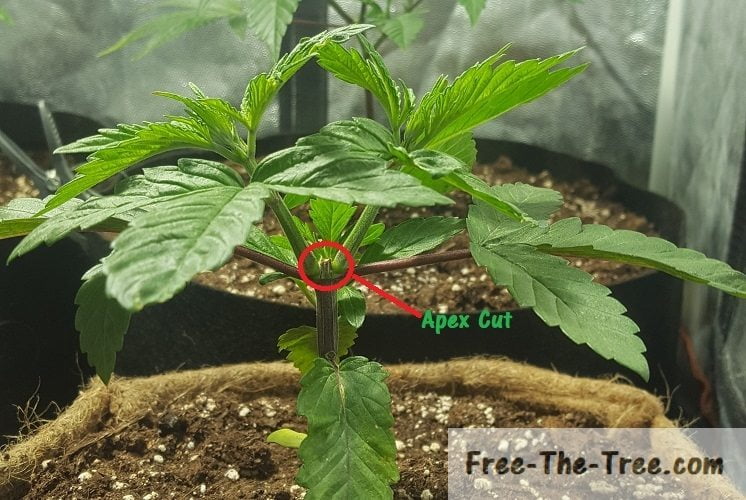
After cutting the Apex you’re going to want to wait until each side branch has developed a new stage of leaves.
Step 3 – Prune Tip of the 2 new branches
Now as you can see we waited a little too long to cut the tip of the side branches. Generally you’d want to cut it before the growth of the next stage in order to avoid any waste of energy. With that in mind, we’re still going to keep the 1st stage branches, in time we’ll prune the 2nd stage growths and that top leaf that’s shading the branch.
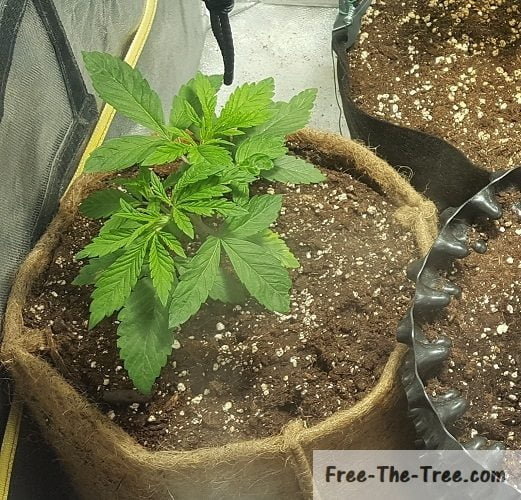
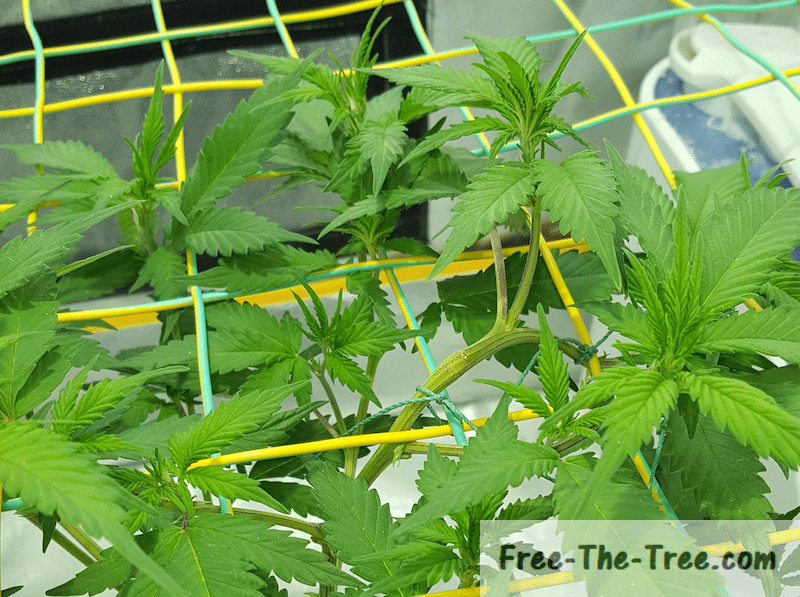
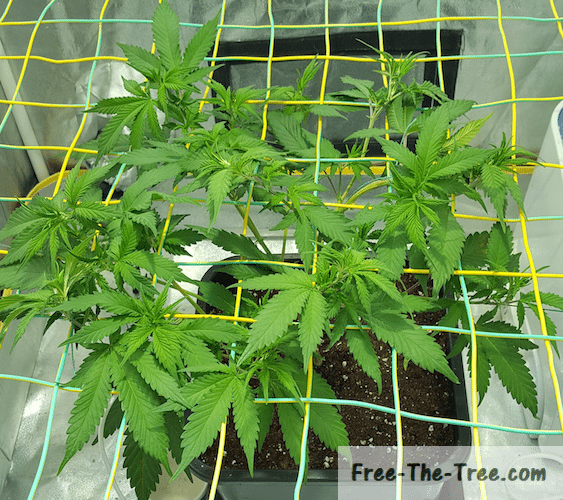
Step 4 – Let the new sets of branches grow
Once you reached this stage you’re going to wait a little until those 4 branches have grown enough to start training them. As you can see above, at this point in time they’re way to small to start doing so. We need to wait a couple days, so the second half of this section will be on the next post 😉
Slow Growth during the early Vegetative Stage
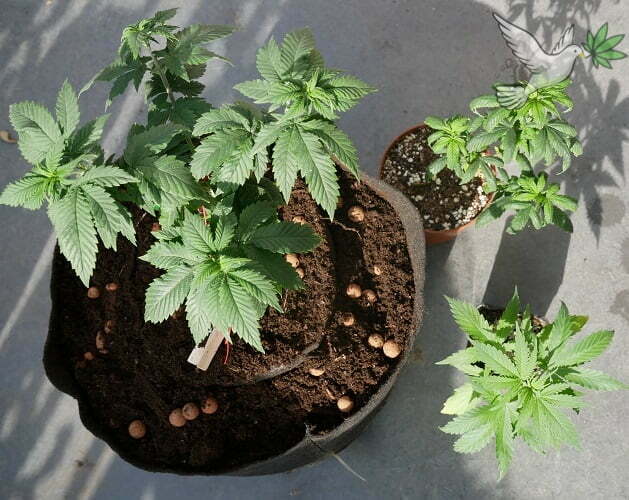
As we started saying in the beginning of the article, 2 out of the 3 plants originating from the germinated seeds have been growing really slowly, especially compared to the third.
After reading left and right, this is due to the fact that we planted them straight into the final pot, whereas the other plant was in a small pot before being transplanted into the final one.
We didn’t know this at first, but a weed plant in that it in a pot that’s too big for it will grow much slower since it’s focusing on root development. This means that the root system will be well developed, but there’s definitely some time lost.
Here’s a couple picture of the growth during this week.
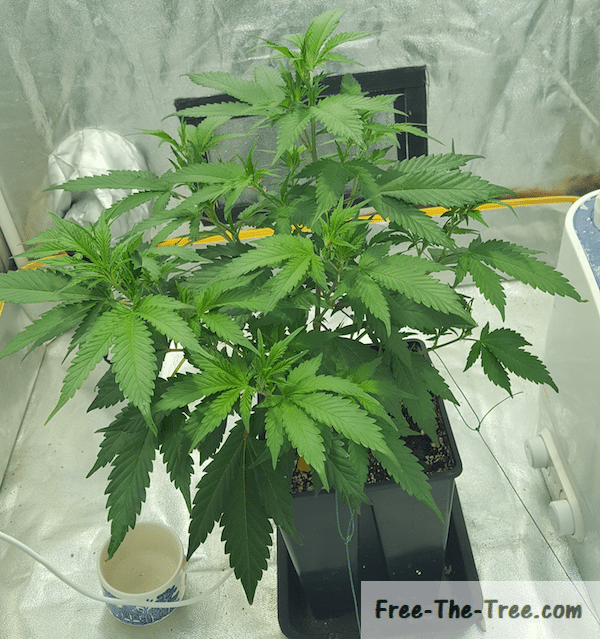
Normal Growth – Blue Kush planted in small pot than transplanted to larger pots.
Slow Growth – Blue Thai and Cheese planted straight into the large pots.
Just with these 2 pictures you can easily see the huge difference. Keep in mind that these seeds germinated at about the same time! (couple days delay for the Cheese plant on the far right).
Crazy how big of a difference in growth there is no? Thankfully this week the 2 slower plants started getting there growing on, but they’ll never catch up the other plants.
As we said earlier, the reason for this is the fact that a marijuana plant that’s planted in a large pot will grow slower during the early vegetative stage.
On the upside, these plants won’t have any transplanting stress and once the root system is well developed they’ll get growing strongly.
Blue Thai – Apex just pruned for ScrOG preperation
Cheese plant event smaller – 2nd stage of leaf growing
As you can see in the two images above, by the end of the second week they had grown “a lot”. The Blue Thai had grown the 3rd level of leaves so we decided to cut the Apex on this one.
On her side, the Cheese is still hanging back. We decided to cut all new side branches in order for her to focus on vertical growth.
I’m not too sure what we’re going to do with her, if she catches up we might do a small scrog, or else we’ll just keep a couple side branches and work her more when we get into the re-vegetation cycle (spoiler ^^).
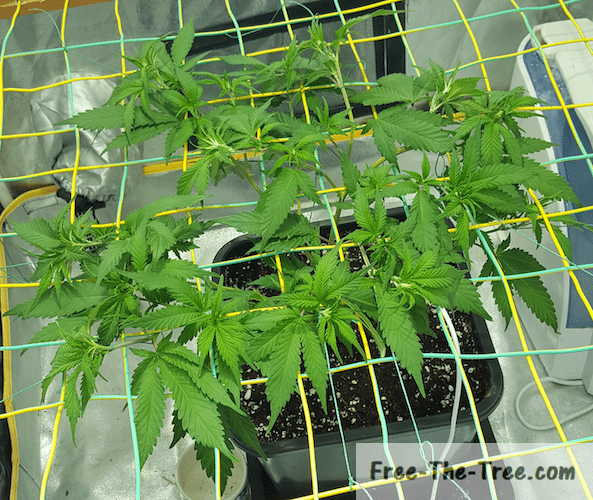
Before we let you go, here’s a couple last pictures of them at the end of week 5, as always click on them to see the full picture.

Hopefully these 2 little ones are going to get their grow on.. Next week we plant to make the cutting of the Blue Kush for a friend and place the screen, so they need to hurry up ^^
Alright Folks, that’s it for this one.
Until next time, be safe and grow easy!
Don’t want to go yet? Check out our other Grow Reports
Check out all our Indoor Growing Tips
Hi There and welcome (back) to Free the Tree!
This past week we’ve seen some nice bud growth all around, although the BBC is still showing signs of Phosphorus deficiency… Hopefully we’ve added enough PK for them to be happy, and not too much for the others..
You can also see that Cheese plant was really getting too tall and close to the light source, which we can’t really raise much more than it is or else the Big Buddha Cheese and Blue Kush won’t have enough light.. So we decided to fold her Apex.
This is the first time we’ve done so many different strains at once and I think we went a little too far by having 5 different ones in there;
Furthermore, the BBC’s are mainly in re-used soil, maybe even dating back 4 grows, I think it may be totally out of nutrients and needs some time to recover..
Let’s get into it!
Phosphorus deficiency
If you read last weeks post you’ve seen that we’ve been dealing with phosphorus deficiency issue showing up so at your last watering we pumped up the amount of PK in the solution.
Since then we haven’t seen new leaves being affected by this deficiency which is a good sign, hopefully it’s the last one of this grow..
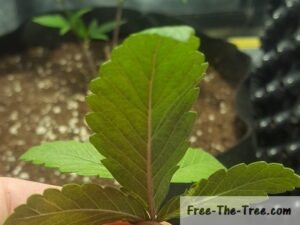
Leaves turned purple/black
Nice Bud growth
Although we’ve been seeing these deficiencies, over the past weeks the buds have been nicely developing, especially on the Big Buddha Cheese.
Her flowering cycle seems to be shorter than the 3 other plants, we might finish by harvesting her a couple weeks earlier 🙂
Buddlets developing into nice buds
Big Buddha Cheese further along than the others
You can clearly see that the BBC is further along the road than her cousins in the room, her buds are looking sooo nice and their full of trichomes, really can’t wait to smoke up.
The smell has also been getting pretty intense, the whole room smells strongly, and when I open the grow room an even stronger odor is released, smelling beautifully sweat. It’s a real pleasure to see these little ones grow!
Apex Too close to the Light
Our cheese plant is the only one we didn’t weave on the screen since it was so small, at first. Now she’s way too tall messing up our whole canopy, make the Blue Kush stretch and is covering up the light of the blue Thai.
On top of all that she’s now way too close to the cooling hood and the Apex is starting to cook, really not an idea situation
Leaves going vertical
Super Cropped Apex during the flowering stage
Since we didn’t want to up the hood even more, making it too far for all the other lights, we decided to super crop the apex. Don’t really know what it’s going to give out, we’ve read left and right and there really all opinions about supercropping during the flowering stage.
Since it was divided we decided to go ahead and try it out. This little one will have been super cropped twice during this grow
I think that this will make her produce fatter buds lower within the stem and the top bud might be a little smaller and with less THC density, but… at least it won’t be all burnt up.
Alright folks that’s all for this one!
Until next time, be safe and grow easy 😉
Don’t want to go yet? Check out our other Grow Reports
Check out all our Indoor Growing Tips
Hey there and welcome (back) to Free the Tree!
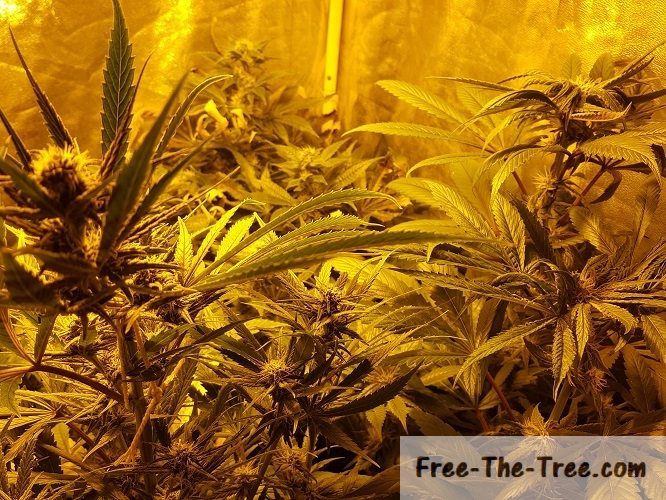
This week the flowering stage has officially started with the appearance of the first pistils 🙂
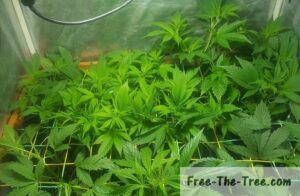
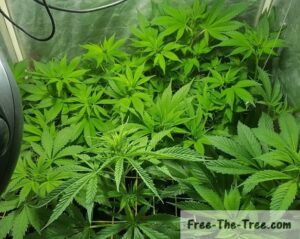
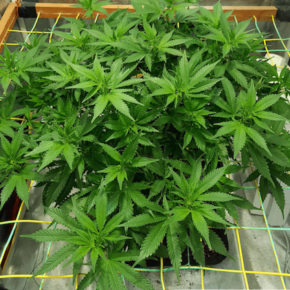
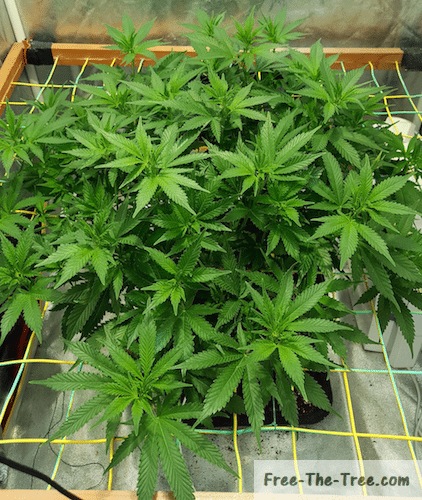
These 5 plants really grew a lot during the stretch, especially the Cheese and the Blue Kush (bottom middle and right) so we’re fighting an un-event canopy.. Apart from that they’re just beautiful!
Let’s go through the main events of the week, if you want to skip straight to a section here’s what we’re going to cover:
- End of vegetative growth
- Results of Super Cropping
- Automatic Water Run
- Switch to HPS lights
- First Pistils appear
End of Vegetative Growth
During this second week of the stretch we kept seeing strong growth across the board but, as we said in the intro, especially on the Cheese and Blue Kush strain.
Since the start of the stretch all the plants grew at least half their size except the Blue Thai. She’s a bit more shy which is a little bit of an issue canopy wise.
Here’s a couple pics of their evolution this week, as always click on them to see the full version.
Start of the Second week – Room left in some area’s of the grow room
(Super Cropping just done)
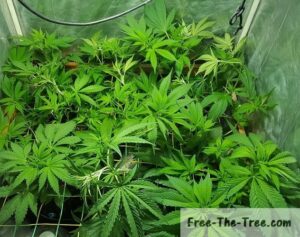
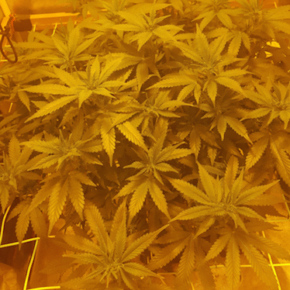
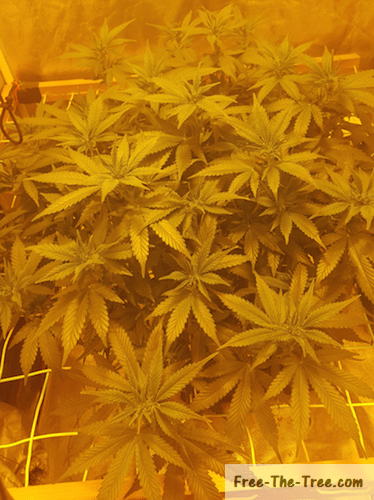
Mid way through week 2 – Grow Room is full
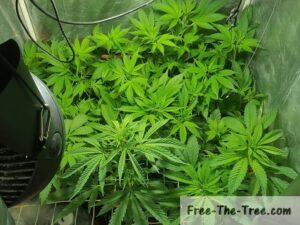
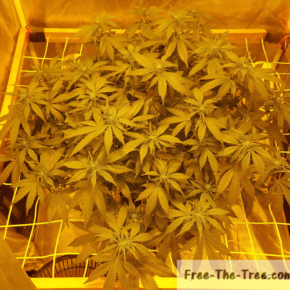
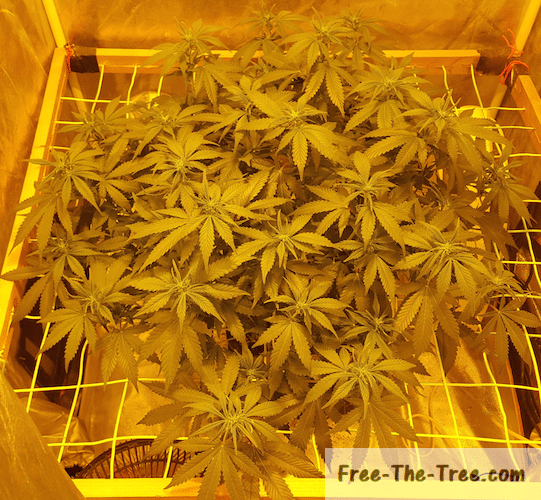
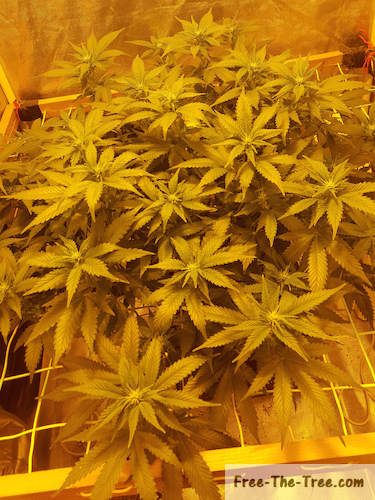
End of the Stretch – Vegetative growth has ended and first pistils are showing.
Just in one week it’s pretty crazy how much they’ve grown no? And compared to where the beginning of last week it’s even crazier! I love this plant haha
From now on they’re going to focus on developing those nice flowers that we love so much, some exciting weeks are ahead of us!
Results of Super Cropping
Last week and at the beginning of this one, we super cropped a bunch of the colas that were too tall.
There were 2 objectives for this, the first evening out the canopy, the second was so strengthen the stems and creating knots so the plant can store more nutrients within the stems.
Here’s how the Cheese plant reacted to it
Cheese plant super-cropped
String holding stem removed a couple days later

Colas standing back up – Knot starting to be visible
During the time that the main stem was super cropped the side branches grew massively, we pinched them a little so that they would strengthen also. I feel like this plant is going to give a niiice yield 🙂
Automatic Watering
We haven’t mentioned this in our previous posts but for the past month or so we’ve been watering our plants with our home made drip system and honestly it’s been wonderful!
It takes about 5 minutes to prepare the mix and then the the drip system waters the plant. We’ve been serving about 13L of water over about 6 hours of time. No water loss and the medium is well irrigated, the plant’s have been loving it! and honestly, so have I.
Water and Nutrients flowing into the grow room
Drips slowly irrigating the soil
With this system in place, I don’t have to choose between taking the time to water them well (about 2hours) or quickly water them to be able to get back to business or whatever. We’ve done the later many times in our previous grows and you can definitely tell on the plant when the soil isn’t well irrigated.
It’s a win-win, I save time and the plants get a nicely watered and nutrient full soil on a regular basis.
Changing to the Sodium Bulb
I think this time around we waited a little too long to change from the Metal Halid bulb.
This time around we changed it the last day of the stretch, which might explain why we haven’t seen any pistils until now.. Next time we’ll definitely get it in there at the beginning of the second week of the stretch in order to avoid over-vegetating our plants.

Changing from HP to HPS bulb
High Pressure Sodium bulb installed in an Air Cooled Hood
First Pistils appear
We’re finally in business! About 2 weeks after changing the photoperiods to 12/12 the bud sites have clearly showed up 🙂 How exiting!
This time around it really took them a while to grow, which I know for a fact isn’t normal for the Big Buddha Cheese and the Blue Thai. I really think it’s linked to the change in light, since the redder HPS light pushes the plant to flower.
Here’s a couple pics of these first signs of the flowers
First Apex pistils growing
First pistils of another colas appearing
Alright folks that’s all for this one!
Until next time, be safe and grow easy 😉
Don’t want to go yet? Check out our other Grow Reports
Check out all our Indoor Growing Tips
Heyheyy everyone, it’s been awhile since the last little grow report!
We’ve been real busy improving the strain comparison tool available (check it out!) as well as the citizen lobbying tool that will be deployed on free-the-tree.org, so some exciting times ahead, but it leaves little time to write about our babies ^^
In this grow report we’re going to cover the past month of the grow. The little ones have grown nicely, we’ve got different levels of development as well as different strains, it’s going to be one interesting flowering period with all their different needs.
We’ve also still been dealing with these pests which has delayed us starting the flowering period. The hesitation comes from the fact that we’re mainly dealing with fungus gnats and these suckers attack the root system. Once we start flowering we want the plants to be in good condition so that they can focus on bud growth, not survival… sooo decisions decisions.. Anyway, here’s what were going to cover today
Table of Content – Grow Report n°5
- Big Buddha Cheese clones rooting
- SexBud early vegetation stage
- Fungus gnats… and other pests
- Making cuttings
- Laughing Buddha vegetation stage
- Blue Thaï Scrog Setup
- Round of transplantions
Big Buddha Cheese clones rooting
Last grow report we told you a friend brought us some clones of one of our faaavorite strains Big Buddha Cheese 😀
We had had a mother of this strain for awhile but she didn’t survive last year’s crazy heat (RIP) and we were all out..
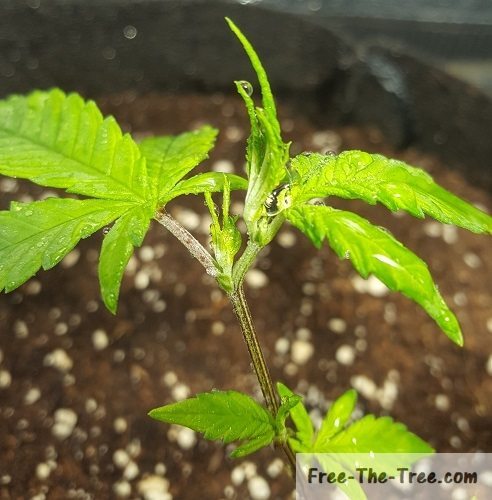
The little clones started rooting nicely, although we had a freaking stink bug-type insect lay eggs (ty to Bannana_bin for helping ID it). The larvae seems to have fed on the foliage of the cuttings, killing the weakest clones..
Luckily we noticed quickly and were able save one individual. As you can see in the pics below, the bugs larvae is chillin (and feeding) on the leaf, leaving black scaring behind.
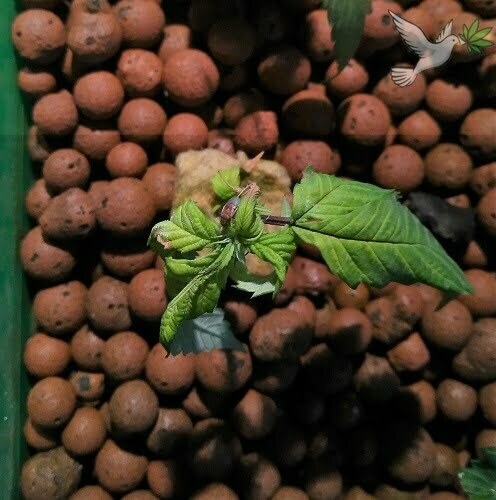
Beetle type pest on BBC clone
Pest larvae feeding on leaf
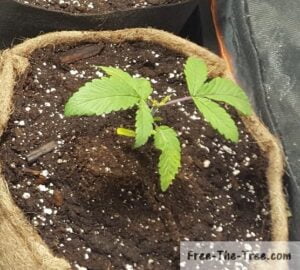
BBC survivor planted into soil
That said, she’s now fighting the fungus gnat larvaes and pupas… If/when she survives all this, we will have one stroooong mother plant!
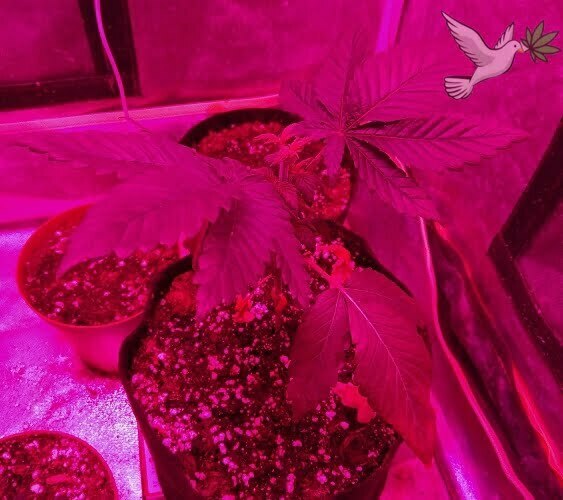
SexBud going through the vegetation stage
Now this little SexBud, by Female Seeds is growing real nicely although our humidity levels aren’t optimal at aaaall 🙂
We had just germinated her when we wrote the last grow report and look at her now. We haven’t given her any nutrients so far, although we’re going to start adding some NP in the next feed to prepare her for the stretch
SexBud cotyledons freshly deployed
First stage leaves fully grown
Second stage leaves grown, third level coming in
SexBud just before being topped
Auxiliary branches growing in
We topped her before writing this piece and are still hesitating on on scrogging her or going for the same LST training as the laughing buddha (see below).
Until we decide we’re going to let her grow a little and then place her in the special little spot we got for her in the flowering tent. Just before the stretch we’ll decide if we place her on the smaller screen or not.
Can’t wait to see go through the cycles of the flowering period!
Fungus gnats persiste and signs of other pests
Once introducing the nematodes into the tent everything started getting much better, we really though we had jumped through this hoop..
Turns out, we had forgotten a pot in the room and a little female laid some eggs in there. We were gone for 10 days, when we got back found a couple individuals within the grow room soo… here we go again..
We also had the pleasure to discover a blackflie and spidermite nest within our outdoor “garden”… hopefully we will be able to manage them well enough out there, avoiding any indoor issue
Sticky traps deployed to catch adult fungus gnats

2 spider mites (and a couple eggs) under strawberry leaf
Hundreds of blackflies feeding on lemongrass
Making some Laughing Buddha and Blue Thai cuttings
For these 2 strains we popped our only seeds and wanted to keep the strain around just in case so we decided to go ahead and clone them hehe
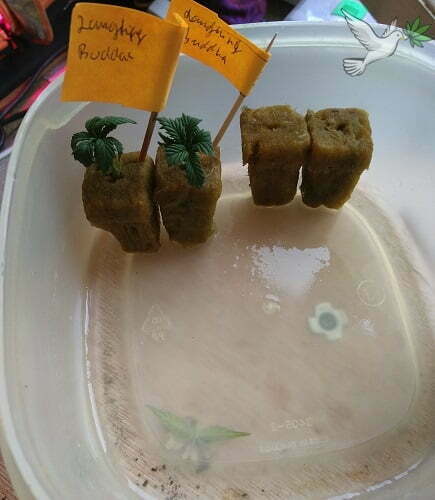
2 of the 4 cuttings made
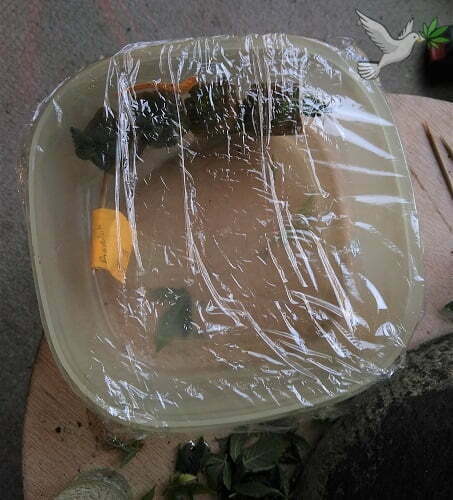
4 cuttings in air-proof container

about 10 days later – 1 visible rooted plant, 3 pending (but still alive!)
At the time we’re writing the article one of the laughing buddha cuttings has grown a nice, strong, tap root. We’re about to set it into soil to let it grow.
The 3 other cuttings are looking ok, we’re going to leave them a couple more days in the container to make sure they’ve rooted nicely before planting them in soil
Laughing Buddha – About to start the flowering stage
Last grow report we had just topped this little one in order to prepare her for a scrog. As you can see below, the had grown nicely since. We defoliated her a couple times in order to keep these 4 main auxiliary branches.
Since the blue thai is about ready to flower, and we have successfully cloned her we’re going to flower her like this, can’t wait to see the first pistils starting to appear 🙂
Freshly topped, first auxiliary branches growing in
4 branches growing in
4 auxiliary branches grown in, flowing time approaching
Blue Thaï ScrOG setup
Sooooo, if you’ve followed some of our previous grows, you know we’re pretty big fans of scrogging.
The thing is, with the back to back pest issues we’ve been having for the past year it’s becoming problematic not to be able to take out the plants for inspection during the whole flowering period.
In order to get the best of both worlds we decided to make some individual scrog screens for 2 of our plants. We’re definitely loosing a bit of room, but we figured it’s not a real problem, it’ll allow each plant to have a little room to breath.
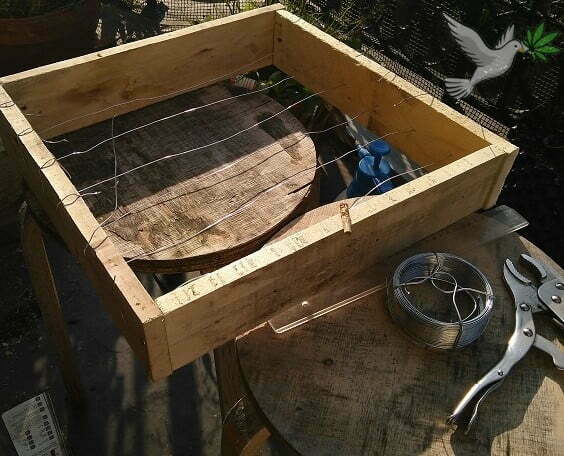
Frame of the net and first wires in
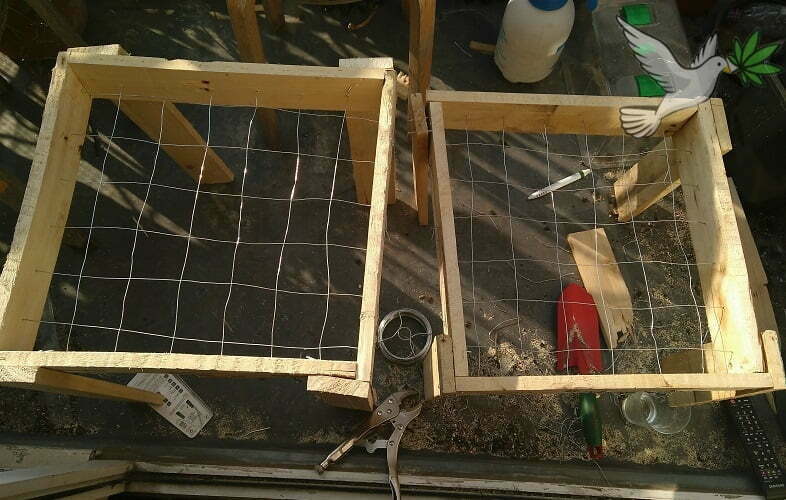
2 scrog nets ready to use
Blue Thai freshly installed on the screen
If you want to check out how we made the scrog net we documented each step over here, total cost ~5 bucks 🙂
With the screen ready we started weaving the blue thai. Once she’s covered about 60% of the screen we will change the photo-period so start the flowering stage hehe
Transplanting 3 little ones
On this 4/20 this little ones were ready to be transplanted 🙂 The laughing buddha and critical + will be flowered pretty soon. Since we just topped the sexbud we’re going to leave her a bit longer in the vegetation tent.
Once her auxiliary branches have grown a bit more we’ll place her into the flowering tent so that she can stretch and start growing some nice buds hehe
Freshly topped, first auxiliary branches growing in
4 branches growing in
4 auxiliary branches grown in, flowing time approaching
Alright folks that all for this one! Hope you enjoyed it, I know we love sharing the growth of our babies as well as what we’re learning along the way 🙂
Remember, if you want to share your experiences, knowledge, or anything, you’re more than welcome to! Just contact us through the form or via instagram
Until next time,
be safe and grow easy
Hey there and welcome (back) to Free The Tree!
This week we finally started the Stretch 🙂 The Potassium deficiencies we were seeing totally stopped spreading which means they now have sufficient levels so we’re good to go!!
On the top picture you can see that out canopy is far from being even which isn’t great, we’re planning to do some FMIing and pruning during the stretch to get that all evened out 🙂
Here’s what we’re going to cover:
- Starting the Flowering Stage
- Vegetative growth during the Stretch
- Pruning branches and leaves
- Super Cropping the top colas
18/6 to 12/12 – Starting the Flowering Stage
In order to get the flowering stage going we need to change the photo-period from 18 hours of light to 12 hours, triggering the wanted change in behavior.
All we’re doing by changing the light cycle is imitating nature, where by the end of the summer the number of daylight hours start being as close as the number of night hours.
The most important thing here is to make sure that they’re in full darkness during the night hours, irregular lights may produce hermaphrodites, which no-one wants (except for seeds)
The days after you change the light period you’ll see your plants starting to grow strongly. By the end of the first week some pistils should also start appearing.

Mechanical Timer for Photo-period control
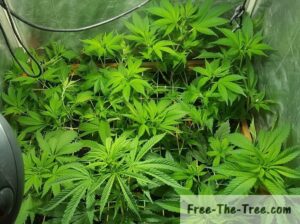
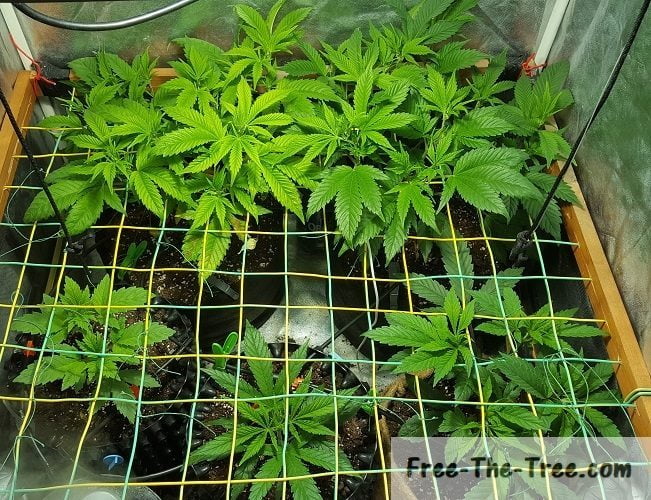
Week 1 of the Stretch – Strong Vegetative Growth
Over just 7 days they’ve all grown a whole lot but I think the most impressive is the Cheese plant, she’s doubled in size which is pretty cool since she was the smallest plant.
It might just be a visual thing though, since she only has 1 main coals whereas the others have multiple.
Here’s a couple pictures of the stretch
Day 0 – Tonight the light will shut off earlier
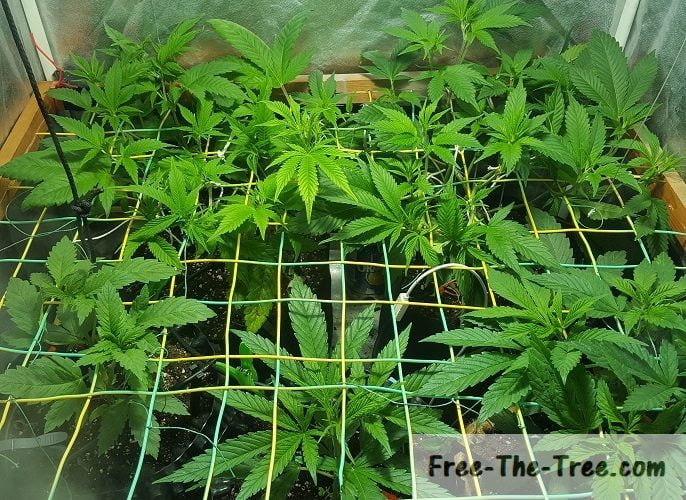
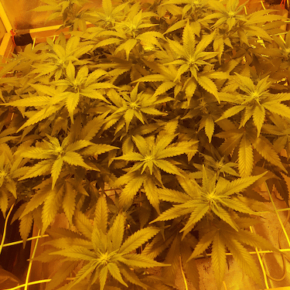
Day 6 – Strong Growth, grow room is full
Day 7 – FMIing, Pruning and Pinching
On day 6 and 7 we decided to start pruning a whole bunch of branches and leaves (mainly branches).
Let’s get into why we did this
Pruning leaves and branches during the Stretch
Since there was such a strong growth during this first week we decided to go for a round of pruning on the 2 Big Buddha Cheese plants.
These 2 gals have produced just to many side branches. If we had kept them this way we would have a bunch of small buds instead of a nice and strong ones. In order to avoid this we’ve removed all the small branches that didn’t show potential.
Whether it’s because they had no direct access to light, better looking branches next to them had more potential or the bud sites were too far apart, they’re gone, without going overboard of course.
Here’s a couple pics (as always click on them for the full view)
Day 6 – Before first round of branch pruning
Grow Room after pruning
About 10 branches removed
There’s another reason for this pruning we didn’t mention above and this is the room around the Colas.
If you’re colas don’t have enough room around them they will basically race each other to the light source. This will make some lengthy and weak stems, which won’t be able to transport many nutrients, thus producing smaller buds.
You want the leaves of your different plants to overlap or touch as less as possible.
Super Cropping the top colas
As you may have noticed our Big Buddha Cheese plants are much, much bigger as the others and some of those cola’s are way taller than the others, which is an issues for the light balance..
In order to keep our canopy as even as possible we’ve decided to super crop the top Colas. This has 3 advantages
- Folding the cola reduces its height
- While she recovers growth will be slowed on that colas
- Once she recovers she’ll be able to store more nutrients within the stem.
We started writing a guide on super cropping : check it out if you have questions on super cropping weed.
Cheese plant before super cropping
Apex Folded and tied horizontally
View of the Horizontal Apex
We repeated this process with every auxiliary branch that we decided to keep. She will be working at repairing these sections, making them more resilient.
Alright folks that’s all for this one!
Until next time, be safe and grow easy 😉
Don’t want to go yet? Check out our other Grow Reports
Check out all our Indoor Growing Tips
Hi there and welcome to this weeks grow report!
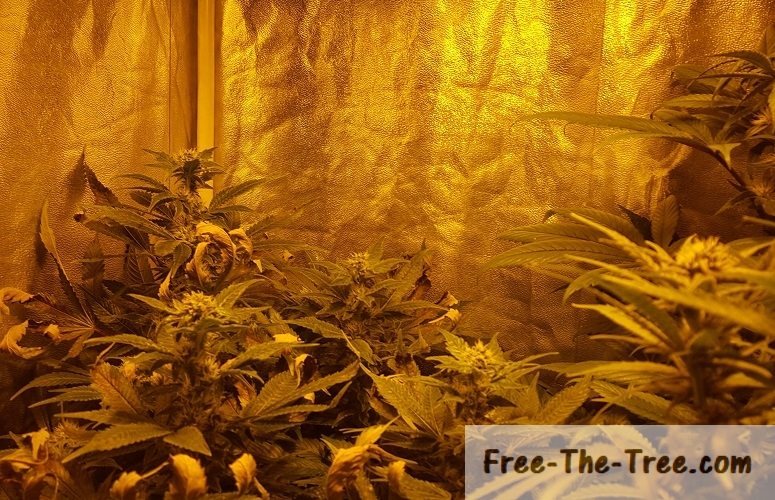
This week was pretty chill, trichomes and flowers keep developing, the Blue Kush started showing her beautiful blue/purple colors and the smell is oh so beautiful, I wish there was a way you could smell them.
We’re still hunting Thrips, adults and larvae’s, on a daily basis. At the end of this round we’re cleaning everything with Clorox and changing all our soil. Those suckers are so persistent once the plants get big it’s horrible.
Trichomes growing like crazy
For the past couple weeks trichomes have been growing but during this week this ramped up strongly.
As you can see in the images the buds are covered with them, especially on the Blue Kush flower.
Cheese Strain Clear & Milky Trichomes
Kush covered with trichomes
Clear trichomes all over the pistils
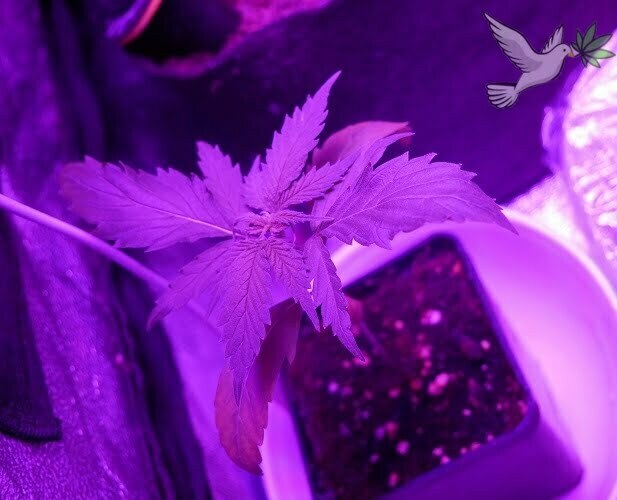
Blue Kush Leaves turning Blue/Purple
The Blue Kush, from Dinafem, can turn a blue/purplish color during the flowering stage if there’s 10°C difference between day and night temperatures, and this time we have them! 🙂
As you can see in the image on the right the fan leaves have started to turn purple little by little. I really can’t wait for her to fully develop her purple dress.
Leaves Turning Purple
All Strain Buds Fattening Strongly
We started saying this last week, but just like the trichomes the growth of the buds has really rapped up strongly.
Whether it’s the Cheese buds thickening strongly or the Big Buddha Cheese buds, the buds have probably taken about 10% in size since last week!
Cheese buds fattening up
Largest Big Buddha Cheese bud over 30cm long
BBC pistils growing making the Bud bigger and bigger
On the other had, the Blue Thai’s buds are really small. Looking at the trichomes, since they’re all still fully clear, the plant seems far from ready to be harvested to there’s hope for them to increase strongly… We’re not really counting on it but fingers crossed.
That said, as you can see in the image on the right hand side, they’re covered in trichomes. We’re really hoping these buds are going to get much bigger than they are currently.
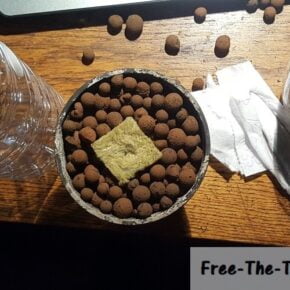
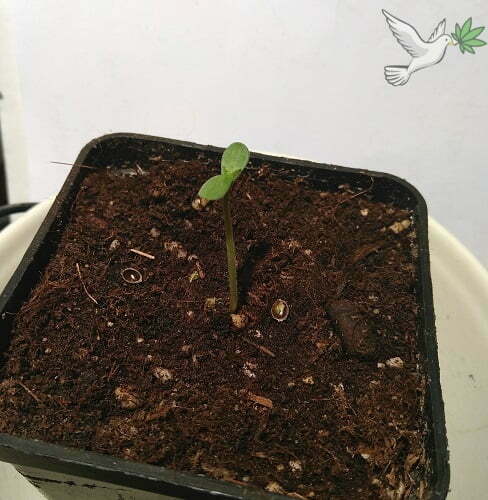
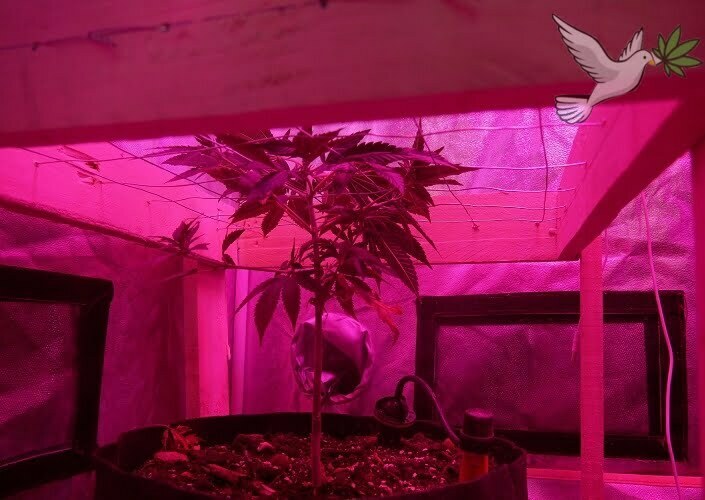
First set of leaves growing on Seedlings
As we said in last weeks post we planted 4 seeds for our next round and honestly they’ve been growing pretty nicely. We set them in a little corner under a light, with 2 pieces of paper on each side acting as reflectors.
As you can see the plants seem to be liking it pretty well, the first set of leaves have grown and the second stage is coming in 🙂
Thanks to this we’ll have saved about 3 weeks of early vegetative stage.
Next round of Seedling Growing
Alright folks that’s it for this week.
Until next time, Be safe and grow easy!
Miss a couple episodes? Here’s all our other Grow Reports
Read up on our Indoor Growing Tips!
Hey there and welcome our weekly grow report!
Here we are in the 5th week of the flowering stage and it hasn’t been much of a smooth road ^^
That said, these babies are still looking pretty nicely, their smell is getting stronger and stronger and seeping into the rest of the house.
This week was actually a pretty smooth one and we were able to get some preeeetty awesome pics hehe, lets get into it 😉
Trichomes fully formed
We’ve bee keeping a pretty regular eye on the trichomes all over the different plants and we’re pleased to see that they’re now globally all fully formed, still mostly clear no the THC production hasn’t started yet but things are looking nice 🙂
Here’s a couple pics, as always you can click on them to see the full version

Flower full of trichomes
Close up on Pistils and flower trichomes
Close up on Pistils and flower trichomes
Aren’t these little things just beautiful? 🙂 In the picture all the way to the right you can see there full form and color, stem and the clear balled tip; those little guys will be full of THC soon enough hehe
Uneven Canopy
We’ve been saying over the past couple grow reports that a couple of our buds were too tall, especially the Cheese and, consequentially, the Blue Kush; We finally got some pics that really illustrate this disparity!
Huge Size difference
2 Plants much taller than the rest of the canopy
Big Buddha Cheese side is pretty even
Now keep in mind that cheese plant has been supercropped, she’s actually much taller than the Blue Thai next to her.
You can also see the Apex of the Blue Thai is suffering, looking all flat. I think it’s too hot for her so close to the hood so we decided to lift the right hand side of the hood as well as get the extraction hose near her in order to extract the heat right there.
Hopefully this will solve the issue..
Weed Buds developing nicely
This week the flowers have grown well, especially the Big Buddha Cheese.
As you can see in the images below Blue Thai is still between the buddlets to the flower, while the Big Buddha cheese is further along with long buds.
2 Blue Thai Buds developing
Big Buddha Cheese flowers and trichomes growing
Main Big Buddha Cheese full of flowers
I think we’ll need to need to start flushing the Big Buddha Cheese a while before the other plants, which isn’t ideal since we’ve installed an automatic watering system.. We’re going to have to personalize it and set up switches in order to water the BBC separately.
Alright folks that’s all for this one!
Until next time, be safe and grow easy 😉
Don’t want to go yet? Check out our other Grow Reports
Check out all our Indoor Growing Tips
Hey there and welcome (back) to Free the Tree!
Today we’re going to cover the last week of the vegetative stage 🙂 within a little more than 2 months we’ll have some nice flowers ready to be harvested hehe.
These last weeks have been pretty full of events, between the Potassium deficiency, branch weaving and finally our 2nd attempt to do some cuttings off our Blue Kush.
Here’s what we’re cover in this grow report:
Let’s get started
Weaving the branches and Removing Leaves
During the vegetation station you’re going to need keep weaving the branches along the screen.
You’ll notice that some leaves are creating shade over some auxiliary branches. As long as the branch in question can handle it, remove the leaf in question.
Here’s our pruning run, as always click on the image to see the full version.
Before Weaving the Branches
After weaving the branches
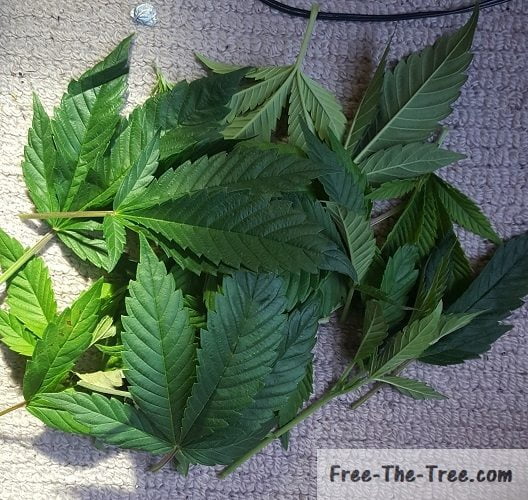
Leaves pruned in order to remove shading
Don’t hesitate on those branches, but do be careful not to brake any. If you do snap a branch use Duck Tape to repair it.
You might also think that removing those branches is counter productive, but exposing those auxiliary branches to will push them to develop as a main cola’s. Do be careful not to remove too many leaves though, you want to leave enough for each branch to do enough photosynthesis.
Potassium Deficiency Spreading
So this week the potassium deficiencies kept on spreading across the two largest plants.
We we’re actually expecting that it would keep spreading this week since we’re the bio grow range of products.
These products are “long term release” nutrients which means that they take about 7 days to release into the soil, meaning that the plant can’t get access to those nutrients for 7 days after introducing it to the soil.

Last Week’s Status of the leaves
Potassium deficiency spreading
Leaf totally consumed by deficiency
Thankfully the deficiency stopped spreading to new leaves quickly so we only lost the couple leaves that were impacted at first.
As we bring forward in our guide, the only way to fix this is to add Potassium (K) the next time you water your plants.
2nd Try at doing Cuttings
If you’ve been following, about 2 weeks ago we tried doing some cuttings of the Blue Kush for one of our friends. Unfortunately that one died because we weren’t able to keep 100% humidity so she started sweating. Once that has started it’s basically over.
This time around our friend is transporting them as soon as we cut the branches.
We’ve covered in depth how to transport in our cuttings guide which we’ll link to further below but here’s some pictures of the process.
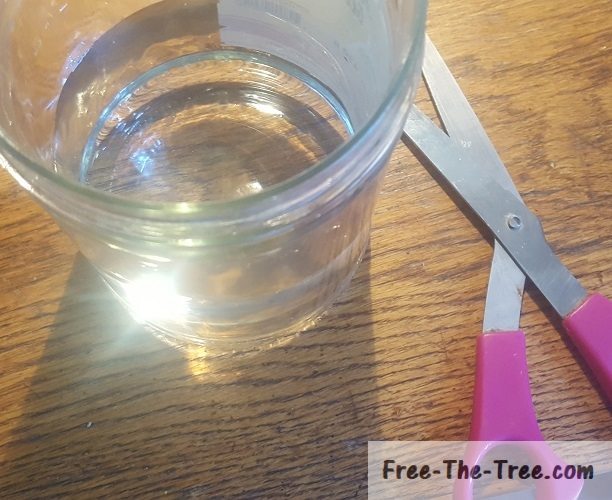
Jar half filled with water
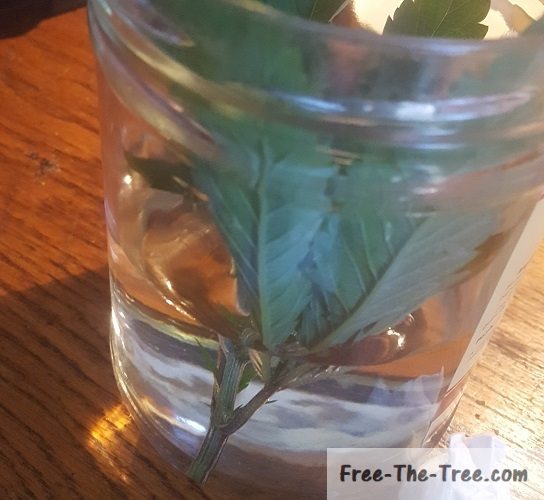
Cuttings in the water
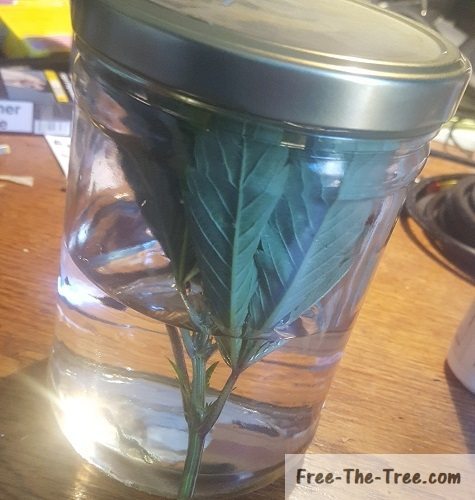
Closed Jar half filled water – 100% Humidity environment
Once the Cuttings are in the water and the jar is closed they’re ready to get going.
The quicker you get home and get them into the block of rock-wool the better the chance they’ll survive! (Don’t take risks driving though, better they don’t survive than you lose your life..)
Picture Evolution of Week 7
Before we go, here’s a couple pics of the grow room during the week. Next week we’re going to change the photo-periods in order to get the flowering stage going!
Start of week 7
Mid way through the week
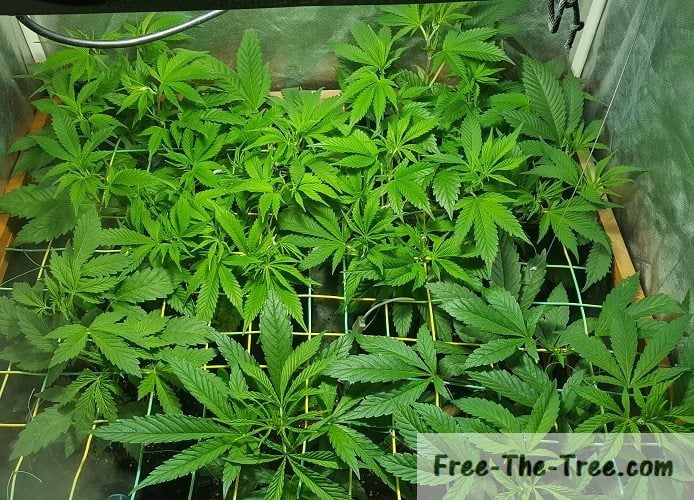
End of the 7th Week
Alright folks that’s all for this one!
Until next time, be safe and grow easy 😉
Don’t want to go yet? Check out our other Grow Reports
Check out all our Indoor Growing Tips
By now our plant was finally ready to get into the flowering stage so we changed the light period from 18/6 to 12/12 of lighting, meaning the plant gets into her stretch phase. This is where she grows a large amount over 2 weeks, by the end of this phase small flowers we’ll be visible on your buds.
If you’re want to know more about the stretch check out our FAQ on the subject.
We’re going to go over the stretch in 4 stages:
- Switching the light cycle to 12/12
- Changing to the yellow light
- The Stretch: Period of very strong growth
- The early flowering stage: Showing her first buds
Changing the light cycle
So in order to start the flowering stage you need to change the light cycle from 18hours of light to 12 hours.
That change will trigger a natural response in the plant telling her its time to focus on the flowers.
At this point the stretch starts, for 2 weeks she will grow before focusing purely on flower production.
For the first couple days after the switch, I like to keep the vegetative stage light in order to reduce the amount of possible stress given to the plant.
Here’s a picture of her a day or two after changing the light. As you can see, no real big change between the vegetative stage yet.
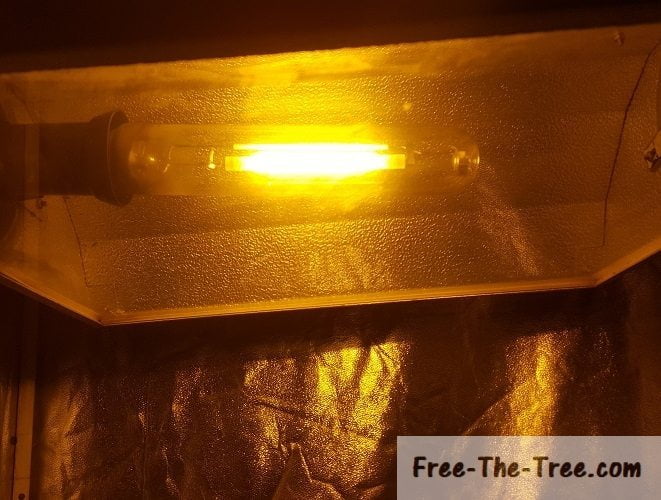
Changing to the Sodium light
I’m using two 400 Watts MH/HPS light bulbs. During the vegetative stage I use the Metal Halide (MH) based light, then switch to the High Pressure Sodium (HPS) lighting during the flowering stage. We’ll do a piece on this, but basically it’s the technic that’s proven to work, although you get more heat issues.
After two/three days of switching the light schedule that’s when I switch from the MH bulb to the HPS one. I do this in order to try and reduce the stress given at once.
After this, she’s fully in her flowering environment.
You can see in the image below that she already started growing nicely during the couple first days.
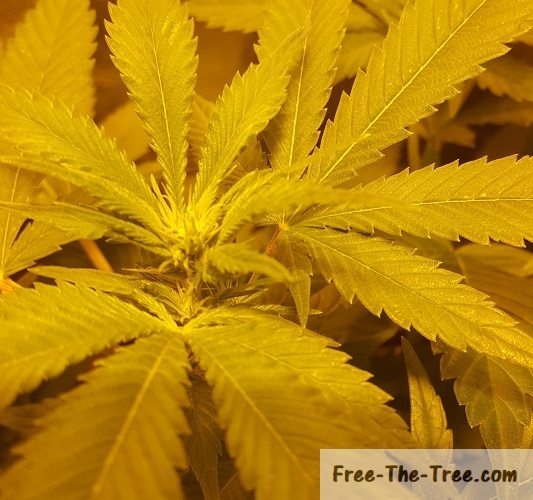
The Stretch: Period of very strong growth
Now I don’t know if you can really tell with the picture below, but for an indica strain her stretch was pretty decent. She grew at least 60% on her main branches.
It’s really too bad I messed up and didn’t cut down most of those branches, I could of had a real nice flowering stage with this one.
If you’re wondering what are the differences between indica and sativa check out our piece here.
At this time you should be reducing the levels of Nitrogen given gradually, once the stretch begins her intake will reduce little by little.
While reducing the Nitrogen increase little by little the levels of Phosphorus and Potassium that you give them.
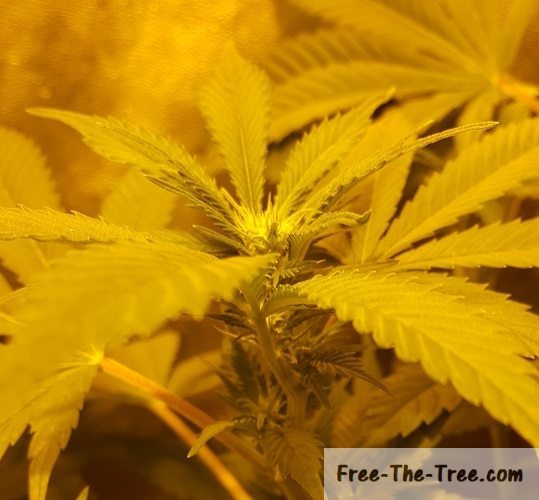
The early flowering stage: Showing her first buds
By the end of the stretch we enter the early flowering stage. You can see in the image below her the first little buds. This white little string like pistils will grow in quantity and size, by the end of this transformation they will look like the buds you’re familiar with 🙂
By this time you should have cut off the Nitrogen nutrients, and start the Phosphorus and Potassium one’s. By now your plant won’t ingest Nitrogen through her roots anymore so you might as well safe it.
She needs Phosphorus and Potassium now in order to produce the flowers we all love so much.
Alright folks that’s all for this one! next time we’ll go over the flowering stage of this little one.
Until then, be safe and grow easy! 😉
Check out all our Big Buddha Cheese grow reports
Hey there, welcome back to another edition of the Big Buddha Cheese series!
On this post we’re going to go over:
Being my first I was really exited at each new stage of this plant, and really just reading all over the place to try and find answers to all my questions.
So let’s get started
The vegetative stage of Big Buddha Cheese
As we say in the previous post we had just gotten out of Nitrogen deficiencies and Nutrient burn, so needless to say we we’re being veeeery careful on nutrient levels.
Basically our mix was of about 5ml of vegetative grow for every 2L of water, given every other watering. She seemed to react pretty good to this so we kept it going.
If you’re looking for tips on watering you’re marijuana plant check out our article right here
She was also growing a large number of new branches and leafs, I made the mistake here to let them all grow, when really I should of cut down the leaf and branch mass.
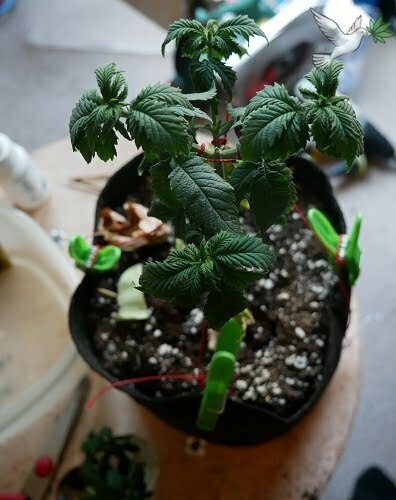
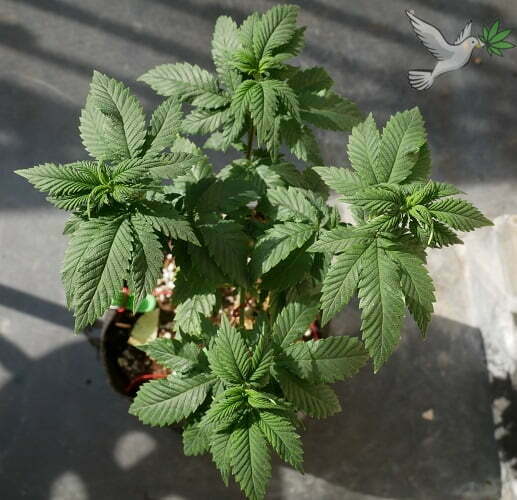
This is what she looked like at this stage
In the left picture she’s 20 days into the vegetative stage, the one on the right is 2 days later.
You can see that we’ve chosen a couple branches and that we’re pulling them with string to the side. The objective for this was to get them growing laterally so that they would get direct access to light.
The second idea behind it is to have multiple branches “invading” the screen during the next steps. This actually worked out pretty well!
Once you have chosen your branches, don’t hesitate to cut unwanted starts once in a while.
I should have also gone for a big trim here, cutting of all branches and leafs that are useless so that she could focus on the growth of the rest.
At this point, we decided that the next day was the day to install the screen (drumroll)
Installing the Screen Of Green
So we did this over 4 days.
On day 1 we installed the screen and starting pulling the branches towards the whole we wanted them to go to. Each day we would lower the screen a little bit, that way we would gain space to start weaving her, without stressing her out too much, I call the “the acclimatation phase”
By day 4 they had reached high enough for us to start weaving the branches on the screen, let the invasion begin!
If you want more info on installing a scrog, check out our tutorial over here
Here’s how it went step by step:
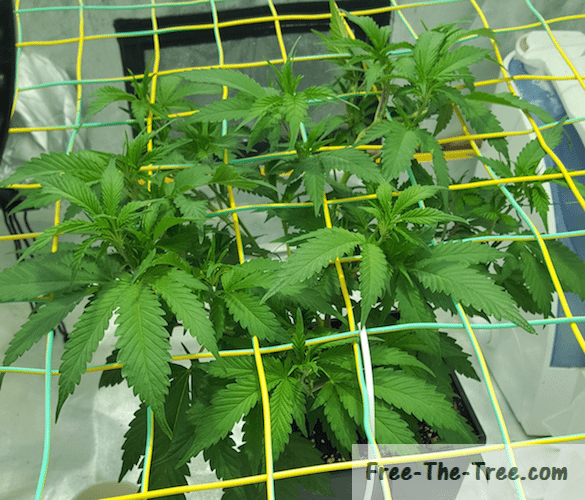
day 1 : Installing the screen
At this point all we did was get the screen in and slide it down at her level.
Now I strongly advise installing the screen high up and slide it down slowly. If it falls you might just brake your plant.
After getting it at the Apex’s level we got some of those top leaves laying on the screen so that they would get as much light as possible, but also so that she started getting used to the screen.
day 2 : Branches going through the screen
By the end of the second day we we’re pleased to see that the branches had grown and started passing through the screen.
In order to take a little more advantage of the previous growth we also brought down the screen a little, which went pretty well. As you can see we also started bending the Apex over the first screen
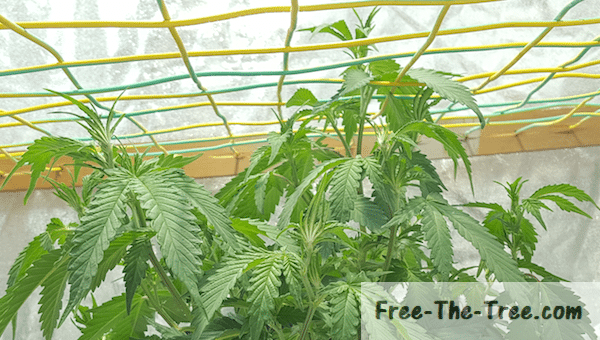
day 4 : Weaving the branches onto the screen
As you can see by the 4th day after installing the screen, the branches had well passed over the level of the net, meaning it’s time for the first session of weaving :).
Here’s how to weave a marijuana plant for a scrog in image:
How to weave your branches for your SCROG
- Identify the direction you want each branch to go in. This planning step is important, you want to make sure that each branch has at least one free space to its left, and one to its right
- Bend the top of the branch over the first line and under the next one.
Don’t hesitate to tie down the branch onto the netting so that it holds.
In the first image on the side here you can see how we tied the apex on both nettings in order to pass her under and over the screen. - Cut any leafs making shade to a spot where a branch could come out. You should also cut the branches that are to close to each other. At each not you should have tops 1 branch growing vertically.
- Take a string, on one end tie it around the top of your branch and the other tie it in the direction where you want you plant to go on the screen. Don’t hesitate to pull well on her she can take it.
You can see on the last image of the set how each branch is weaving over and under the screen, as well as the green string pulling them in the direction we want her to go.
Thanks to this technique, with just one plant you can actually fill up a whole grow room! the only thing is that you’ll keep her in a longer vegetative stage.
That’s all for this one guys! On the next article we’ll go over her invasion on the screen, it got pretty dense hehe
Until then, be safe and grow easy
Hey there and welcome (back) to Free The Tree!
This 3rd week of the flowering stage was pretty calm, we did our final pruning, removing the Cola’s that needed to go, our Big Buddha’s started showing some strong phosphorus deficiency signs and those darn thrips won’t die.. So yeah, not all that calm but we’ve had worst ^^
On a better note, the pistils have been growing like crazy, trichomes have been appearing all over the place and the smell.. oh they’re starting to smell up the room very nicely.
Let’s get into it
Pruning Marijuana during the Flowering Stage
About a day after the the end of the stretch we decided to go for a last round of pruning on the Big Buddha Cheese plants.
Since we scrogged them a massive amount of colas were present and most of them don’t cut it.
“They don’t cut it” means that they either have a stem wayyyy to weak, the flower nodes are spaced out too much or they don’t have a direct access to light source.
Either of these situations indicate that the cola will consume more energy than it can produce. This means that the cola won’t produce much AND take energy away from the other colas; For those reasons it’s best to let them go.
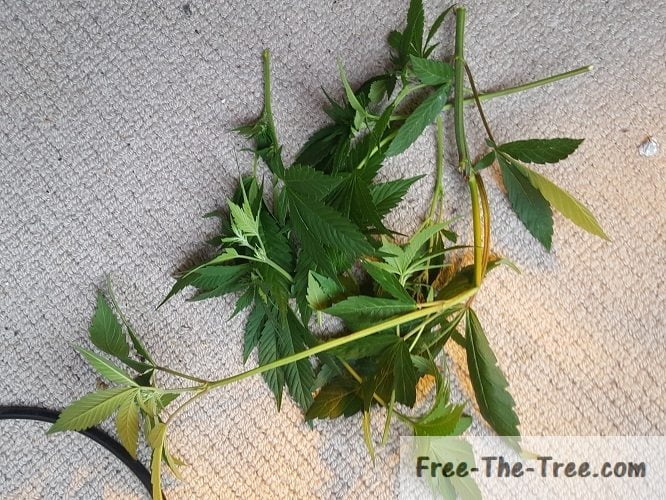
As you can see we didn’t prune that much this time around, but the colas we did remove are pretty long.
Most the colas could have been kept but their placement wasn’t optimal and had no direct access to the light source.
Since they were weaved on the screen we could of un-weaved them (carefully) so that they could reach the level of the canopy.
It’s actually what we did with some of the them, but these one’s we’re just in the way or too short.
Pistil growth and Buddlets appearing
Now that we’re really into the flowering stage the plants have been focusing their development on the flowers, and it’s been pretty visible.
Since the second week of the stretch trichomes have started to appear but they’re now growing much more and starting to form little budlets on the Apex of each plant.
From now on their just going to grow grow grow until they form some nice and dense flowers ready to be consumed 🙂
These next couple weeks are going to be really exciting, can’t wait ^^
(if you want to be notified for the next posts clic on the little bell on the bottom left)
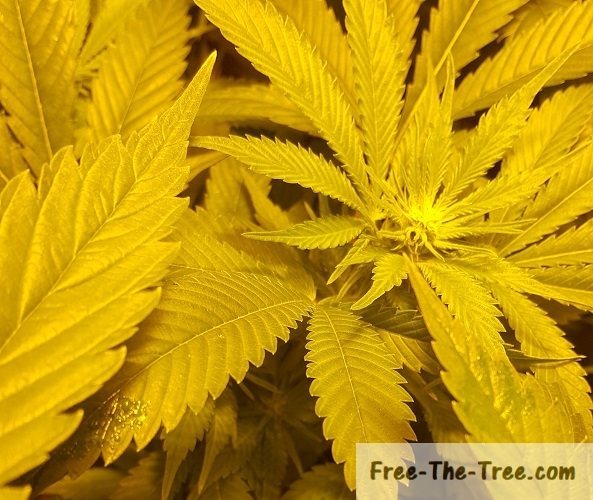
Pistils forming buddlet on Apex
Signs of Phosphorus deficiency on the Big Buddha Cheese
Since the end of last week we’ve been seeing the leaves of the Big Buddha Cheese plants starting to become brown, curl down and the most impacted ones are actually turning a purple/blue color..

It took us a little while to diagnose what was going on, but as soon as those leaves turned black we knew.. Our babies can get enough Phosphorus.
Know we know that our pH levels have been between 6 and 7, meaning that the roots are able to extract it from the medium so that’s not the issue.
In order to solve this next watering we definitely need to up the levels of Phosphorus. Hopefully the other strains won’t get into a nutrient burn situation.. that would be one headache to handle
Couple Early Flowering Stage pictures
Since this week was mainly marked by deficiencies and pruning we figured it would be good to finish on a positive note, that is some nice pictures of them during this stage of flower growth, as always click on the image to get a full view.
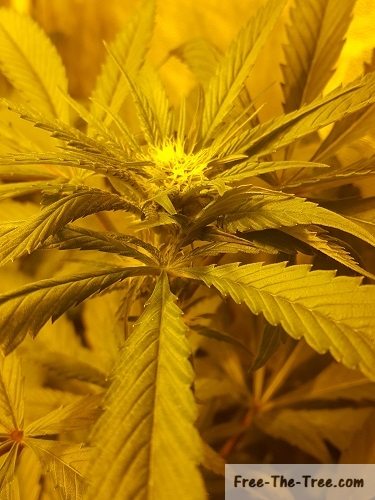
Apex Pistils growing
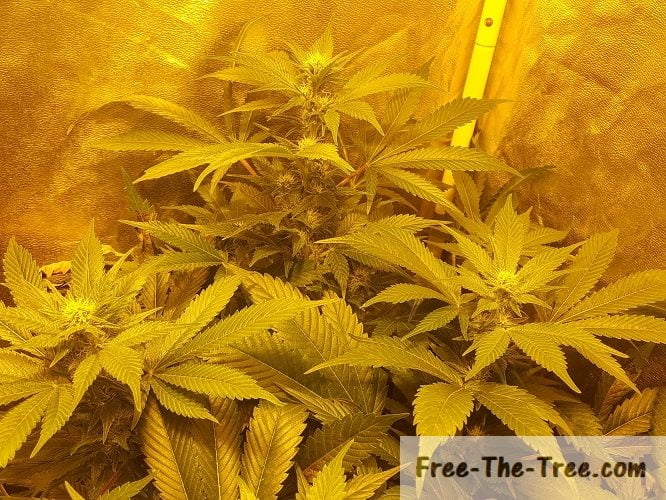
Scrogged BBC flowering
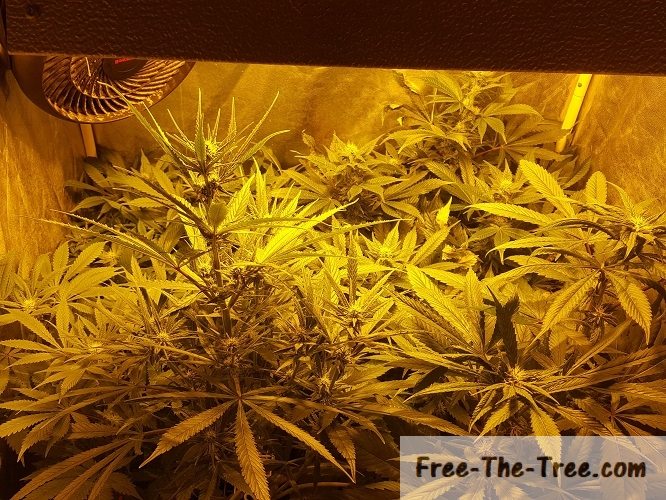
5 Strains flowering
Alright folks that’s all for this week!
Until next time, be safe and grow easy 😉
Don’t want to go yet? Check out our other Grow Reports
Check out all our Indoor Growing Tips
Welcome back to the Big Buddha Cheese series! If you’ve been with us all the way, it’s been a fun but rough ride!
We started with 4 cuttings, only 1 survived, so to maximise the harvest we decided to try our first SCROG ever! on our first plan ever, a bunch of firsts ^^
As you can see, by now we’ve got one nice looking plant, developing a large number of branches.
At this point we really made a huge mistake, which we’re going to cover here so that you don’t make it with your screen of green!
Let’s get going, to recap in this article we’re going to cover:
- SCROG: What nutrients to give your plant during the vegetative stage
- SCROG: What to do during the vegetative stage
- The importance of defoliation
SCROG: What nutrients to give your plant during the vegetative stage
Your plant is going need all the energy she can in order to take over this screen. Now its important to remind this, nutrients are not the source of energy for a plant, light is through photosynthesis, nutrients are only a supplement.
That said, the mix is pretty straight forward as always during the vegetative stage.
Here’s to mix we gave here so that you can adjust your own, as a reminder we also inputed the temperature and humidity levels:
| Nutrient | Amount |
| Nitrogen based | 3/4ml for every 2L of water |
| Root booster | 1.5 ml/2L the first weeks, after 0ml |
| Temperature | Between 20°C and 26°C |
| Humidity | Around 50% |
Now remember with nutrients, it’s always better to go lower than over. If you notice Nitrogen deficiencies, just add a little more at your next watering, it’s always easier than dealing with nutrient burn
Ok, now you have you’re plant going on your screen, cool! but what to do? Do you just keep weaving indefinitely? Let her grow as much as she wants until your max is reached? sooo many question, we’re going to try to answer them all!
SCROG: What to do during the vegetative stage
While your Cannabis plant grows you’re going to need to guide her, make sure she doesn’t waste her energy.
On the pictures i’m going to share, you’ll see the example of… basically what not to do. This was our first run, I was thinking “Lets get as much branches, we’ll have a bunch of buds, yay!”, but really this is the worst thing possible.
Here’s what you want to do:
- Keep weaving the branches that you’ve dedicated to invading the screen.
While doing so, identify the one’s you’re going to keep out of the one’s that are growing off of your main branches.
Generally you’ll see 2 branches growing at each knot, I like to keep the top one out of both. - Make sure there’s enough room between each branch you’ve chosen.
I like to have one or two wholes of the screen of distance between each branch so that they have room to grow nice leaves to catch light, without making shade to their neighbour. - Cut any branches that are not the one’s you’ve chosen.
- Cut any leafs that are too low, making shade to your branches or not generating any energy.
Be careful when cutting top leaves, you want to leave some to the branch in question! She needs to make food too - Keep this process going during the whole vegetative stage
Cutting your branches and leafs in this manner will do 2 things.
The first, it will boost growth in the younger areas of the plant, that have more light exposure.
Secondly, the plant can focus its energy on a couple strong branches instead of spreading it out all over the place. This will give strong branches instead of many weak ones.
You’ll thank me for this when you have a couple nice huge buds instead of a bunch of shy one’s 😉
Now as promised, our free-growing scrog
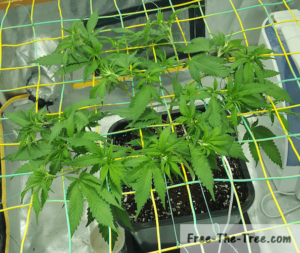
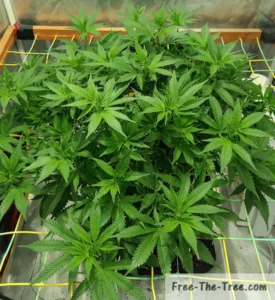
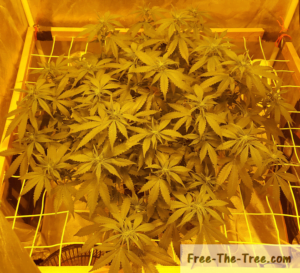
So full disclosure that last one is during the stretch. But you can see over her life she started growing soooo many branches, at that time I was all excited about it. But really, choose your branches, cut the rest.
For you guys to compare, check out our second run, this time we didn’t hesitate of cutting down what was needed. Look at the difference:
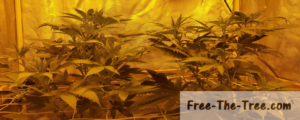
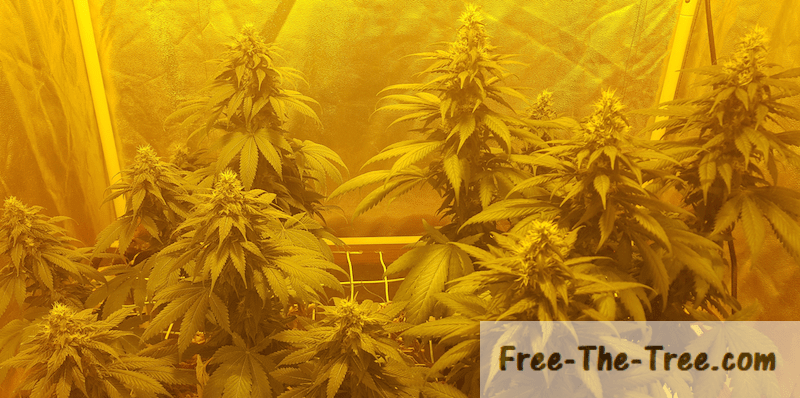
Now you can see on this one that there are less individual branches than our Big Buddha cheese, but these buds are so much bigger than the final render is much bigger this way.
Appart from that look at the difference in size of those leafs!
Before we leave you, we wanted to make a last little part on defoliation and its importance.
The importance of defoliation
So defoliation is the action of cutting leafs and branches off your leafs.
As we’ve seen, when doing a screen of green this is crucial in order to contain and concentrate to growth of the plant. This doesn’t mean using other styles of indoor growing you should defoliate.
During the vegetative stage, you should always defoliate your plants, here are some quick advantages of doing so:
- Your plant will grow faster
- Your plant will grow newer leafs higher up the stem, thus have better access to the light source
- A few dense buds are better than a bunch of buds with hardly no flowers on them
- Your plant will look nicer
Alright that’s it for this one! next time we’ll go over the stretch of this strain, soon you’ll get to see her flowers 😉
Until then, be safe and grow easy